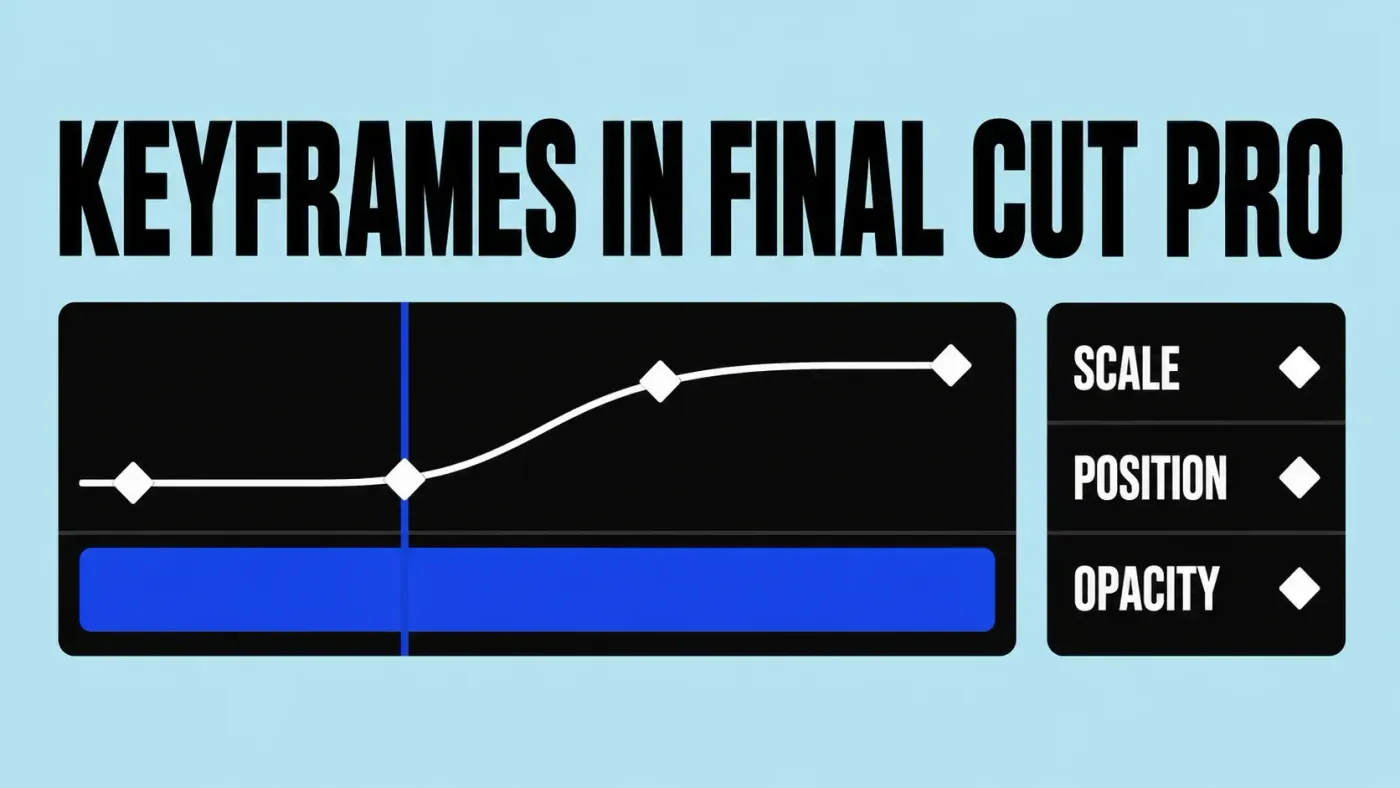
To add a keyframe in Final Cut Pro, select the clip, put the playhead where the change should start, and click the Keyframe button beside a setting in the Video inspector or press Option-K. Then move the playhead and change the value; Final Cut adds the second keyframe and animates the frames between them. To see and edit those keyframes on the clip, choose Clip > Show Video Animation (Control-V), or Clip > Show Audio Animation (Control-A) for audio effects. I'd set the values in the inspector and do all the timing in the Video Animation editor, because dragging a keyframe sideways there shows timecode and can't change the value by accident.
Below: adding keyframes in the inspector and the viewer, reading the Video Animation editor, moving and deleting groups, the four curve shapes, audio, color and mask keyframes, copying keyframes to other clips, the iPad app, and fixes for the problems that make keyframing feel clumsy.
Add keyframes in the inspector
A keyframe stores one value at one frame. Final Cut works out the frames between two keyframes, so any movement needs at least two of them, and Apple's introduction to video keyframing lists effects, their parameters, and clip properties such as position and opacity as things you can animate.
- Park the playhead. Select the clip in the timeline and move the playhead to the frame where the change begins.
- Set the first keyframe. In the Video inspector, hold the pointer over the parameter, such as Scale in the Transform section or Opacity in Compositing, and click the Keyframe button that appears (or press Option-K). The button turns solid while the playhead sits on that keyframe.
- Set the second one. Move the playhead and change the value. Final Cut adds the next keyframe automatically, so there's no need to click the button again.
- Move between them. Arrows appear beside the Keyframe button when keyframes lie on either side of the playhead. Option-Semicolon jumps to the previous keyframe and Option-Apostrophe to the next.
Until a parameter has its first keyframe, a change applies to the whole clip. That's the usual reason a "zoom" turns out to be a clip that's simply bigger from start to finish. The shortcut for adding a keyframe is Option-K, in the inspector and in the Video Animation editor alike, and the guide to Final Cut Pro keyboard shortcuts collects the rest.
Animate position, scale, and rotation in the viewer
For movement, the viewer is quicker than typing numbers. Apple's page on animating built-in effects gives this order:
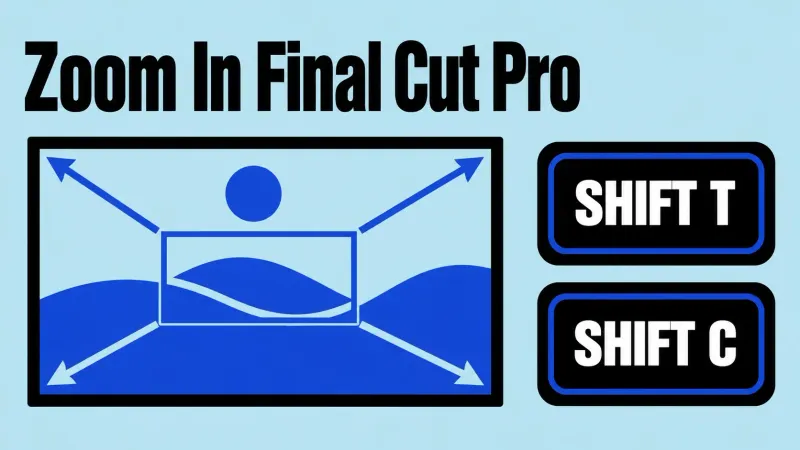
- Select the clip, put the playhead at the start of the move, and choose Transform from the pop-up menu in the lower-left corner of the viewer (or press Shift-T).
- Set the starting size and position, then click Add Keyframe in the upper part of the viewer.
- Move the playhead and drag the image to its new position or size. A keyframe is added automatically, and a red line shows the path.
- Click Done in the upper-right corner of the viewer.
Keyframes sit on the red line as white squares, and the first and last carry white arrows. Click a square to jump to that keyframe. Control-click one for five options: Linear for a straight path in and out of that point, Smooth for a curve with Bezier handles, Delete Point, Lock Point so it can't be dragged by mistake, and Disable Point to ignore it while keeping it for later. The same Transform keyframes reframe a horizontal shot for a vertical version of the edit, and the guide to zooming in on a clip covers punch-ins, Ken Burns, and Crop keyframes, which work differently from everything else on this page.
To move several layers as one, such as a logo with its own title, I'd put them in a compound clip and keyframe the compound's Transform once, because one set of keyframes can't fall out of step the way three separate sets can when one layer gets trimmed.
See and edit keyframes in the Video Animation editor
Final Cut doesn't draw video keyframes on the clip until you ask, which is why they seem to vanish from the timeline. Select the clip and choose Clip > Show Video Animation (Control-V), or Control-click it and choose Show Video Animation. Each effect gets its own row, and Apple's keyframe guide explains the markings:
- White diamond: a keyframe for the parameter chosen in that row's down-arrow menu.
- Gray diamond: a keyframe on another parameter of the same effect. Choose All from the menu to show every parameter at once.
- Double diamond: more than one parameter has a keyframe on that frame.
- Yellow diamond: a selected keyframe, ready to copy, move, or delete.
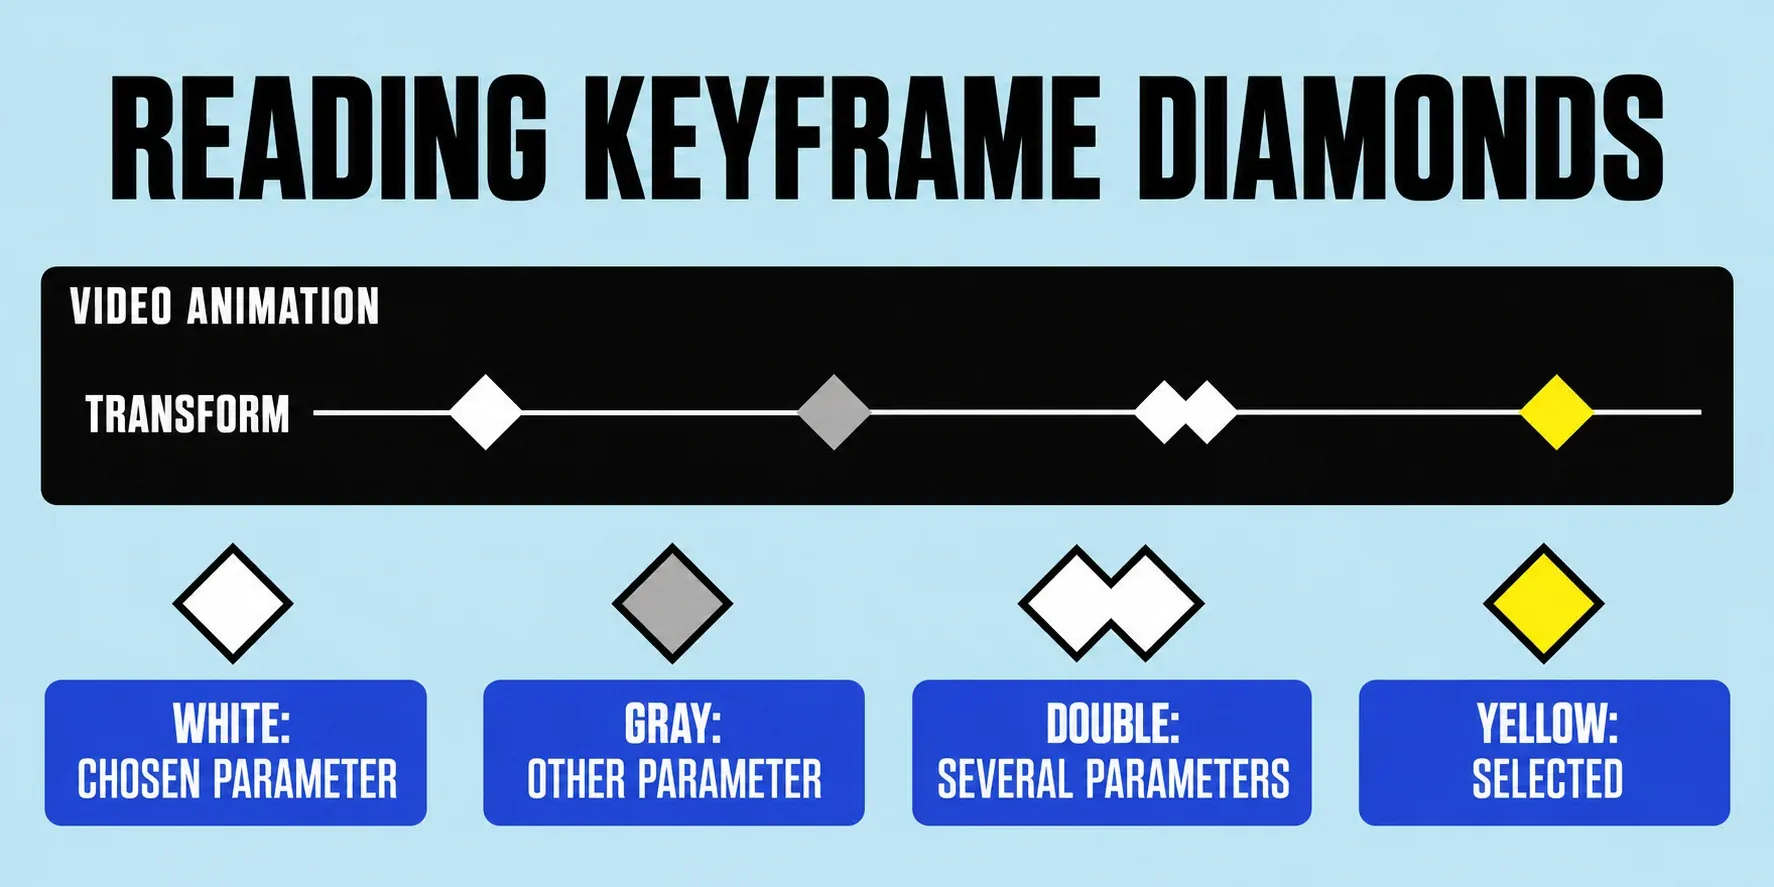
Drag a keyframe left or right to retime it; the timecode appears as you drag. To change its value, click the effect's disclosure button to expand the row, then drag the keyframe up or down, holding Command for finer steps. Option-click the line to add a keyframe, or Option-click while dragging to add one and set its value in one move. Option-Shift-Delete deletes the selected keyframe, and clicking the solid Keyframe button in the inspector removes the one under the playhead.
With several effects stacked, Clip > Solo Animation (Control-Shift-V) collapses the editor to one effect at a time, though effects can't be deleted while it's on. Press Control-V again to hide the editor. Some effects, such as opacity, also show fade handles once the row is expanded, so a fade from black is a drag rather than two keyframes; the guides to titles and text and transitions show when a title fade or a cross dissolve does the job better.
To key a change across a stretch of the clip, expand the effect, choose the Select tool (A) or the Range Selection tool (R), drag across the area, and drag the effect line up or down inside it. Final Cut creates the keyframes for that change automatically.
Move, nudge, and delete groups of keyframes
Shifting a dozen keyframes doesn't mean redoing them. Apple's page on modifying groups of keyframes covers these moves:
- Select a run of keyframes: click the first, then Shift-click the last, and every keyframe in between is selected. You can't select keyframes that aren't next to each other. A selection rectangle works too, and audio keyframes on the clip itself need the Range Selection tool.
- Move them in time: drag the selection left or right.
- Change their values together: drag up or down and the values keep their relation to each other, unless the group hits the top or bottom of the graph, where it flattens and stays flat.
- Nudge: Comma and Period move the selection one frame earlier or later, and Option-Up Arrow or Option-Down Arrow changes values by one unit.
- Edit a pair: select the line between two keyframes and drag it to change both.
- Shift the whole curve: Command-Option-drag moves every keyframe on that curve by the same amount and keeps its shape.
Ease the motion: Linear, Ease, Ease In, and Ease Out
A Linear curve moves at the same speed from the first frame to the last, which is the main reason keyframed moves can look mechanical. In the expanded row of the Video Animation editor, Control-click the line between two keyframes and pick a shape, or Command-drag the line sideways to bend it. Apple's page on adjusting effect curves defines the four options:
| Shape | What it does | Good for |
|---|---|---|
| Linear | Constant rate of change from one value to the next | Mechanical moves, rolling credits, anything that should feel steady |
| Ease | Starts slowly, speeds up, and slows down into the end value | Most position and scale moves that start and stop on screen |
| Ease In | Starts slowly, then accelerates toward the end value | A move that leaves the frame or hands off to a cut |
| Ease Out | Starts quickly, then decelerates toward the end value | A title or logo that flies in and settles |
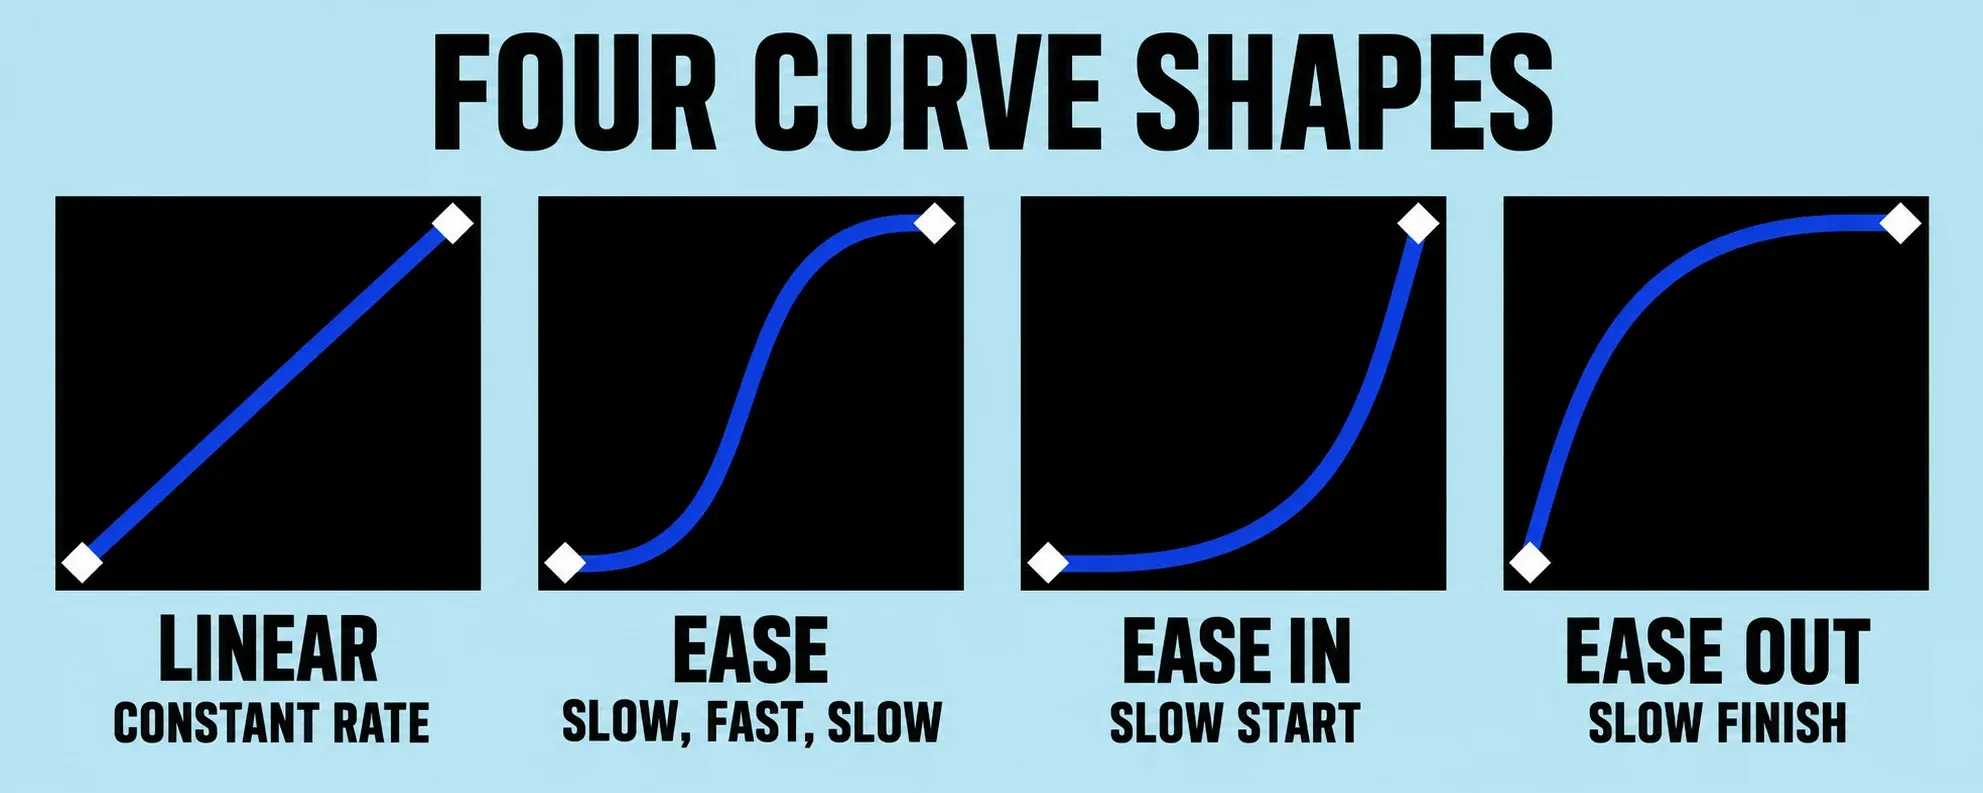
Curve shapes work for video effects only. Audio volume keyframes always change in a straight line, and only fades made with the volume fade handles can take another shape, as the guide to fading audio in Final Cut Pro explains.
A zoom has its own trap. Larry Jordan's article on adding and modifying keyframes points out that a zoom at an even rate seems to speed up as it gets tighter, and recommends easing it in and out; he also suggests stills at two to three times the frame size so a push-in doesn't soften. I'd check the curve on every scale move and set Ease, because an even-rate push rarely looks like a camera move.
Four presets are all Final Cut offers. Editors who want After Effects-style graphs use Keyframe Toolbox, a LateNite effect sold on the Mac App Store as a one-time US$19.99 purchase, which adds separate graphs with Bezier handles for opacity, position, scale, rotation, and blur, plus easing presets. I'd stay with the built-in shapes until a move needs a bounce or an overshoot, because a project that relies on a third-party effect needs it installed on every Mac that opens the library, and the guide to Final Cut Pro plug-ins covers what to check before buying one.
Keyframe audio volume and audio effects
Volume is the one parameter you can keyframe right on the clip. Option-click the volume line where the change begins, or press Option-K at the playhead, and drag keyframes up or down. For a dip under a line of dialogue, press R for the Range Selection tool, drag across the section, and drag the volume line down inside it; according to Apple's page on keyframing audio effects, Final Cut creates the keyframes along the adjustment for you.
Every other audio effect needs the Audio Animation editor: select the clip and press Control-A. Keyframes there move left and right, and up and down once the row is expanded. Command-Option-drag shifts all keyframes by the same amount, and Option-Shift-Delete removes the selected ones. For a reverb that should ring past the end of a clip, Apple suggests adding a hold segment to the last frame and extending the reverb keyframes into it. Fades and crossfades are easier with the fade handles than with keyframes.
Keyframe color corrections and masks
Color corrections keyframe as a whole. Click the Keyframe button at the top of the Color inspector, or press Option-K, and that keyframe stores every setting of the correction, which is why color keyframes always show as double diamonds and the button turns solid yellow. Apple's page on keyframing color corrections covers the rest. Because one keyframe holds the whole grade, I'd finish a static correction first, as in the guide to color correction in Final Cut Pro, and add keyframes only where the light really changes, such as a door opening mid-shot.
Masks keyframe per control. Use the Keyframe button beside a single mask parameter, or choose Add from the down-arrow menu in the effect's heading to key all of them at once; the button turns yellow. On a Draw Mask, each control point can be keyframed numerically under Control Points, which Apple describes on its page about animating a mask with keyframes. For a moving person, Magnetic Mask follows the subject without a keyframe per frame.
Copy keyframes to another clip or parameter
Select the keyframes in the Video Animation editor (they turn yellow), choose Edit > Keyframes > Copy (Option-Shift-C) or Cut (Option-Shift-X), select the destination parameter, put the playhead or skimmer where the first keyframe should land, and choose Edit > Keyframes > Paste (Option-Shift-V). Apple's page on copying and pasting keyframes lists the rules that decide whether anything happens:
- A parameter must be selected, and the playhead must be over the destination clip. Otherwise nothing pastes.
- Pasted keyframes replace existing ones only within their own time span; keyframes outside it stay.
- Some keyframes paste only onto a similar parameter: volume onto volume, not onto opacity.
- Pasting works within a clip, between parameters, and between clips, including the published parameters of a title.
For a whole animation, Edit > Paste Attributes (Shift-Command-V) is faster. Select the source clip, press Command-C, select the target clips, and tick the attributes to paste. Apple's guide to copying effects between clips describes the Keyframe Timing choice: Maintain keeps the original spacing, and Stretch to Fit spreads the keyframes over the length of the target clip.
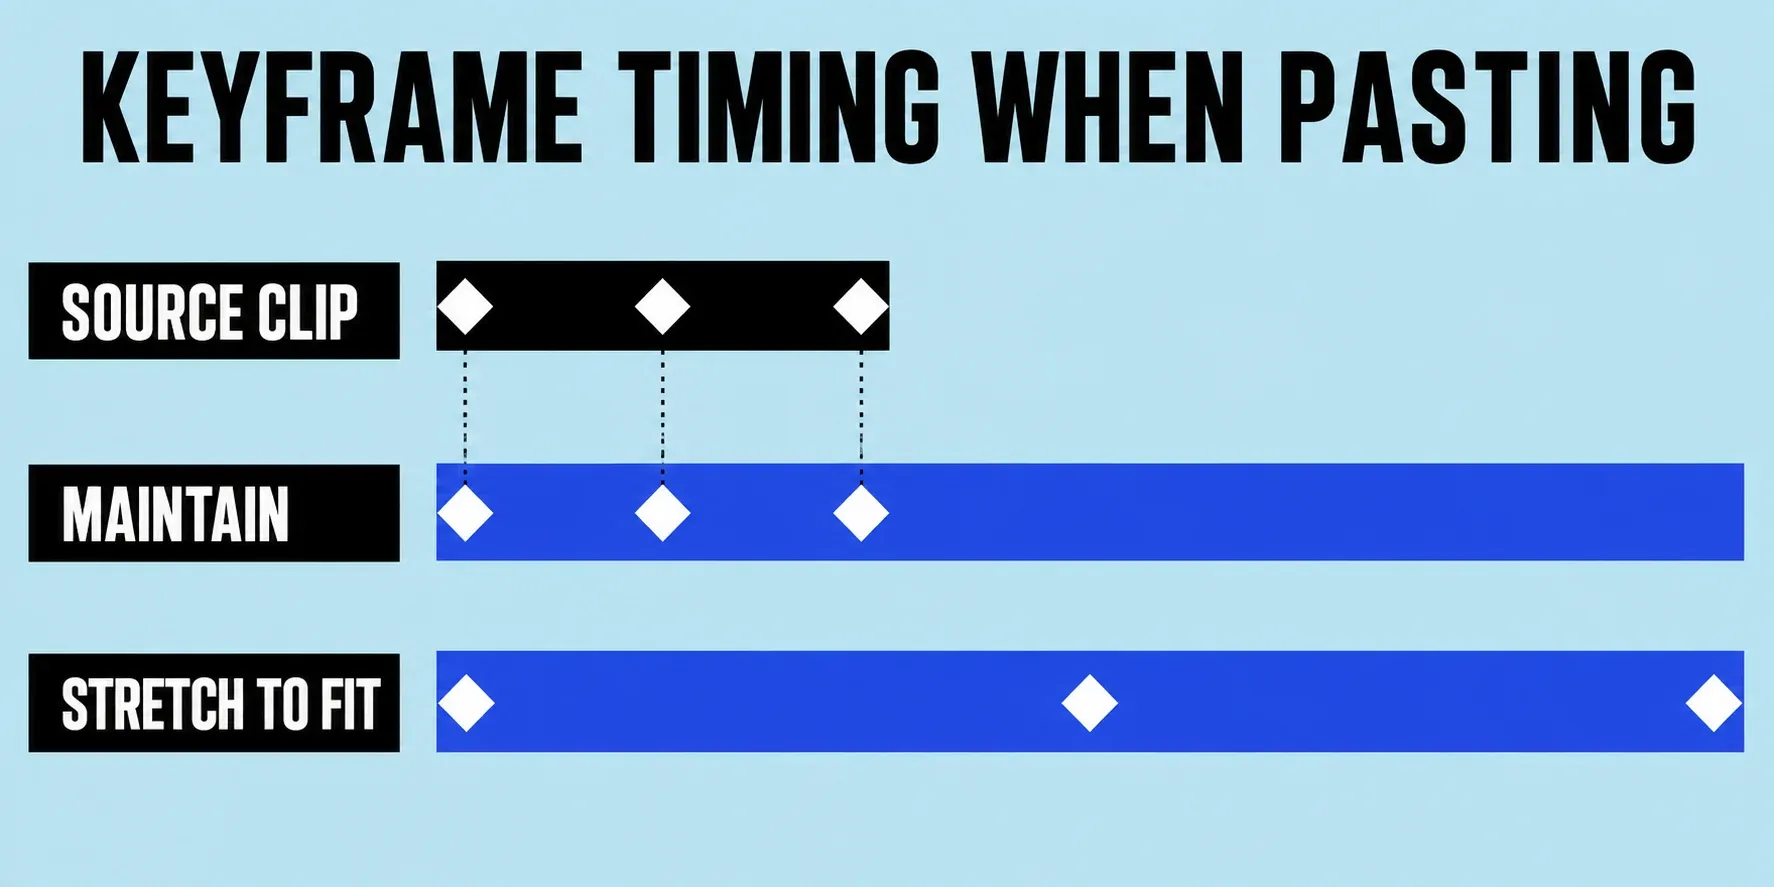
I'd use Maintain for anything tied to a beat or a cut point, because Stretch to Fit moves the last keyframe to the end of a longer clip and the move no longer lands where it did.
Keyframes in Final Cut Pro for iPad
On iPad, select the clip and tap Animate in the lower-left corner; the keyframe editor opens below the timeline. Choose the setting to animate, or All, tap the add button to place a keyframe, then set the value with Inspect. Apple's iPad guide to animating effects with keyframes lists what can be keyed: opacity, Transform (position, scale, rotation, and crop), effect settings, title and object settings, and audio volume. Transitions can't be keyframed on iPad. Keyframes can be dragged, or nudged with the jog wheel. To copy an animation, use Copy All Settings or Copy Effects at the top of the inspector, then Paste Transform Settings, Paste Format Settings, or Paste Effects on the other clip; Apple notes that every transform, format, or effect setting of the first clip comes along, not only the keyframes.
When keyframes don't behave
- No keyframes visible on the clip. Press Control-V for video or Control-A for audio effects, and choose All in a row's menu if only one parameter shows.
- The value changed for the whole clip. The parameter had no keyframe yet. Undo, add the first keyframe, then change the value at a second point.
- A keyframe won't move up or down. Expand the row with its disclosure button. If an effect has no disclosure button, Apple says its keyframes can't be dragged vertically, so change the value in the inspector.
- Paste did nothing. The playhead was off the clip, no parameter was selected, or the parameter type didn't match.
- Volume keyframes won't ease. That's by design; use the fade handles for a shaped fade.
- An effect won't delete. Solo Animation is on. Press Control-Shift-V to turn it off.
- A zoom looks like it accelerates. Set Ease on the scale keyframes, as Larry Jordan suggests.
- There's no speed keyframe. Speed changes don't use keyframes. Apple's page on variable speed effects builds a ramp from speed segments, and the speed ramp guide walks through it.
What I'd do
For a new move, I'd key only the start and end, set Ease on the line between them, and play it at full speed before adding a third keyframe, because a two-keyframe move with Ease is far easier to retime than one patched with extra keyframes. For an animation that repeats, such as a lower-third slide or a logo reveal, I'd build it once and spread it with Paste Attributes set to Maintain, because copying a finished move is faster and more consistent than keyframing each clip again.