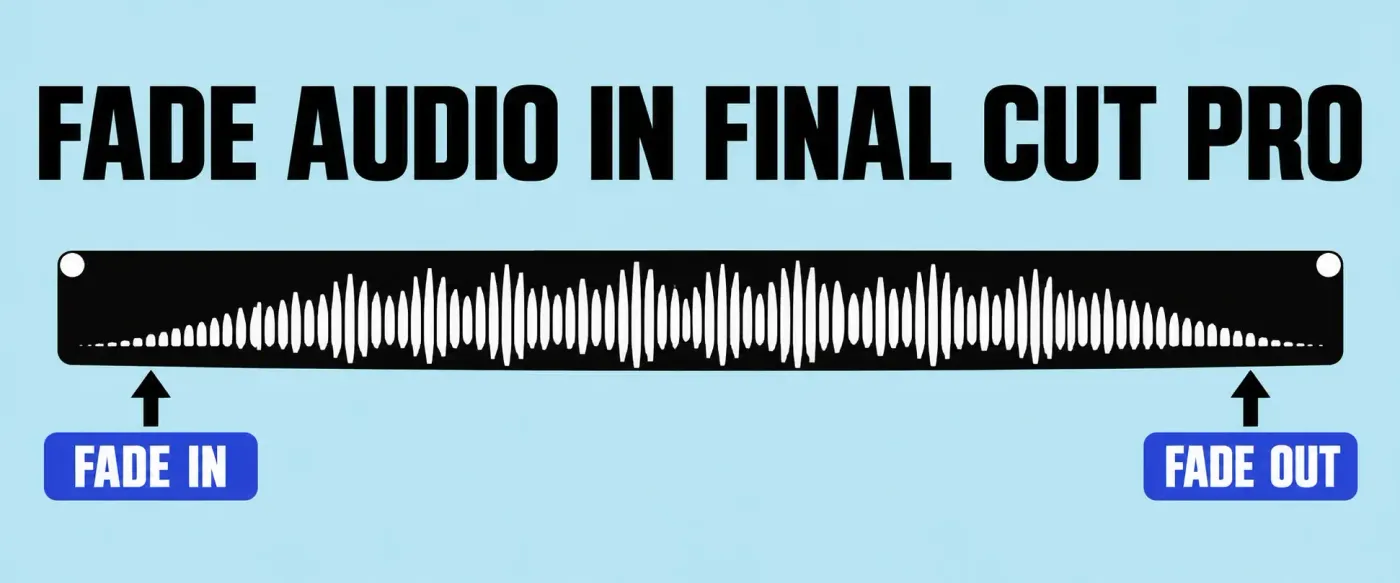
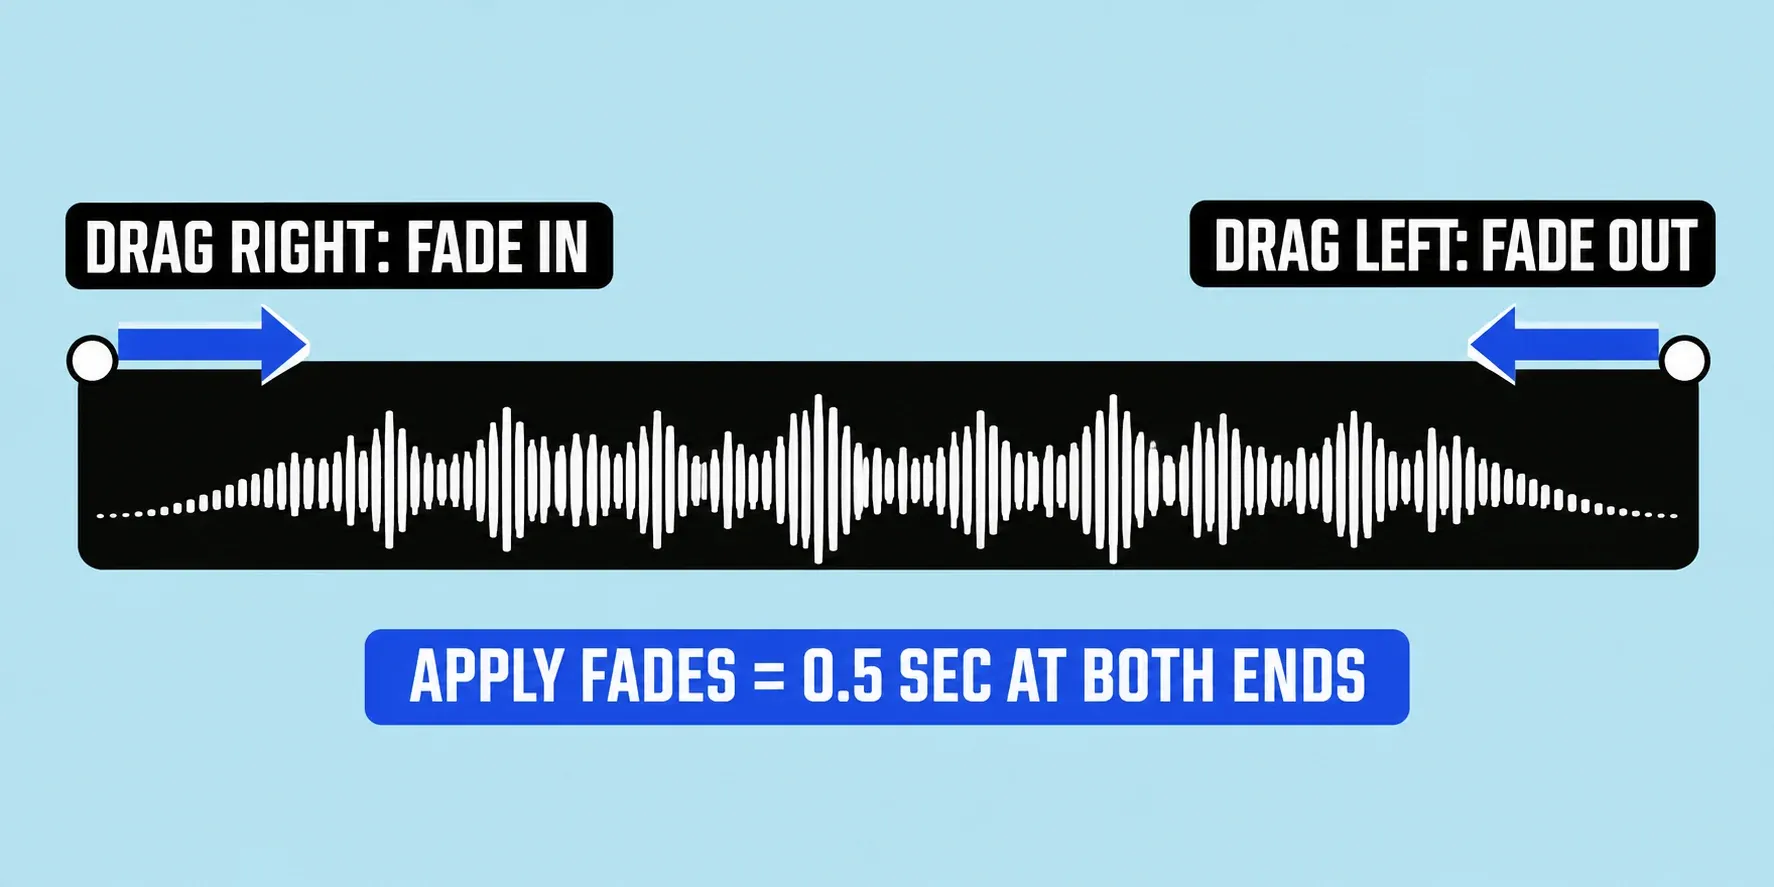
To fade audio in Final Cut Pro, hover over a clip in the timeline and drag the fade handle in the top-left corner of its waveform to the right for a fade-in, or the handle in the top-right corner to the left for a fade-out. For quick fades at both ends, select the clip and choose Modify > Adjust Audio Fades > Apply Fades, which adds half-second fades unless you've changed the default. To crossfade two clips that sit side by side, select both and press Option-T. A fade-in always rises from silence to the volume you've set for the clip, and a fade-out falls from that level back to silence.
Below: the handle and menu methods, which fade shape to pick, fading in the middle of a clip, three ways to crossfade, J-cuts and L-cuts, removing fades, the iPad steps, and what to check when a fade won't behave.
Drag the fade handles in the timeline
Fade handles are built into every clip with sound, and Apple's guide to fading audio in and out describes them this way:
- Point at the waveform. Move the pointer over the clip in the timeline. A fade handle appears in the top-left and top-right corners of the audio waveform.
- Drag the left handle right to the point where the fade-in should end.
- Drag the right handle left to the point where the fade-out should begin.
- Play across the edge and drag again until the fade sounds right.
The handles work on audio clips, on the audio part of video clips, and on audio components you've expanded in the timeline. If a clip is too narrow to grab a corner, zoom in on the timeline with Command-Plus Sign.
I'd use the handles for anything you judge by ear, like music under a voiceover, because you can drag and replay until the fade finishes on a beat, and a fixed default length can't do that.
Apply fades from the Modify menu
When several clips need the same fade, the menu is faster. Select one or more clips in the timeline, choose Modify > Adjust Audio Fades, and pick a command:
- Apply Fades adds a fade at the beginning and end of every selected clip. If a clip already has a fade, Apply Fades leaves it alone.
- Fade In and Fade Out work as switches. They add the fade if the clip doesn't have one and remove it if it does.
- Remove Fades takes the fades off both ends of the selected clips.
- Crossfade blends adjacent clips and gets its own section below.
Menu fades use the default length, half a second out of the box. To change it, choose Final Cut Pro > Settings (Command-Comma), click Editing, and move the Audio Fade slider in the Durations section; Apple's Editing settings page lists it next to the Crossfade slider, which sets the length for Option-T. I'd set both before you fade a whole timeline, because it's quicker than dragging a dozen handles afterward, and Apple gives the same tip for crossfades.
Crossfade is the only fade command with a default keyboard shortcut. If you fade a lot of clips, open the Command Editor with Final Cut Pro > Command Sets > Customize (Option-Command-K), duplicate the default set, and give Apply Fades, Fade In, or Fade Out a key of your own. The Final Cut Pro keyboard shortcuts guide walks through the Command Editor.
One trap: Apply Fades on two clips that butt against each other fades the first one down to silence and the second one up from silence, so the sound dips at the cut instead of blending. When you want one sound to hand over to the next, use Crossfade.
Pick a fade shape
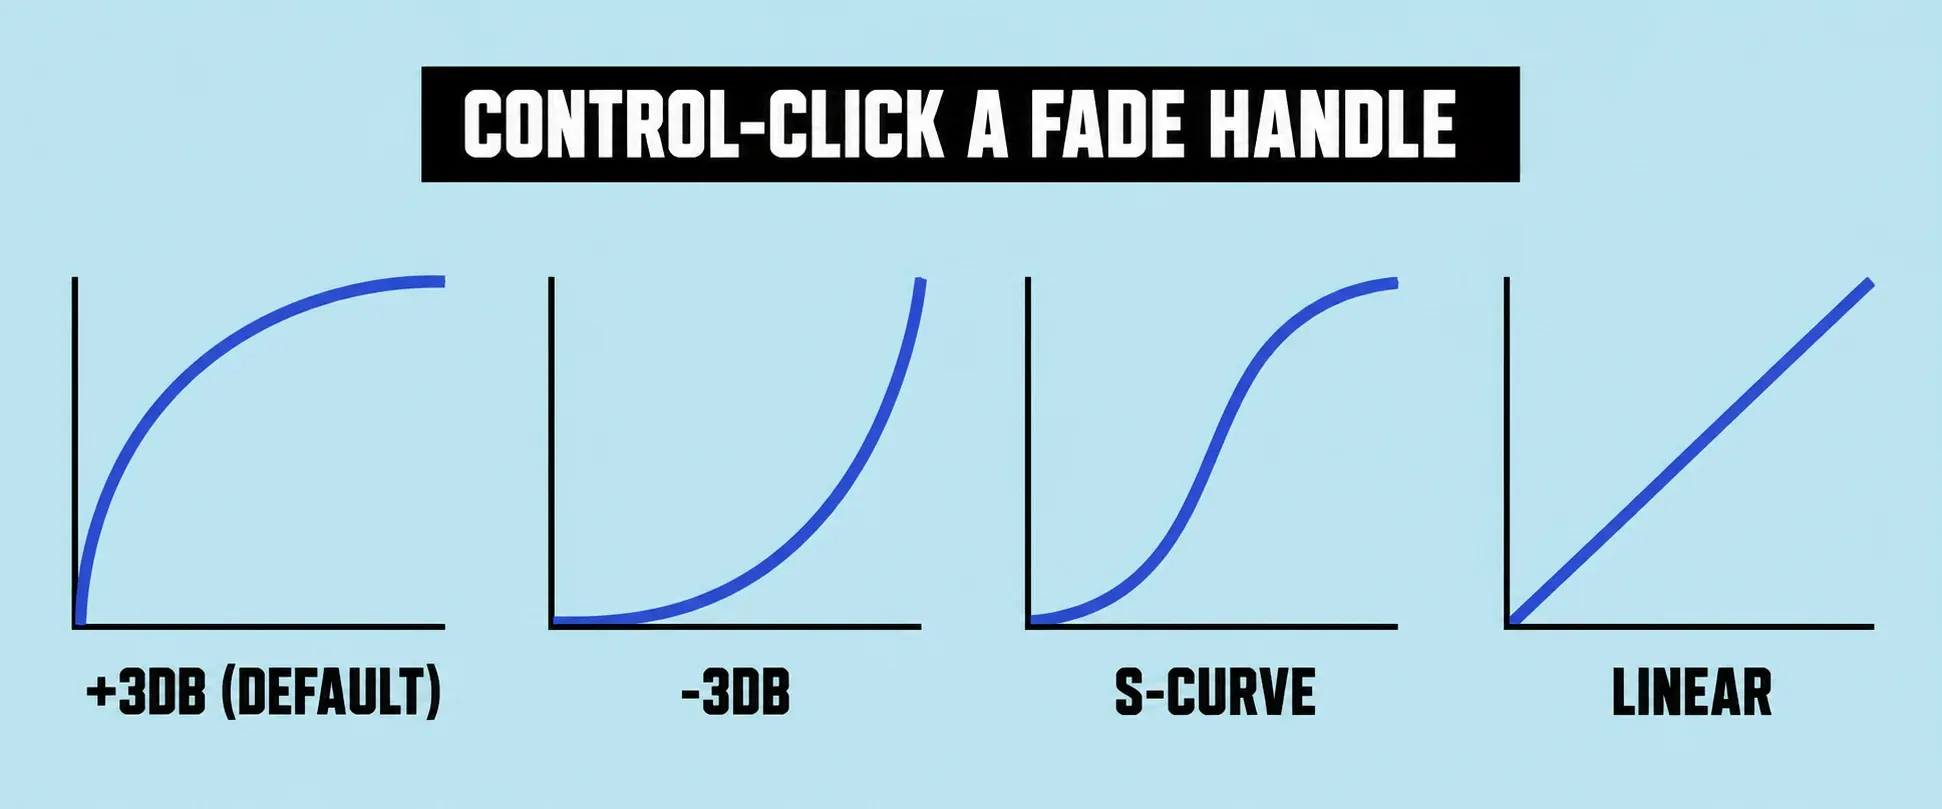
Control-click a fade handle and choose one of four shapes. The shape changes how the fade sounds, not how long it lasts:
| Shape | What it does |
|---|---|
| +3dB | The default. Fade-ins start quickly and end slowly; fade-outs start slowly and end quickly. Apple calls it the best choice for keeping a natural volume through a crossfade. |
| –3dB | The opposite: fade-ins start slowly and end quickly; fade-outs start quickly and end slowly. |
| S-curve | Eases into and out of the fade, with the midpoint at 0 dB. |
| Linear | Keeps a constant rate of change for the whole fade. |
I'd leave +3dB on crossfades, since it's the shape Apple recommends for them. On a music fade-out, the +3dB curve holds the level and then drops quickly at the very end; if that ending sounds abrupt, switch the fade-out to Linear or –3dB so the drop starts earlier.
Fade in the middle of a clip
Fade handles sit at the ends of a clip. To lower or raise the sound partway through, for example under one line of dialogue, use keyframes on the volume line, as Apple's guide to adjusting volume explains:
- Range Selection: press R, drag across the part you want to change, then drag the volume line inside the range up or down. Final Cut creates the keyframes along the adjustment points for you.
- Manual keyframes: Option-click the volume line, or press Option-K, at each point where the level should change, then drag the keyframes up or down. Apple's keyframe guide shows volume keyframes as white diamonds.
To fade an effect such as reverb instead of the volume, choose Clip > Show Audio Animation (Control-A) and add keyframes there. And if you later change the level of several clips at once, use Modify > Adjust Volume > Relative (Control-L): Apple notes that it keeps fades and keyframes, while Absolute (Control-Option-L) sets one level across the selection and deletes keyframe adjustments.
Crossfade two clips with Option-T
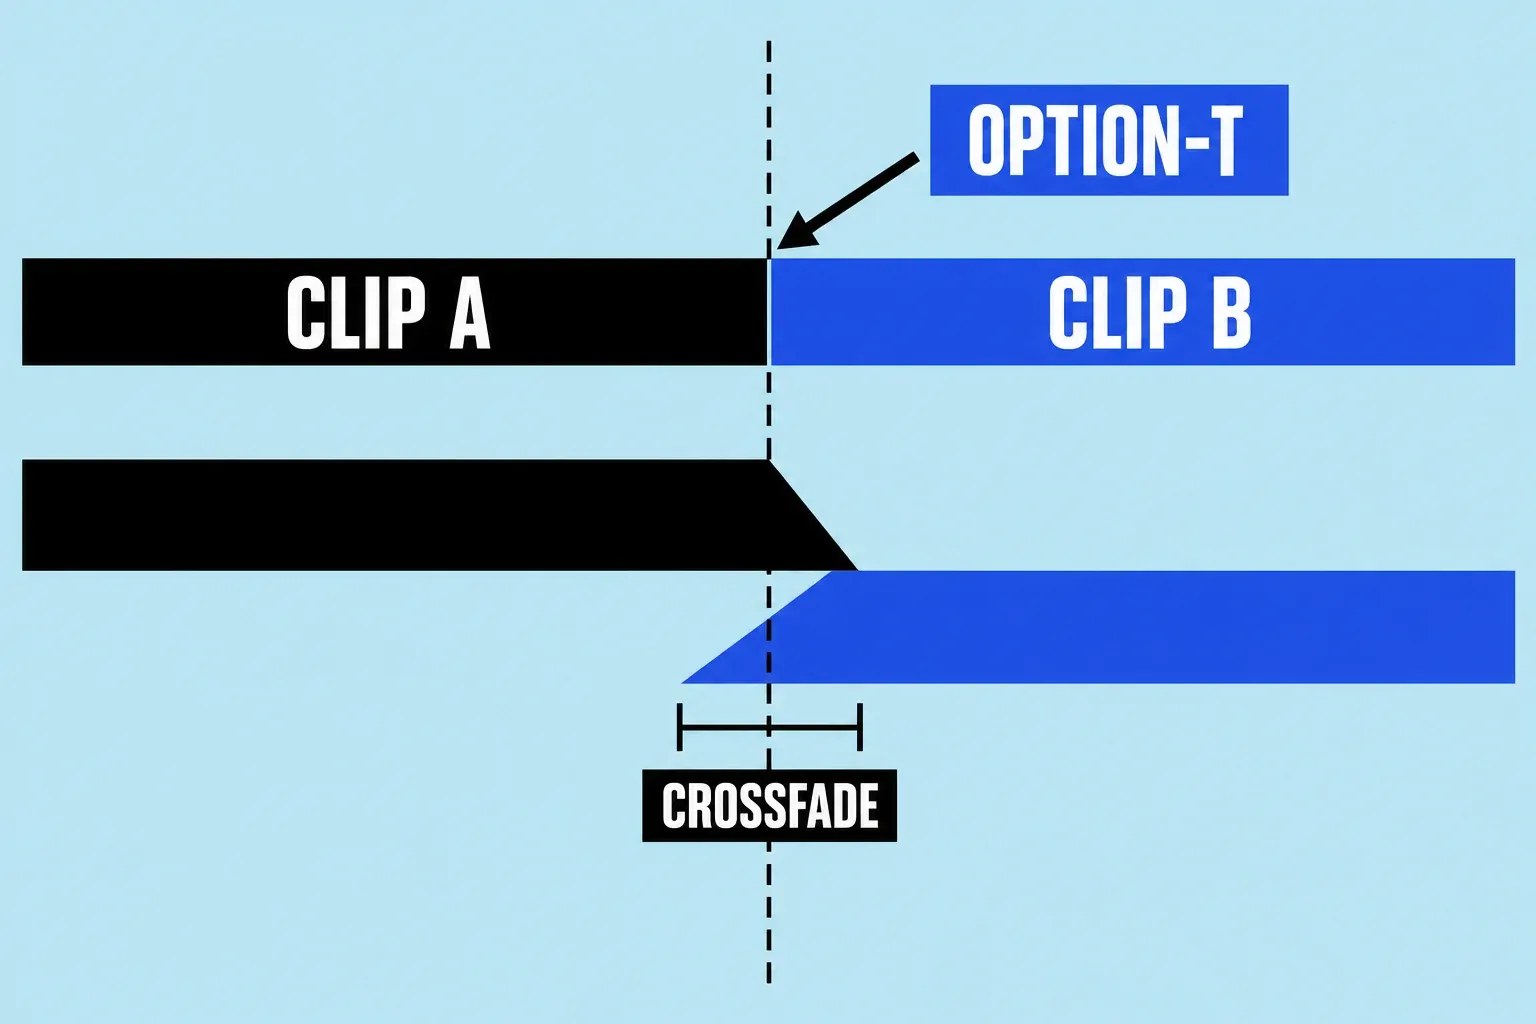
A crossfade fades the first clip's sound down while the next one fades up, so for a moment you hear both. Apple's crossfade guide gives three ways to make one: the Crossfade command, fade handles dragged by hand, or the crossfade that comes with a video transition. The command is the quickest:
- Select two or more adjacent clips in the timeline.
- Choose Modify > Adjust Audio Fades > Crossfade, or press Option-T.
Final Cut builds the crossfade from the clips' media handles, the extra footage beyond each clip's start and end points. To see the overlapping audio, select the clips and choose Clip > Expand Audio Components (Control-Option-S). If a clip doesn't have enough extra media for the default length, Final Cut offers to overlap the clips instead, and Apple's page on how transitions are created explains that accepting works like a ripple edit and makes the project shorter.
The length comes from the Crossfade slider in Final Cut Pro > Settings > Editing. For connected clips, Apple sends you to the manual method in the next section.
Crossfade music or connected clips by hand
The manual route lets you decide exactly where each fade starts and ends:
- Select the two adjacent clips and choose Clip > Expand Audio (Control-S). The audio opens up below the video.
- Drag the end point of the first clip and the start point of the second so their audio overlaps by the length you want.
- Drag the fade handles on each clip so the first fades out while the second fades in across the overlap.
- Control-click either handle if you want a different shape on that side.
Connected clips, such as two music tracks, can already overlap in time because Final Cut stacks them one above the other; the Magnetic Timeline guide explains how that stacking works. Drag the fade handles on both and you have a crossfade.
I'd build song changes this way instead of pressing Option-T, because a musical crossfade usually has to start on a bar line and run its own length, and with handles you set each side separately.
Crossfades that come with a video transition
When you add a video transition between clips with attached audio, Final Cut applies an audio crossfade automatically. It skips that step if the audio is detached or expanded from the video. The Final Cut Pro transitions guide covers adding and trimming the video side.
To change the shape of that crossfade, select the transition in the timeline, open the inspector with Command-4, and choose a shape from the Fade In Type and Fade Out Type pop-up menus in the Audio Crossfade section. Some transitions have a fixed audio crossfade duration that the Crossfade slider doesn't change. Fades made with fade handles override a transition's crossfade, so if the inspector changes seem to do nothing, check both clips for handle fades first.
Fade the overlap in J-cuts and L-cuts
In a split edit, the next shot's sound starts before its picture (a J-cut), or the previous shot's sound carries on after the picture changes (an L-cut). Apple's split edit guide has you expand the audio with Control-S or by double-clicking the waveform, drag the audio edge to where the sound should start or end, and then shape the overlap with fade handles or keyframes so it sounds natural. Press Control-S again to collapse the clip. The guide to trimming and splitting clips covers the edit itself.
I'd keep the fade on a J-cut short, so the incoming sound arrives cleanly instead of sitting under the end of the previous line.
Remove fades and crossfades
- Fades: select the clips and choose Modify > Adjust Audio Fades > Remove Fades. To clear only one end, choose Fade In or Fade Out, which removes that fade if it's there.
- Crossfades: trim each clip to a point beyond the crossfade, or select both clips, choose Trim > Align Audio to Video, and then choose Modify > Adjust Audio Fades > Remove Fades.
Align Audio to Video puts the audio start and end points back in line with the video, which undoes any J-cut or L-cut on those clips. If you want to keep a split edit, trim instead.
Fade audio on iPad
Final Cut Pro for iPad sets fade lengths in the inspector. Apple's iPad guide lists the steps: tap the clip in the timeline, tap Inspect, tap the audio tab, then tap the number next to Fade In or Fade Out and drag the dial to set the length in seconds. The same four shapes are available.
When a fade or crossfade won't work
- No handles appear: move the pointer over the waveform itself, and zoom in with Command-Plus Sign if the clip is narrow.
- Apply Fades changes nothing: the clip already has fades, and Apply Fades doesn't replace them. Choose Remove Fades, then apply again.
- A fade vanished: Fade In and Fade Out are switches, so choosing one on a clip that already has that fade removes it.
- Option-T asks to overlap the clips: one of them lacks extra media. Accepting shortens the project; to avoid that, trim the clip ends in a little so there's media to spare, then press Option-T again.
- A video transition added no audio crossfade: the audio is detached or expanded, so Final Cut didn't add one. Build the crossfade with fade handles instead.
- The transition's crossfade settings do nothing: handle fades on the clips override them.
- The Crossfade slider is ignored: that transition has a fixed audio crossfade duration.
- The sound dips at a cut: both clips have their own fades. Use Crossfade instead of Apply Fades on neighboring clips.
What I'd do
Set the Audio Fade and Crossfade lengths in Settings once. Then use Apply Fades on clips that should start and end softly, Option-T at cuts where one sound should flow into the next, and fade handles for music you judge by ear. Keep +3dB on crossfades, build song changes by hand, and use Range Selection when the level has to change in the middle of a clip. If you fade nearly every clip, assign Apply Fades a key in the Command Editor and save yourself a trip to the Modify menu each time.