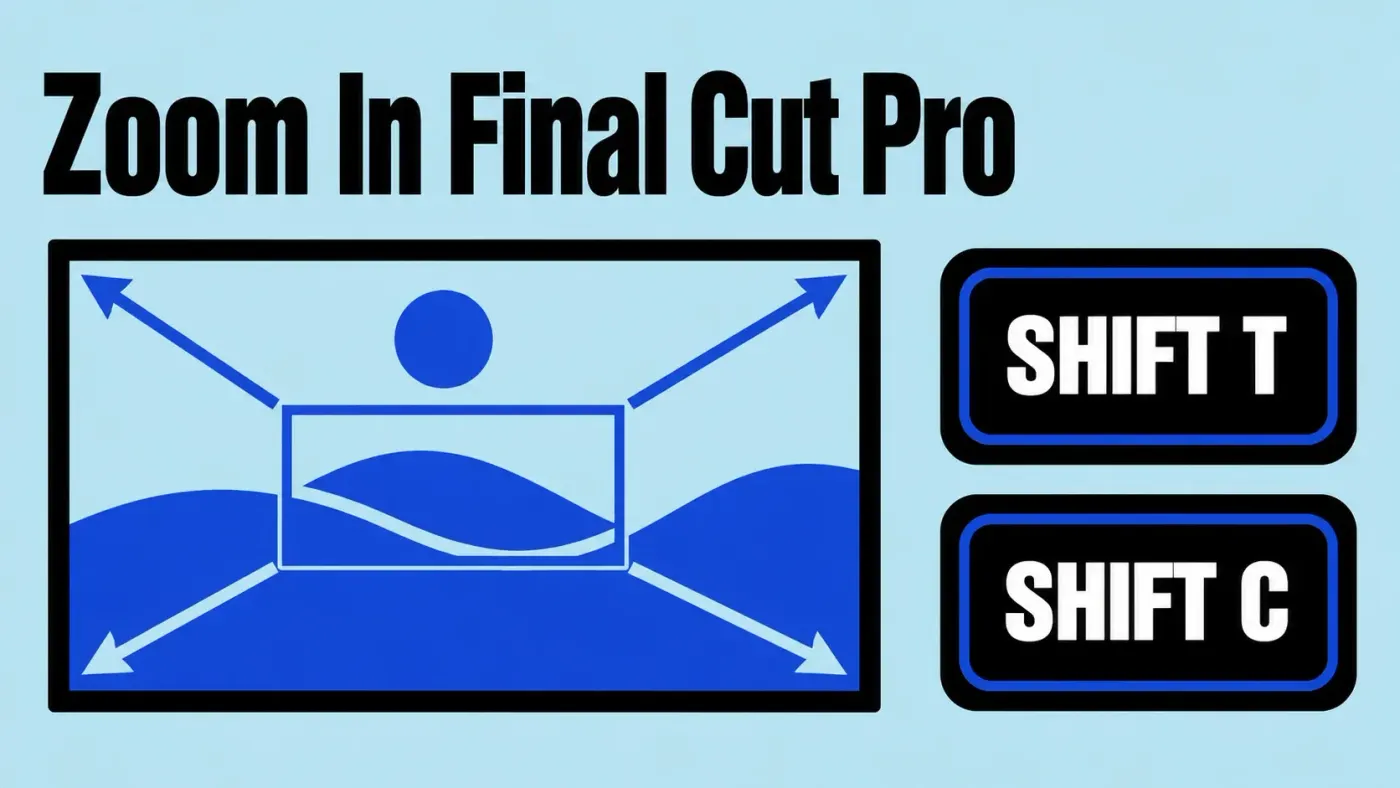
To zoom in on a clip in Final Cut Pro, select it in the timeline, press Shift-T to show the Transform controls in the viewer, and drag a blue corner handle outward, or raise Scale in the Transform section of the Video inspector. For a zoom that moves during the shot, use the Ken Burns effect (Shift-C, then the Ken Burns button) for a simple start-to-end push, or set Transform keyframes when the zoom has to start partway through or hold. Command-Plus Sign zooms the timeline or, with the viewer active, your view of the picture; neither one changes the exported video.
Below: a static punch-in, how far you can scale before the picture softens, smooth keyframed zooms, Ken Burns and its easing options, Crop keyframes for longer paths, a method table, timeline and viewer zoom, the iPad steps, a free plug-in, and fixes for the usual zoom problems.
Punch in with the Transform controls
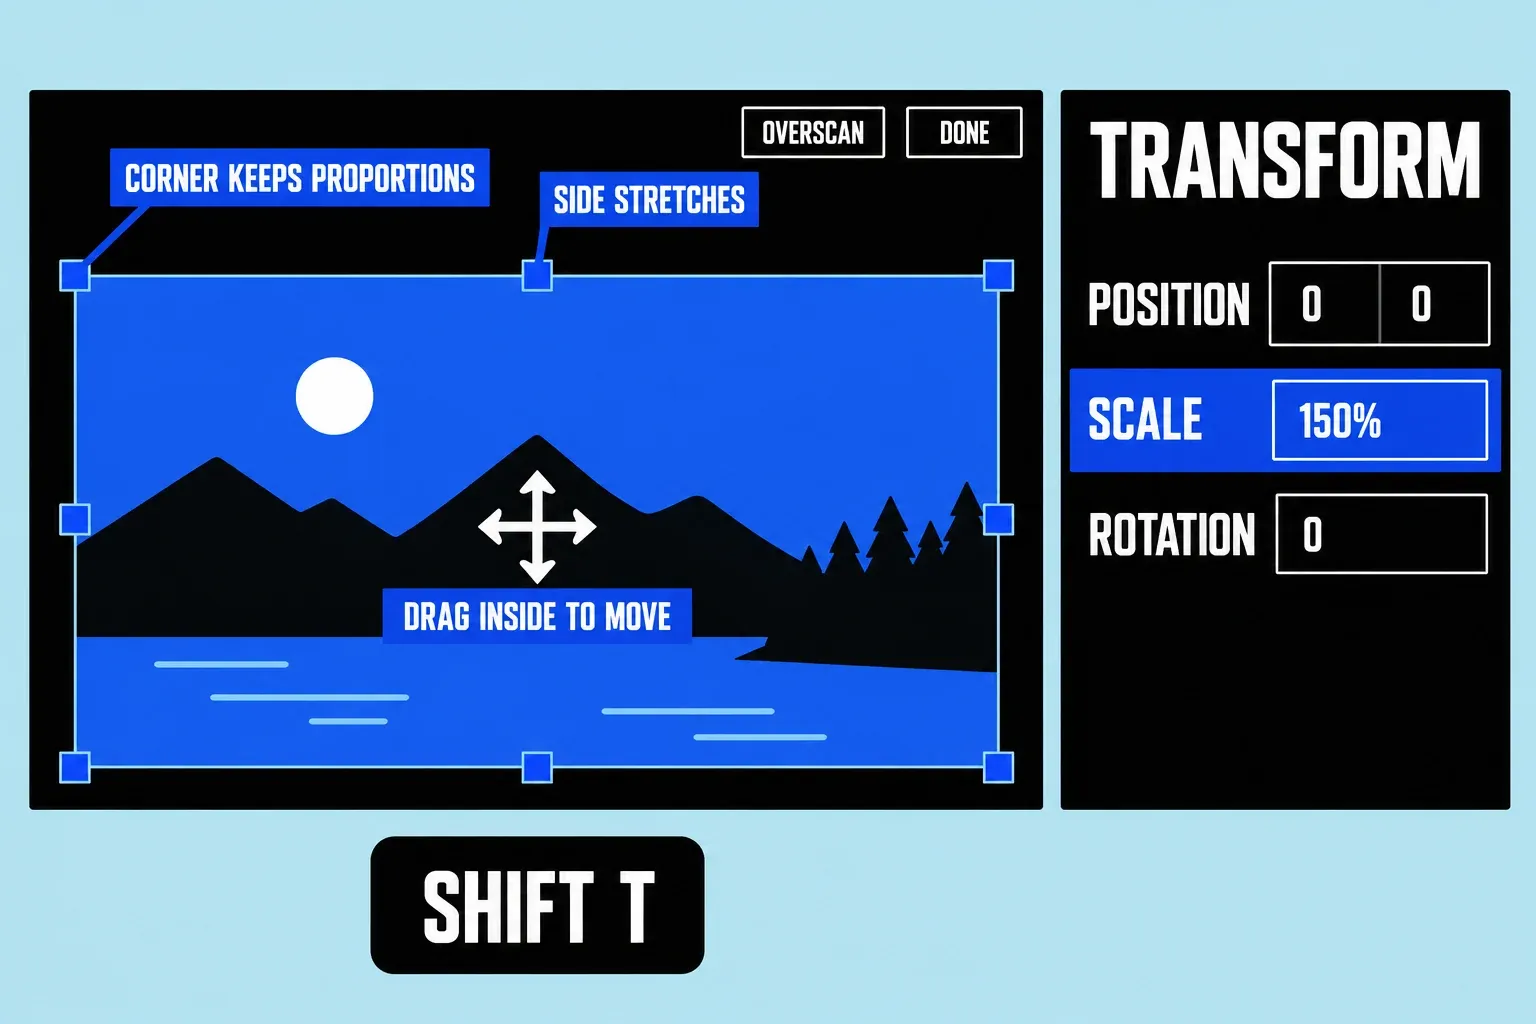
Apple describes Transform as the effect that's "often used to zoom in on a clip, allowing you to reframe a shot." Apple's guide to resizing, moving, and rotating clips gives three ways to open it once the playhead is over the clip: the pop-up menu in the lower-left corner of the viewer > Transform, Shift-T, or Control-click in the viewer > Transform. Then:
- Drag a blue corner handle outward. Corner handles scale the image and keep its proportions.
- Drag inside the image to slide the enlarged picture until the subject sits where you want it.
- Click Overscan in the upper-right corner of the viewer to see the parts of the image that now hang outside the frame.
- Click Done in the upper-right corner.
For exact numbers, open the inspector (Command-4), click the Video button, and type a value into Scale in the Transform section, for example 150%. Position X and Y move the frame. Leave the blue handles in the middle of each side alone when you zoom: they change the aspect ratio and stretch faces.
A punch-in on a cut is the quickest way to tighten a talking-head shot. Put the playhead where the tighter framing should start, press Command-B to blade the clip, select the second piece, and scale only that piece. I'd use this for interviews and screen recordings, because the cut hides the change of size and there are no keyframes to time. The guide to trimming and splitting clips covers the Blade tool if the split lands in the wrong place.
To give other clips the same framing, select the zoomed clip, press Command-C, select the other clips, choose Edit > Paste Attributes (Shift-Command-V), select Transform, and click Paste. Apple's guide to copying effects between clips notes that Paste Attributes copies individual settings and keyframes, and asks whether keyframes should keep their spacing (Maintain) or stretch to the new clip's length (Stretch to Fit).
How far you can zoom before the picture softens
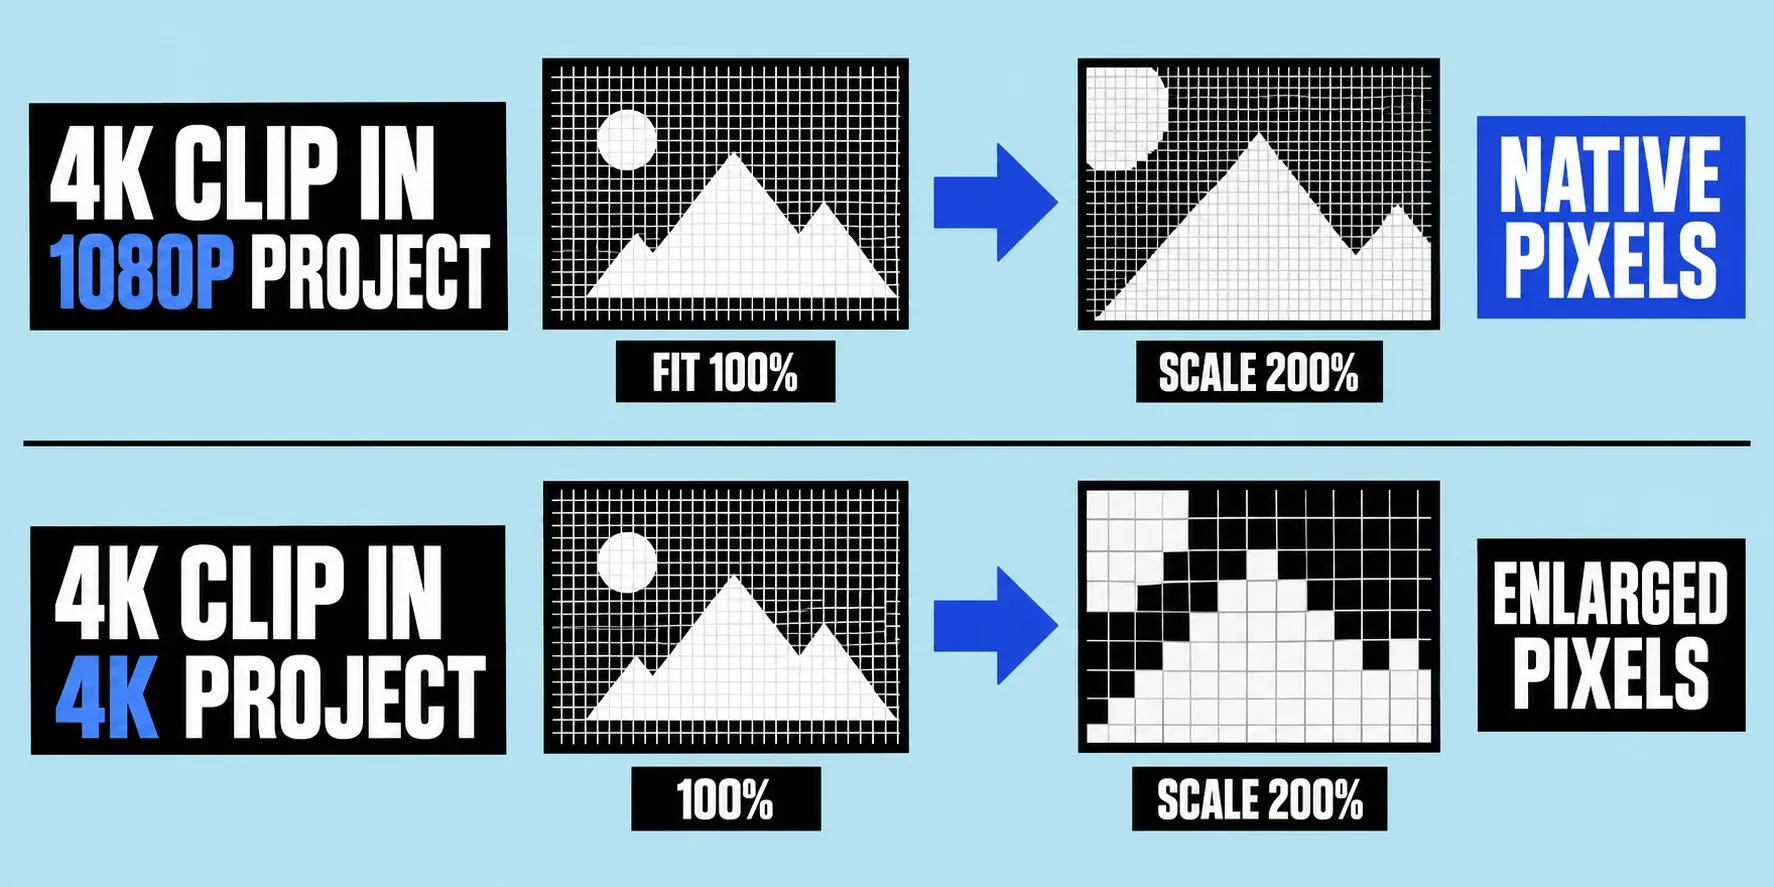
Scale above 100% enlarges pixels unless the clip has more of them than the project frame. That's where Spatial Conform comes in. When a clip's frame size differs from the project's, the Video inspector shows a Spatial Conform section with three types, as Apple's page on conforming frame sizes explains:
- Fit, the default, fits the whole clip inside the project frame without cropping it.
- Fill fills the frame and crops along the clip's longer dimension.
- None leaves the clip at its own size, so a larger clip appears cropped.
Here's what that means for a punch-in. A 4K UHD clip (3840 × 2160) in a 1080p project (1920 × 1080) is shown at Fit, which is half its recorded size. You can scale it to 200% and still use pixels the camera recorded; switching Spatial Conform to None shows that native framing in one click. Put the same clip in a 4K project and anything above 100% is upscaling.
Final Cut takes the project's format from the first video clip you add, so 4K footage in a 4K project leaves no spare pixels for a clean zoom. If I knew a 1080p delivery would need punch-ins, I'd keep the project at 1080p and the footage at 4K, because that doubles the zoom range before quality drops. Photos follow the same rule: a large still has room for a long push, and a small web image softens almost at once.
To judge sharpness, click in the viewer and choose 100% from the Zoom pop-up in its top-right corner. Apple's viewer zoom guide says a full-resolution view shows every pixel in the image, which the scaled-down Fit view doesn't.
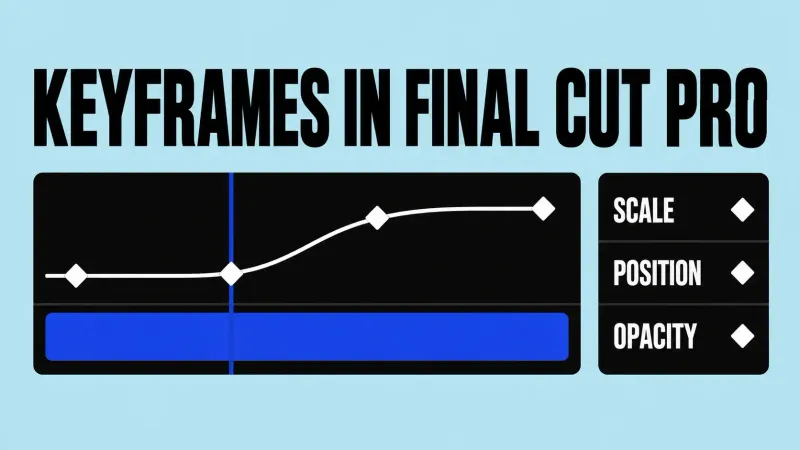
Animate a smooth zoom with Transform keyframes
Keyframes let the zoom start and stop wherever you want inside the clip. Apple's guide to working with built-in effects gives the steps:
- Park the playhead where the zoom should begin.
- Press Shift-T and set the starting framing. For a push-in from the full shot, leave Scale at 100%.
- Click the Add Keyframe button in the upper part of the viewer.
- Move the playhead to where the zoom should end.
- Drag a corner handle or change Scale. Final Cut adds the second keyframe automatically.
- Click Done and play the range.
After the last keyframe the clip keeps that value, so a zoom that should stay tight needs nothing more. To hold and then zoom back out, move to the end of the hold, click Add Keyframe without changing anything, then move on and set Scale back to 100%.
The same keyframes are available in the Video inspector: click the Keyframe button beside Scale, or press Option-K, then move the playhead and change the value. To retime a zoom, choose Clip > Show Video Animation (Control-V) and drag keyframes left or right in the Video Animation editor; Apple's keyframe guide says the timecode appears as you drag. With a parameter selected in that editor, Option-Semicolon and Option-Apostrophe jump to the previous and next keyframe.
If you also move the frame, the viewer draws its path as a red line. Control-click a keyframe handle on it and choose Smooth to get Bezier handles for a curved path, or Linear for a sharp corner.
I'd pick keyframes over Ken Burns whenever the zoom has to land on a beat or a line of dialogue, because you place both keyframes yourself instead of inheriting the clip's first and last frames.
Pan and zoom with the Ken Burns effect
Ken Burns is the fast route for photos and for slow pushes across a whole clip. Apple's pan-and-zoom guide calls it "actually a Crop effect with two crop settings, one at the clip start and another at its end," and Apple's introduction to built-in effects says it suits video clips as well as stills.
- Select the clip and put the playhead over it.
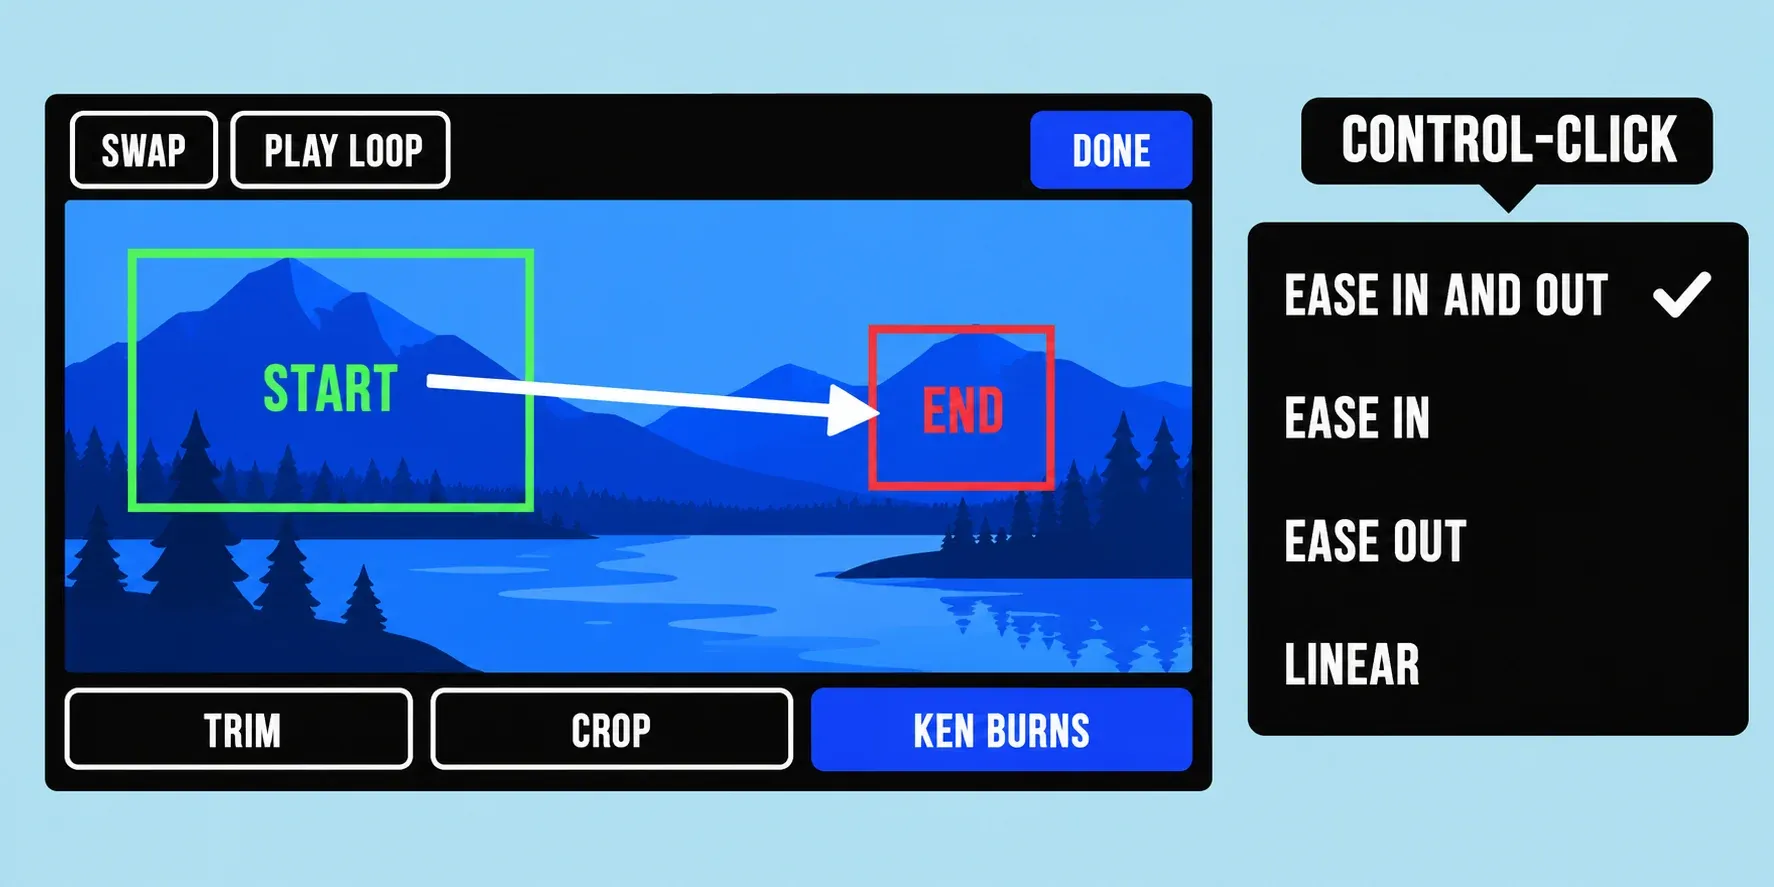
- Press Shift-C (or Control-click in the viewer and choose Crop), then click the Ken Burns button at the bottom of the viewer.
- Set the start. The green rectangle is the framing on the first frame. Drag its handles to change the size and drag inside it to move it.
- Set the end with the red rectangle the same way. An arrow shows which way the image travels.
- Click Play Loop to preview the move, or Swap to reverse it, so a push-in becomes a pull-out.
- Click Done.
Out of the box the two rectangles give a small zoom to the center, and the move eases in and out: it starts slowly and settles slowly. To change that, Control-click in the viewer with the Ken Burns controls open and choose Ease In and Out, Ease In (easing only at the end), Ease Out (easing only at the start), or Linear for a constant speed. I'd use Linear for a run of photos joined by dissolves, because each move keeps its speed through the transition instead of slowing to a stop under it.
Ken Burns always runs from the clip's first frame to its last, so the clip's length sets the speed. Trim a clip shorter and the same move plays faster; extend it and the move slows down. Ripple Training's Ken Burns walkthrough makes the same point. Photos come in at 4 seconds by default; select several and choose Modify > Change Duration (Control-D) to give them one length.
Because the move spans the whole clip, Ken Burns can't pause on its final framing. When the shot needs to settle, I'd build it with Transform keyframes instead, since the value simply stays put after the last keyframe. The other option is a freeze frame: put the playhead on the last frame and choose Edit > Add Freeze Frame (Option-F). Apple's freeze frame guide notes that effects applied to the source clip are rendered into the freeze-frame clip, and the freeze frame vs hold guide explains when a hold segment is the better pause.
Draw a longer path with Crop keyframes
Ken Burns has exactly two framings. For a move with stops along the way, such as across a document or a group photo, Apple's tip is to animate the Crop effect with intermediate keyframes, which Apple's crop guide calls "effectively, a manual Ken Burns effect."
- Press Shift-C and click the Crop button at the bottom of the viewer.
- Frame the first area. With the playhead at the first position, drag the corner handles and the crop window, then click Add Keyframe.
- Move the playhead, reframe for the next area, and repeat for each stop.
- Click Done. The cropped area expands to fill the screen.
The cropped image always keeps the original aspect ratio, so the move never stretches the picture. To pause on one area, give it two keyframes with the same framing.
Which zoom method to use
| What you want | Method | Why |
|---|---|---|
| A tighter frame for the whole clip | Transform: corner handle or Scale | One setting, nothing to animate |
| A jump zoom on a cut | Blade (Command-B), then scale the second piece | The cut hides the size change |
| A smooth push that starts mid-clip or holds | Transform keyframes | You choose where it starts, stops, and holds |
| A start-to-end pan and zoom on a photo | Ken Burns | Two rectangles, easing built in, speed set by clip length |
| A move with several stops | Crop keyframes | As many framings as you need |
| A closer look while you edit | Viewer zoom (Command-Plus with the viewer active) | View only; the export doesn't change |
| Reaching short clips in the timeline | Timeline zoom (Command-Plus, Z, Shift-Z) | View only |
Zoom the timeline and the viewer
If you meant the timeline rather than the picture, Apple's timeline zoom guide lists these controls:
- Zoom In and Zoom Out: View > Zoom In (Command-Plus Sign) and View > Zoom Out (Command-Minus Sign).
- Zoom tool: press Z, then click or drag over an area to zoom in, or Option-click to zoom out. Hold Z to use it temporarily; releasing the key brings back the previous tool.
- Zoom to Fit: View > Zoom to Fit (Shift-Z) shows the whole project. View > Vertical Zoom to Fit (Option-Shift-Z) sets clip height so every clip fits in the visible part of the timeline.
- Zoom slider: click the Clip Appearance button in the top-right corner of the timeline and drag the slider.
The viewer has its own zoom. Click in the viewer to make it active, then choose a level from the Zoom pop-up or press Command-Plus Sign. Once part of the frame is off screen, a navigation box appears with a red rectangle that marks what you're seeing; drag it, or press H for the Hand tool and drag the image, then press A to get the Select tool back. Choose Fit or press Shift-Z to see the whole frame again. Apple's guide states that the zoom level "affects your view only and has no effect on the output media file."
If Command-Plus does nothing, check which pane is active, then look at the key in the Command Editor (Final Cut Pro > Command Sets > Customize). The Final Cut Pro keyboard shortcuts guide shows how to find and reassign a command.
Zoom in on iPad
Final Cut Pro for iPad does the same jobs from the inspector:
- Static zoom: tap the clip, tap Inspect in the lower-left corner, open the transform controls at the top of the inspector, and make sure Lock Proportions is on. Drag a purple corner handle in the viewer or type a value into Scale, as Apple's iPad resize guide shows.
- Ken Burns: in the inspector, tap Crop Tools (scroll down if you need to), then Ken Burns. The green-cornered rectangle sets the start, the red-cornered one sets the end, and a white path runs from a green A to a red B. Reset and Disable sit at the top of the inspector. Apple's iPad crop and reframe guide recommends rendering the clip afterward for the best playback.
- Fill the frame: for clips with a different aspect ratio, Auto-Resize > Scale to Fill enlarges and crops the image, and Auto Crop reframes to follow a moving subject.
- Timeline: pinch open or closed anywhere in the timeline, or press Command-Plus Sign, Command-Minus Sign, or Shift-Z on a connected keyboard.
A free plug-in for photo moves
The built-in tools cover most zooms. If you animate a lot of large photos, FxFactory's Pan and Zoom plug-in is free and runs in Final Cut Pro, Motion, Premiere Pro, After Effects, and DaVinci Resolve once the FxFactory app installs it. Final Cut gets three versions:
- Generator animates an image file from disk at the highest quality, and FxFactory recommends it for images of 8K and up. The photo isn't added to your library automatically, so don't move or delete the original, and include it in your backups.
- Title goes above clips in the timeline; its quality is limited by the resolution the clip is rendered at.
- Effect goes on a clip like any video effect, as a simpler alternative to Transform.
It keeps the move in sync with the clip's length and has a Motion Blur parameter. I'd reach for the Generator only when the source photos are far larger than the project frame, because that's the case it was built for; for ordinary stills, Ken Burns already does the job. The Final Cut Pro plugins guide covers installing and managing third-party effects.
When the zoom goes wrong
- Black edges after scaling or moving. The image no longer covers the frame. Raise Scale until the edges disappear or move the image back with Position, and click Overscan to see which parts of the picture fall outside the frame.
- Black bars on a photo or phone clip before you zoom. Spatial Conform is set to Fit. Switch it to Fill in the Video inspector, or let a Ken Burns or Crop move fill the frame. The vertical video guide covers Fit, Fill, and reframing for the opposite shape.
- The zoom looks soft. You've gone past the clip's native resolution. Check it at 100% in the viewer, lower Scale, or start from higher-resolution footage. If the clip is also stabilized, the stabilization guide explains how cropping trades field of view for clean edges, which leaves less room to punch in.
- Faces look stretched. A side handle changed the aspect ratio. Click the Reset button in the Transform section of the Video inspector and scale with a corner handle.
- The keyframed zoom doesn't move. A single keyframe only sets a value. Add a second keyframe with a different Scale at a later playhead position.
- A Ken Burns move got faster or slower. The clip was trimmed; the move always spans the full clip.
- The zoom is missing from the export. You zoomed the viewer, not the clip. Use Transform, Crop, or Ken Burns.
- You want to compare before and after. Click the blue checkbox next to Transform or Crop in the Video inspector to switch the effect off and on without losing its settings.
What I'd do
For a single tighter frame, I'd scale with Transform and stop there. For movement, start with Ken Burns on photos and whole-clip pushes, and switch to Transform keyframes as soon as the zoom has to start late, hold, or land on a specific word. Before any big punch-in, check the clip at 100% in the viewer, because the scaled-down Fit view can make an upscaled shot look sharper than it will on a full-size screen.