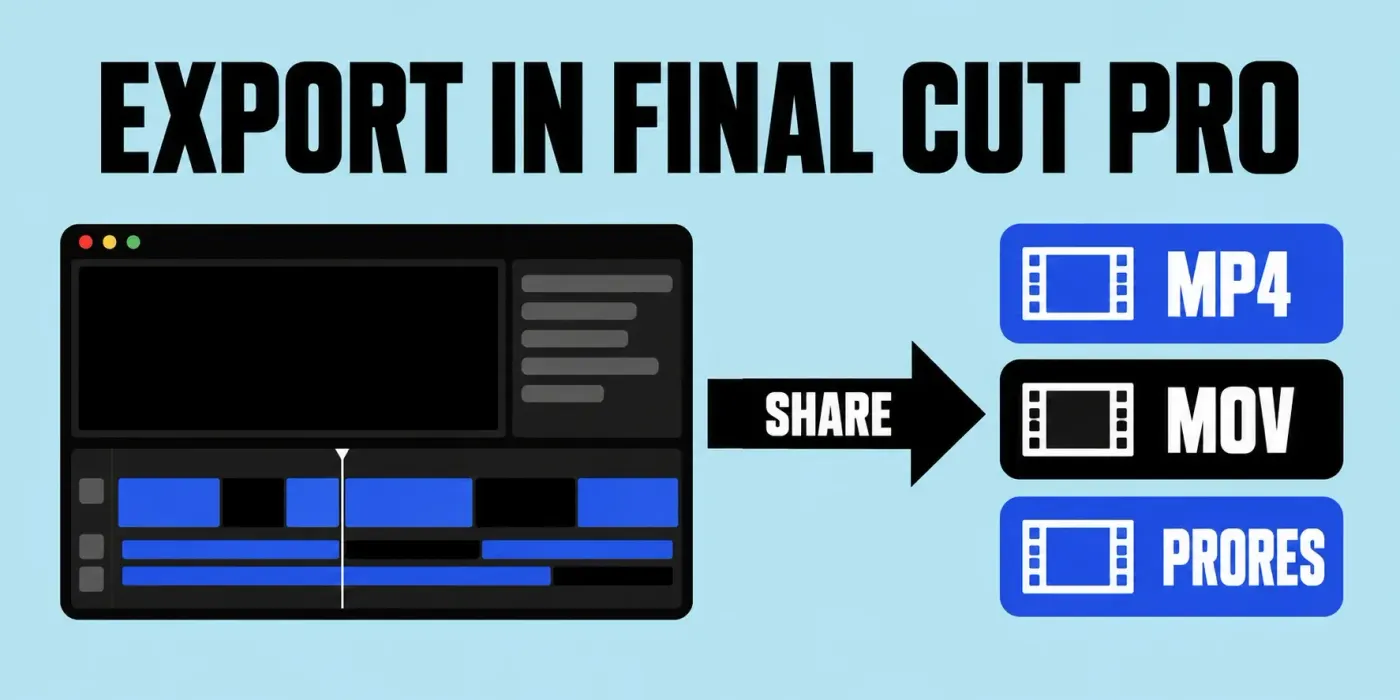
To export a video from Final Cut Pro, select the project in the browser or open it in the timeline, choose File > Share > Export File (Command-E), check the Settings pane, click Next, pick a folder, and click Save. The Format menu decides what you get: Computer writes an .mp4 that plays on Macs and PCs, Web Hosting writes a .mov for YouTube or Vimeo, and Video and Audio writes a full-quality .mov master in ProRes or another codec your project supports. I'd export one ProRes master of every finished project and make upload files from it, because the master still plays and re-encodes after the library and its media are gone.
Below: the six steps, a table of what each Format writes, how to get an MP4, codec and color settings, how big the file will be, exporting part of a timeline or several projects at once, Social Platforms and captions, stills and audio, making Command-E use your own settings, finding the file and speeding up the next one, the iPad app, and why an export doesn't replace the library.
Export a video from Final Cut Pro in six steps
- Switch off proxies. If the project plays proxy media, open it in the timeline, click the View pop-up menu in the top-right corner of the viewer, and choose Optimized/Original. Final Cut then builds the file from optimized media, or from the original files when optimized media doesn't exist, which is the last step of any proxy workflow in Final Cut Pro.
- Choose what to export. Select the project in the browser, or click in the timeline so the open project is active. For one section only, set a range with I and O first; the range section below explains why a selected clip isn't enough.
- Open the Share window. Choose File > Share > Export File, press Command-E, or click the Share button in the toolbar and choose Export File.
- Read the summary. The bottom of the window lists frame size, frame rate, audio channels and sample rate, duration, file type, and estimated file size. For some destinations, holding the pointer over the Compatibility icon in the lower-right corner lists the devices that will play the file. The title in the Info pane starts as the project name, but editing it renames nothing: the exported file takes the project's name.
- Set the format. Click Settings and choose Format, Video Codec, Resolution, and Action. Whatever you change becomes that destination's default next time, as Apple's Export File instructions note. For separate video, title, audio, or caption tracks, click Roles at the top of the window.
- Save. Click Next, choose a location, and click Save. The export runs in Background Tasks while you keep editing, and a notification appears when it's done.
Which Format to choose, and the file it writes
Format is the choice that matters most in the Settings pane. Apple splits the menu into mastering formats, which export at the project's own resolution and offer the high-quality codecs, and publishing formats, which let you pick a resolution for a device or website.
| Format | Group | File | Resolution | Use it for |
|---|---|---|---|---|
| Video and Audio | Mastering | .mov (MXF also possible) | Project's own | A master to keep, archive, or hand to a colorist or broadcaster |
| Video Only | Mastering | .mov without audio | Project's own | Picture for a separate sound mix |
| Audio Only | Mastering | Audio file in the format you pick | None | A finished mix or a voice track |
| Apple Devices | Publishing | .m4v | Selectable | Playback on iPhone, iPad, Apple TV, or Mac |
| Computer | Publishing | .mp4 | Selectable | Anyone who asks for an MP4, Windows PCs, most upload sites |
| Web Hosting | Publishing | .mov | Selectable | YouTube or Vimeo uploads |
Apple's page on Export File and Apple Devices settings describes these groups but not the extensions; the .m4v, .mp4, and .mov in the table match Epidemic Sound's walkthrough of the Share window. Resolution changes only in the publishing formats, and a destination never scales up: choose 4K for a 1080p project and the file still comes out at 1080p.
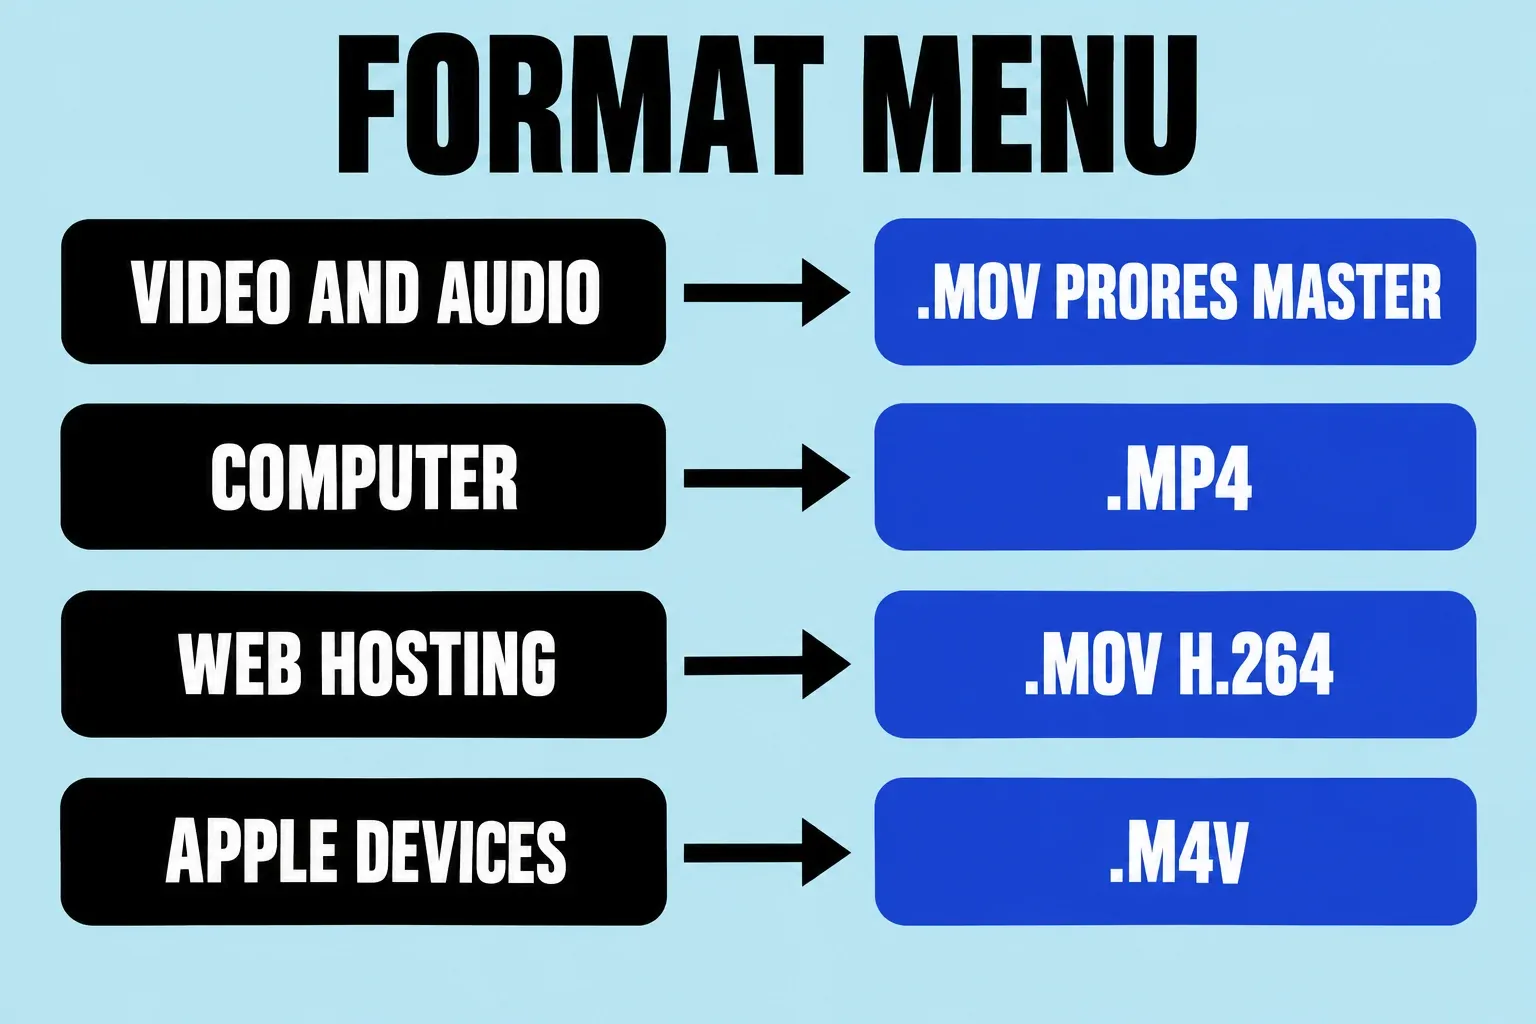
I'd pick Computer whenever someone asks for "an MP4" and Video and Audio whenever the file is the last copy of the edit, because those two cover nearly every request a client or a website makes.
How to export an MP4 from Final Cut Pro
Choose Computer from the Format menu, and the export is an .mp4. Epidemic Sound's guide sets the Video Codec to H.264 Better Quality there: it takes longer to encode than H.264 Faster Encode and gives a better picture.
Already exported an H.264 .mov from Web Hosting or Video and Audio? Apple's article on converting a MOV file to MP4 skips the second export. Select the file in the Finder, choose File > Get Info, and check that More Info lists H.264 under Codecs. Control-click the file, choose Rename, replace mov with mp4, press Return, and choose Use .mp4. Duplicate the file first if you want to keep the .mov. The rename works only for H.264; a ProRes .mov needs a new export with Computer.
YouTube and Vimeo don't need an MP4, since both take .mov uploads and Web Hosting exists for exactly those sites. Resolution, frame rate, and HDR choices for that upload are in the Final Cut Pro export settings for YouTube.
Codec, color space, chapters, and the Action menu
Video Codec choices depend on the project's media format, so the list changes from project to project. Mastering formats include the ProRes family, and Apple's list of formats Final Cut Pro exports adds AVC-Intra, DV, DVCPRO HD, H.264, HDV, HEVC, MPEG IMX, MV-HEVC, uncompressed 4:2:2, and XDCAM. Publishing formats use delivery codecs: H.264 and, for many projects, HEVC. In its overview of share destinations, Apple says HEVC makes smaller files than H.264 at the same quality and can carry HDR.
I'd pick H.264 Better Quality when the playback device is unknown, because older PCs and TVs that can't decode HEVC still play H.264, and an export runs once while people watch it many times.
- Color Space isn't a free choice: the project settings and the codec decide it. If the file looks different from the viewer, the checks for colors that change after export find where the image first shifts.
- Audio Format is a menu only for Audio Only. In the other formats it just shows which audio format the file will use.
- Include chapter markers writes your chapter markers into the file, so QuickTime Player and other players can jump between chapters.
- Allow export segmentation speeds up H.264 and HEVC exports on some Macs; the speed section below lists when it appears.
- Action decides what happens afterward: Save only, open the file in QuickTime Player or another app, Open with Compressor (listed only when Compressor is installed), Home Videos in the TV app, or Add to Photos.
How big will the exported file be?
The Share window shows an estimated file size before you click Next, so compare it with the free space on the target drive. For ProRes masters, Apple publishes target data rates in its ProRes white paper and notes that real files stay close to the target. Dividing the gigabytes-per-hour figures by six gives the size of a 10-minute project:
| ProRes version | 1080p30 rate | 10 min at 1080p30 | 2160p30 rate | 10 min at 2160p30 |
|---|---|---|---|---|
| ProRes 422 Proxy | 45 Mb/s | 3.3 GB | 182 Mb/s | 13.7 GB |
| ProRes 422 LT | 102 Mb/s | 7.7 GB | 410 Mb/s | 30.8 GB |
| ProRes 422 | 147 Mb/s | 11 GB | 589 Mb/s | 44.2 GB |
| ProRes 422 HQ | 220 Mb/s | 16.5 GB | 884 Mb/s | 66.3 GB |
| ProRes 4444 (no alpha) | 330 Mb/s | 24.7 GB | 1,326 Mb/s | 99.5 GB |
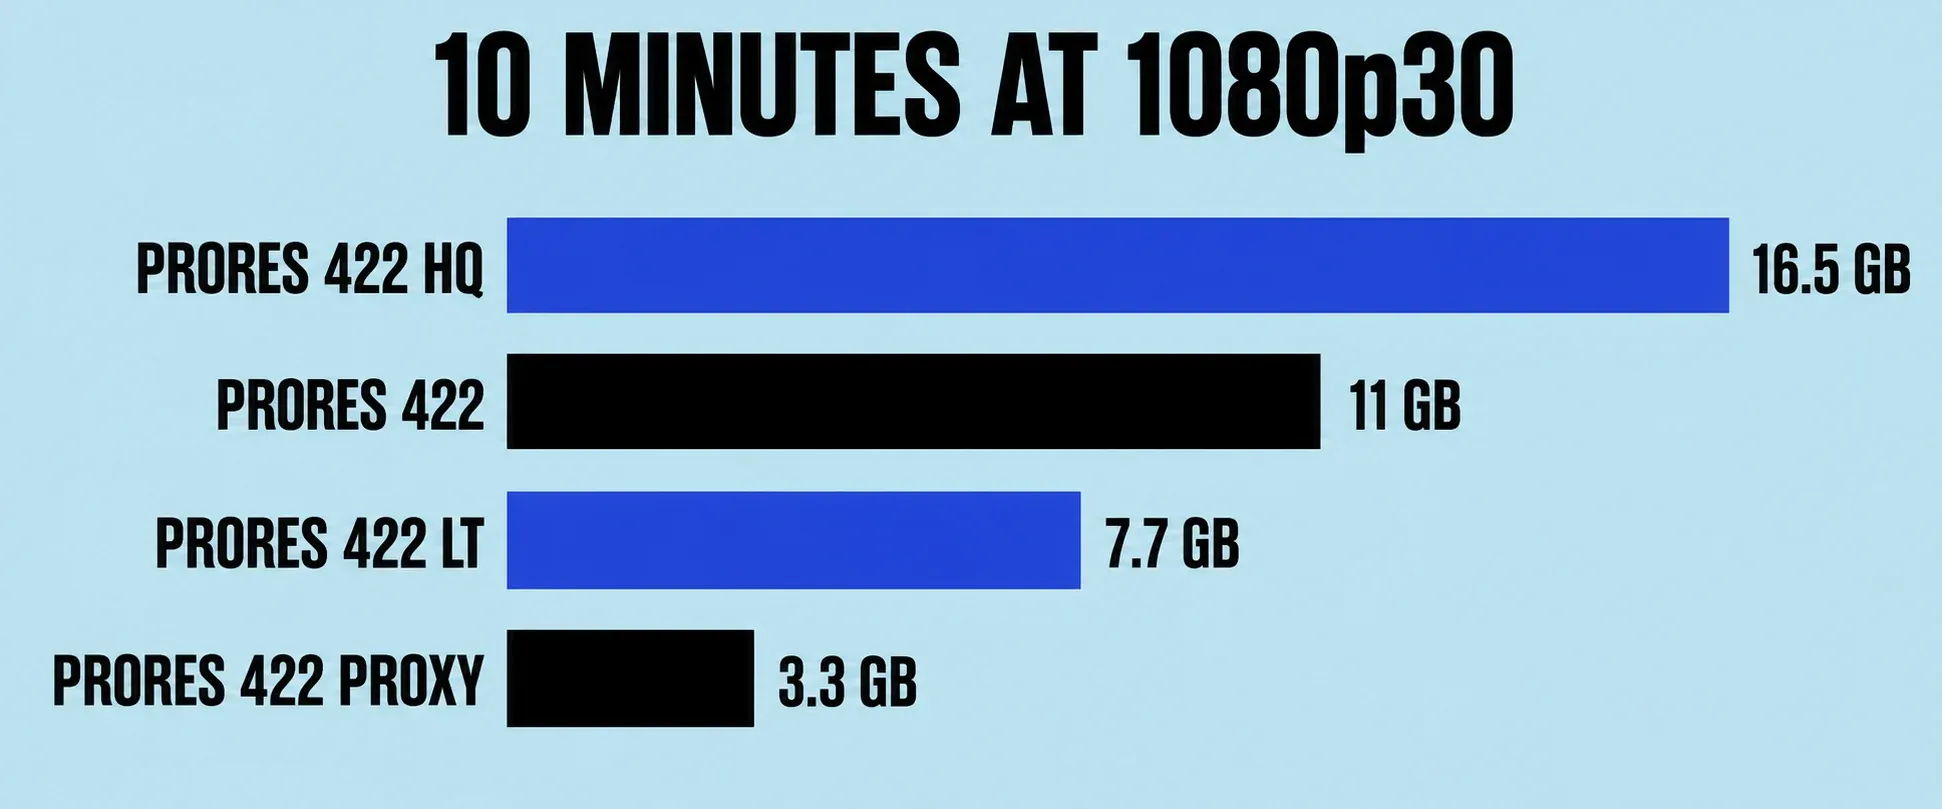
H.264 and HEVC files are far smaller, and their size depends on the format, codec, and resolution you choose, so the Share window's estimate is the figure to go by. Check free space against that estimate before any long ProRes export: a 10-minute UHD master in ProRes 422 HQ is already about 66 GB.
Export part of a timeline, or several projects at once
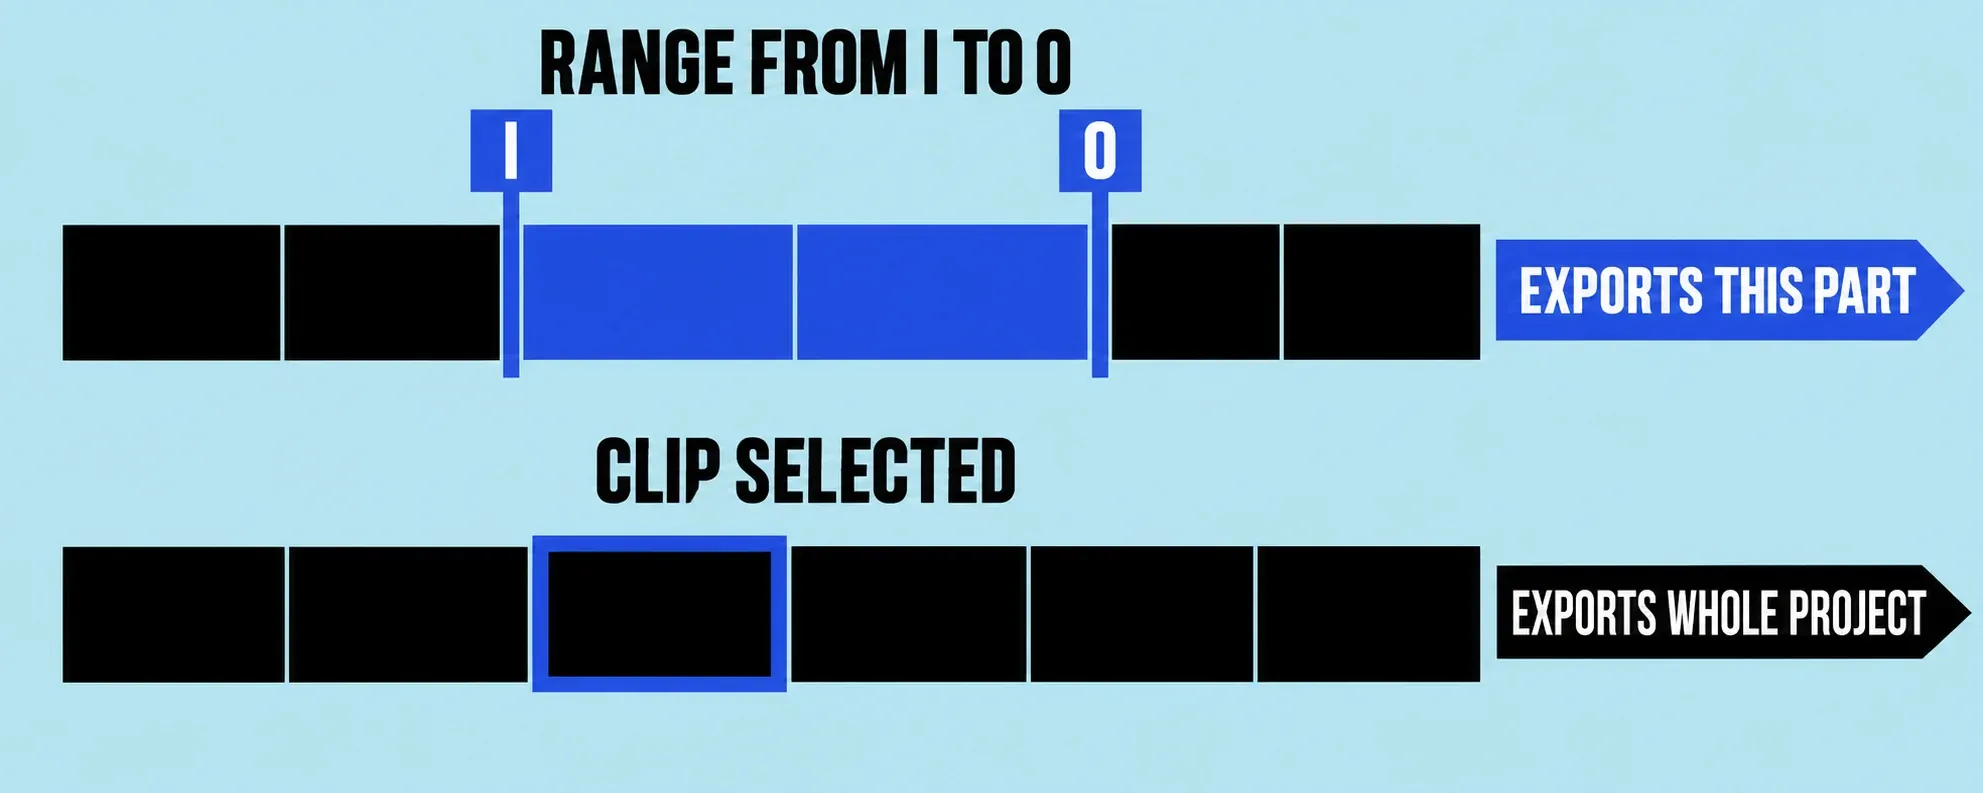
To export one section, set a range: press I at the start and O at the end, or select a clip and press X to mark a range around it. Then press Command-E. Apple's note is blunt that a clip selection isn't sufficient, so a selected clip without a range still gets you the whole project. In the browser, ranges marked in one or more clips can be shared the same way.
To export several projects in one go, select them in the browser and choose a destination from File > Share. A batch holds only projects or only clips, and Apple's notes on batch sharing say it isn't available for every destination. If the projects use different roles, frame rates, or frame sizes, the Share window can't change those settings for the batch, so fix them in each project first. Captions are more forgiving: CEA-608, iTT, or SRT captions can go out as sidecar files, with a folder for each project.
Social Platforms, Apple Devices, and captions
File > Share > Social Platforms replaced the old YouTube & Facebook destination. Apple's steps to share on the web say it writes a MOV file with H.264 video and AAC audio and uploads nothing; you post the file yourself. The Social Platforms settings cover Resolution, Compression (Multi-pass for better quality or Single-pass for speed), exporting captions as embedded or sidecar files, burning captions in, and export segmentation.
The Apple Devices destinations come in 720p, 1080p, and 4K versions, from the lowest data rate and smallest file to the highest. The default Share menu also lists an HEVC destination with optional HDR, Apple Vision Pro for spatial video, and Send Frame to Pixelmator Pro.
Vertical Reels and Shorts start from a separate 9:16 project and export as a 1080×1920 file, as the steps for vertical video in Final Cut Pro show. Burned-in captions become part of the picture and can't be switched off, while an SRT or iTT sidecar stays a separate file the viewer can toggle; the difference between captions and subtitles decides which one a delivery needs. Building the caption file itself is covered in importing and exporting SRT closed captions.
Export a still frame, audio only, or separate role files
Save Current Frame isn't in the Share menu by default. Choose File > Share > Add Destination and double-click Save Current Frame. After that, park the playhead on the frame and choose File > Share > Save Current Frame. Apple's steps to export still images list three settings: the image file type, scaling the image to preserve its aspect ratio, and burning in captions. A run of frames uses a separate image sequence destination.
For sound only, open Export File, set Format to Audio Only, and pick the file type in Audio Format. For stems, click Roles at the top of the Share window and choose which roles go out as separate tracks or files; a mixer usually asks for dialogue, music, and effects apart.
Make Command-E export your own settings
Command-E shares to the default destination, which is Export File out of the box. Control-click another destination in Final Cut Pro > Settings > Destinations and choose Make Default to change that. With a clip selected in the browser, Command-E exports the clip; with the timeline active, it exports the project.
New destinations come from File > Share > Add Destination or the same Destinations pane: drag a destination type into the list or double-click it, or Control-click one you already use and choose Duplicate. Control-click also deletes a destination or reverts it to its original settings, and double-clicking its name renames it. A bundle exports one file per destination inside it: select a few destinations, Control-click the list, and choose New Bundle from Selection. Apple's page on creating share destinations also covers dragging destinations to the Finder as .fcpxdest files and back in on another Mac. Restore Default Destinations brings back the stock list, but it deletes every custom destination, so drag yours to the Finder first.
I'd build one bundle with a ProRes master and an H.264 upload file and make it the default, because Command-E then writes both files and nobody has to remember the second export.
When a delivery spec asks for something these destinations can't set, such as a target bitrate, MPEG-2, or MP3, that's the point where Apple Compressor with Final Cut Pro is worth adding.
Find the exported file and speed up the next one
Progress shows in Window > Background Tasks (Command-9) or the Background Tasks button in the toolbar, where an export can be paused, resumed, or canceled. When it finishes, select the project, press Command-4, and click the Share button at the top of the inspector. Its pop-up menu has Reveal in Finder, as Apple's page on the status of shared items shows; not every shared item creates a file.
For H.264 and HEVC, Allow export segmentation sends parts of the video to the Mac's media engines at the same time. Apple's page on simultaneous processing says the checkbox appears for projects about 3 minutes or longer, is selected by default, and works on the M1 Max, M1 Ultra, M2 Max, M2 Ultra, and M3 Max. It applies to Apple Devices, Export File, Social Platforms, Email, HLS, and Compressor Presets, but not to HEVC HLG Dolby Vision 8.4. On other Macs, H.264 Faster Encode or Single-pass in Social Platforms gives up a little quality for time.
If an export stops with an error, keep the edit safe first and test a short range before another full export; the order of checks is in Final Cut Pro export failed.
Exporting from Final Cut Pro for iPad
The iPad app has no Export File window. On the Projects screen, select the project, tap above the video preview, and tap Video; inside an open project, tap next to the project name, then Share, then Video. Choose whether to include audio, then a preset:
- Default: the current timeline settings, for YouTube or Vimeo.
- High Quality: Apple ProRes 422 HQ, with the largest files.
- Smaller File Size: HEVC, for quick uploads and storage.
- Social Platforms: H.264, for Instagram, Facebook, TikTok, and the widest range of devices.
Advanced settings change Video Codec, Resolution, File Type (MOV or MP4), and Color Space (SDR Rec. 709 or HDR HLG). Tap Export, then Save Video for Photos, Save to Files for iCloud Drive, the iPad, or a connected drive, AirDrop, or an app. Apple's iPad export guide adds Audio Only (AAC, WAV, or AIFF), Current Frame (TIFF, PNG, or JPEG), and exporting the project itself for Final Cut Pro on another iPad or a Mac.
An export isn't a backup of your edit
An exported file is flat: cuts, titles, and audio levels are baked in and can't be adjusted later. To reopen the edit next year, keep the library and the media it points to. A library backup holds the project database, not the media, as the guide to Final Cut Pro library backups explains, and how libraries, events, and projects fit together shows what lives where. File > Export XML hands the edit to color or sound apps, but the XML carries no media either.
Do not delete the original media or the library after an export until you have played the exported file all the way through and have a copy of the library together with its media.
What I'd do
For a finished project, I'd export a ProRes 422 HQ master with Video and Audio, then an upload file with Computer and H.264 Better Quality, or Web Hosting when the site takes .mov, and play both in QuickTime Player before deleting anything. For a new destination or a new delivery spec, I'd export a 20-second range first, because a short test shows a wrong codec, a color shift, or a missing caption in seconds instead of after a full export.