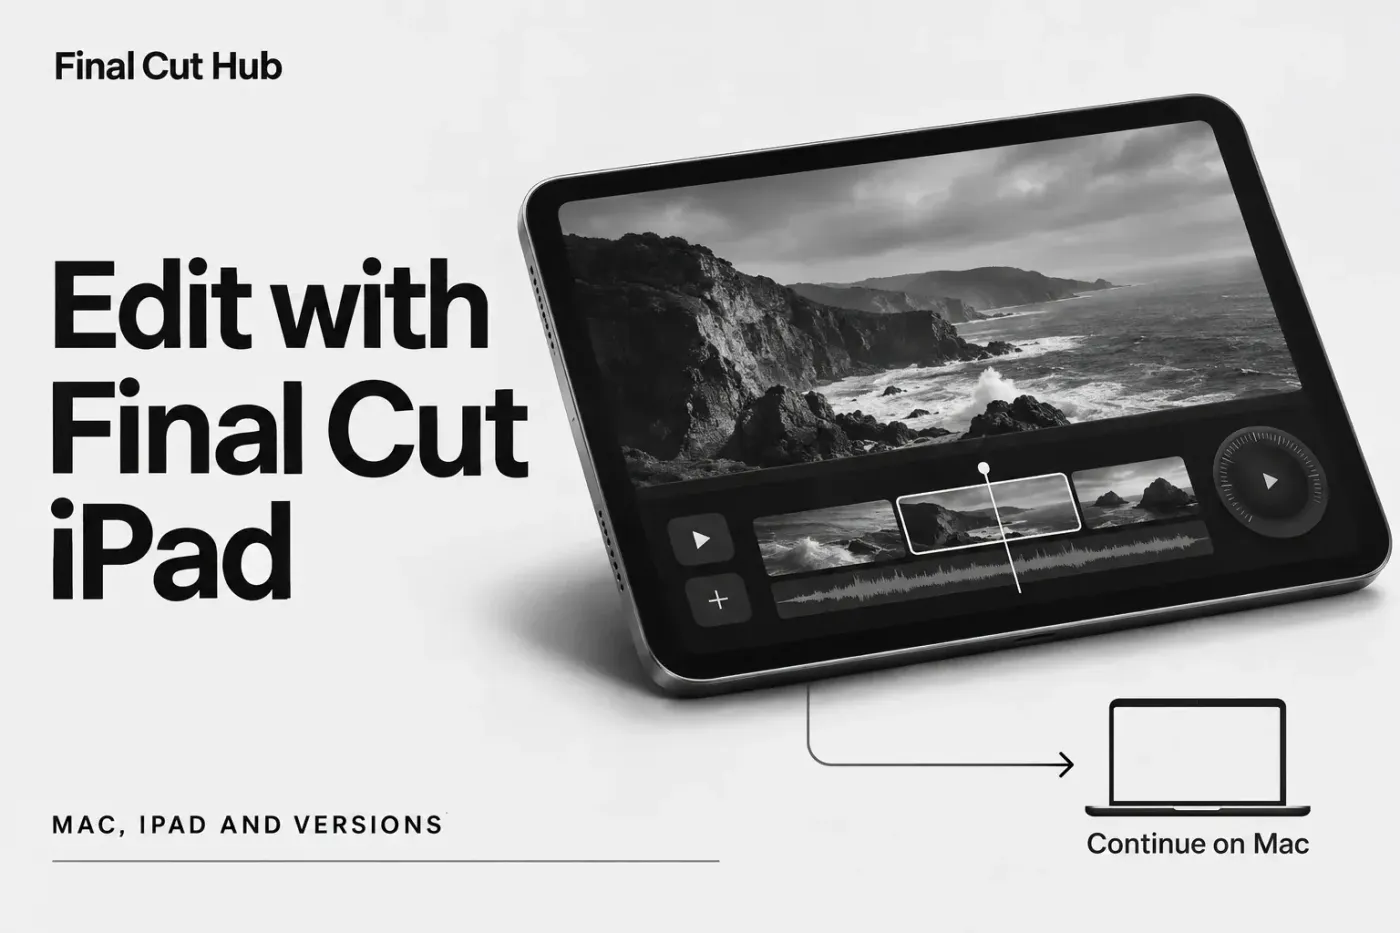
Final Cut Pro for iPad is Apple's touch version of its video editor, and the current release runs on any iPad with an M-series chip, plus the iPad (A16) and the iPad mini (A17 Pro or A20 Pro), on iPadOS 26.6 or later. The app is a free download, and editing needs a paid plan: in the U.S., Apple Creator Studio costs $12.99 a month or $129 a year, with a one-month free trial for eligible new subscribers, while existing standalone iPad subscribers can reactivate their plan after Creator Studio expires. It handles 4K, HDR and multicam, and SlatePad's six-minute 4K project exported in about 2:28 to 3:55 on the four tested models. It's still a smaller app than the Mac version, with one color effect instead of wheels and curves, no Magnetic Mask, no libraries, and projects Apple supports moving from iPad to Mac. A return trip needs a separate converter with its own limits.
Below: which iPads qualify and which features need a newer one, the cost in a paragraph, a current iPad-versus-Mac table, moving a project to the Mac, planning storage before the first import, a first project step by step, export settings, what published export times show, and when the iPad is the right place to edit. Mac requirements live in the system requirements guide, and the editing ideas that work the same on both devices are in the beginner tutorial.
Which iPads run Final Cut Pro
The App Store listing for version 3.4 asks for iPadOS 26.6 or later and a device with an M-series or A16 or later chip. That covers every iPad Pro and iPad Air with an M-series chip, the iPad (A16) and the iPad mini (A17 Pro or A20 Pro). Apple's Final Cut Pro product page still prints iPadOS 18.6 as the minimum in its FAQ, a line that fits older releases; the App Store requirement is the one that applies to the version you download today. An iPad with an older chip, such as the A14 in the 10th-generation iPad or the A15 in the sixth-generation iPad mini, can't run it.
Clearing the minimum gets you the app, not every feature. These are the ones with their own requirements:
| Feature | What it needs |
|---|---|
| Background export, so the export keeps running while you use another app | An iPad with M3 or later and iPadOS 26 |
| Skimming clips by hovering Apple Pencil | M2 or later, or the iPad mini (A17 Pro) |
| HDR workflow | iPad Pro (M5), iPad Pro (M4), or iPad Pro 12.9-inch (5th generation or later) |
| Generate Captions | iPadOS 26 or later, U.S. English only |
| Cinematic mode editing in version 3.4 | iPadOS 27 or later |
| Live Multicam | Up to four devices running a compatible Final Cut Camera version. The current iPhone app requires iOS 26.6 or later, and Live Multicam requires Apple Creator Studio. |
| Projects on an external drive | iPadOS 17.5 or later and a USB-C cable rated for at least 5 Gbit/s |
If you're buying an iPad for editing, I'd get one with an M3 or later, because background export is the requirement you'll feel on every single project. On an older chip, Final Cut has to stay on screen until the file is written, and a long 4K export ties up the whole iPad.
What it costs
Apple Creator Studio is the standard subscription route for Final Cut Pro for iPad. It also covers Final Cut Pro for Mac, Logic Pro, Pixelmator Pro and the Mac-only Motion and Compressor. In the U.S., the standard plan costs $12.99 a month or $129 a year, with a one-month free trial for eligible new subscribers. Verified students enrolled in and educators employed at degree-granting colleges and universities pay $2.99 a month or $29.99 a year. The standard subscription supports Family Sharing, while education plans are for individual use. If you previously held a standalone iPad subscription, Apple lets you renew it after Creator Studio expires: open Settings, tap your name, tap Subscriptions, choose the expired standalone subscription, and tap Renew. The $299.99 one-time Mac purchase doesn't include the iPad app. Which plan to pick, the three-month offer that comes with a new iPad, and when buying beats subscribing are in the price guide, the free trial guide and the purchase versus subscription comparison.
Ending the subscription doesn't trap the edit in the app. Apple's rules for a lapsed subscription still allow exporting projects, media and finished videos; continuing to edit needs an active subscription. Keep the app and its projects in place while exporting what you need. Cancelling billing and deleting the app are different actions, and deleting the app also deletes its internal projects.
iPad vs Mac: what's different now
The editing model is the same Magnetic Timeline. Apple's overview of the iPad app lists connected clips and storylines, keyframes, speed effects, Cinematic mode editing and multicam editing with up to four angles. The differences sit around the timeline: how media is organized, how far color goes, and what you can add from outside.
| Area | iPad | Mac |
|---|---|---|
| Organizing | Projects that hold their own media and one or more timelines; no libraries or events | Libraries with events and projects |
| Color | One Color Adjustments effect, color grading presets, video scopes and built-in camera LUTs | Color Board, Color Wheels, Color Curves, Hue/Saturation Curves and custom LUTs |
| Masks and keying | Masks, Scene Removal Mask, Green Screen Keyer | The same, plus Magnetic Mask |
| Effects and plug-ins | Built-in video effects and dozens of audio plug-ins; the guide covers no third-party video effects | Built-in effects plus third-party plug-ins and Motion templates |
| Other Creator Studio apps | Logic Pro and Pixelmator Pro | Also Motion and Compressor |
| External display | The viewer only, full screen | Browser, viewers or timeline on a second display |
| Touch and capture | Apple Pencil, jog wheel, pro camera mode, Live Drawing, Live Multicam recording | None of these |
Color is the gap most people hit first. Apple's iPad color page describes one Color Adjustments effect with Enhance Light and Color, Exposure, Contrast, Brightness, Highlights, Black Point, Shadows, Saturation, and Warmth and Tint for highlights, midtones and shadows, plus a Mix slider and masks to limit it. That's enough to fix exposure and white balance; it's not the shot-matching and look-building covered in the color grading guide. Apple's own product page tells you to export to the Mac "to access features like advanced color grading, Magnetic Mask, and more," and the Magnetic Mask guide and the plugins guide cover the Mac side of those rows.
“One Color Adjustments effect” means one kind of control panel, not a limit of one correction on a clip. Apple allows additional color adjustments on the same clip, each with its own settings. A second instance and a mask can separate a local fix from an overall correction. That doesn't add the Mac's wheels or curves.
For a larger preview, connect a display, open the project and turn on External Monitor Playback below the viewer. The display shows the viewer full screen. It won't move the timeline or browser onto that screen, so a monitor doesn't turn the iPad layout into the Mac's two-screen workspace.
Filipe Esposito at Macworld, writing in April 2026 after the Creator Studio updates, still called the iPad app "a secondary, companion experience" compared to the Mac app, and pointed at duplicated media, an external display that only shows a preview, and keyboard shortcuts that "are inconsistent on the iPad." I'd agree for long projects and anything that needs a real grade, and disagree for short edits, where shooting and cutting on one device is the whole point and none of the missing rows come up.
Move a project to the Mac (one way only)
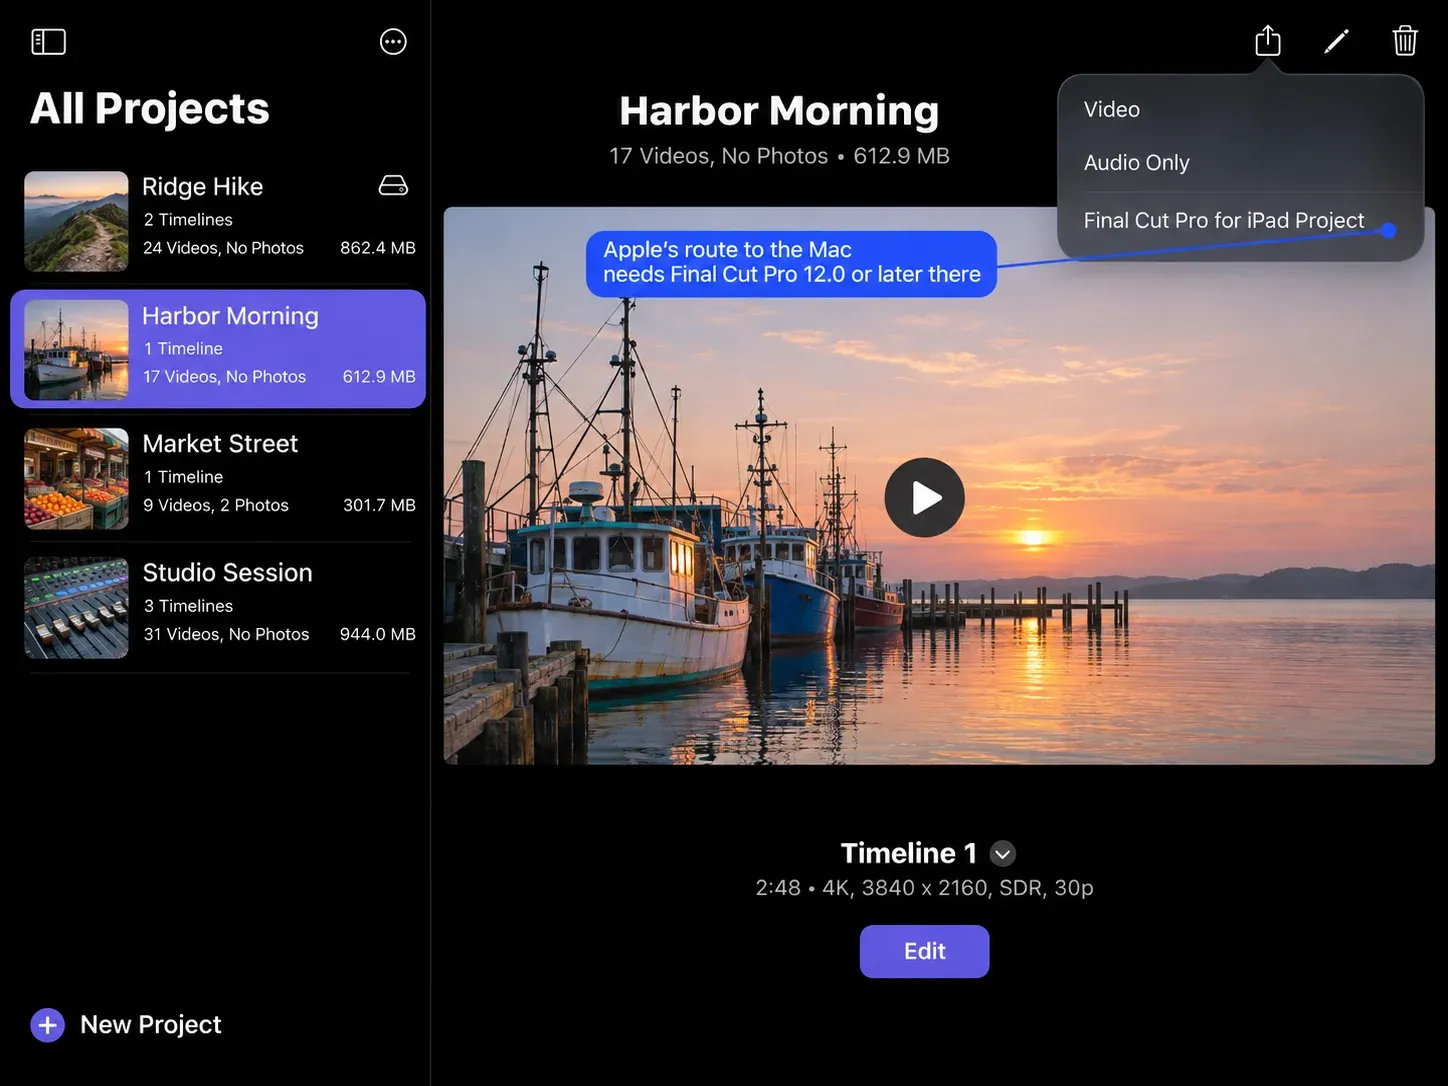
Apple's native project handoff goes one way, from iPad to Mac; a separate converter handles the return trip. The Mac guide's iPad import page gives these steps, and the App Store listing notes that sending to the Mac requires Final Cut Pro 12.0 or later there:
- On the iPad's Projects screen, select the project, tap Share, then tap Final Cut Pro for iPad Project. With the project open, tap the down arrow beside the project name at the top left, tap Share, then tap Final Cut Pro for iPad Project.
- For an internal project, leave Include All Media on; turn it off only for an offline export. External projects always include their media, so this switch isn't shown.
- Tap Export, then choose AirDrop or Save to Files, which includes iCloud Drive.
- On the Mac, double-click the transferred file, or choose File > Import > Final Cut Pro for iPad Project. AirDrop puts it in Downloads.
- Name the new library in the Save as Library window and click Save.
The project is copied into a separate Final Cut Pro library, with its media when Include All Media was on for an internal project, or automatically for an external project. Soundtracks are the catch: they arrive as "a simple AAC audio file that no longer dynamically adjusts" to the edit, so I'd finish the music edit on the iPad before sending. A soundtrack that can't adapt any more turns every later trim on the Mac into a manual music edit.
Before deleting an iPad project after the handoff, open the new Mac library and play representative clips from every intended timeline. Check titles, the start and end of the edit, audio and any soundtrack changes. Keep the original media and an independent project backup until that check is complete. A transferred file existing in Downloads isn't proof that the finishing library has everything it needs.
Going back from Mac to iPad has no Apple route. The paid Transfer Toolbox from LateNite Films ($9.99 on the U.S. App Store) converts a Mac library into an iPad project. Version 2.0.0 lists support for Final Cut Pro 12.3 and 12.4 on Mac and 3.4 on iPad. Follow its recommended single-event naming pattern, Default MM-DD-YY, such as Default 05-31-23, and start project timecode at 00:00:00:00. The converter can let you proceed after a naming warning. Keep all Motion content and media inside the library, and install any custom fonts on the iPad by hand. In a library copy, turn off Stabilization and Rolling Shutter before converting; enabled effects can cause Import Failed. FxPlug4 effects won't work on iPad, and some Motion templates display incorrectly, so check the converted project's media, titles and effects before continuing. I'd start any project that might touch both devices on the iPad, because that direction is Apple's own and the reverse depends on a library built to someone else's rules.
The converter's documented transfer limits also say it uses original media rather than proxies, doesn't let you modify imported compound clips on iPad, and exposes only the first four angles of a larger multicam clip. Before moving a job back, try a library copy containing the actual formats, compound structure and angles you need. Check that those edits remain possible, as well as whether the project opens. A successful conversion alone doesn't prove the return edit is workable.
Plan storage before the first import
Plan enough room for the media your project will import. Apple's project guide distinguishes internal projects from self-contained external projects. Import copies media into the project: an internal project uses iPad storage, while a project on an external SSD keeps its media on that drive. Budget for the copied clips and render files, and keep the originals backed up separately.
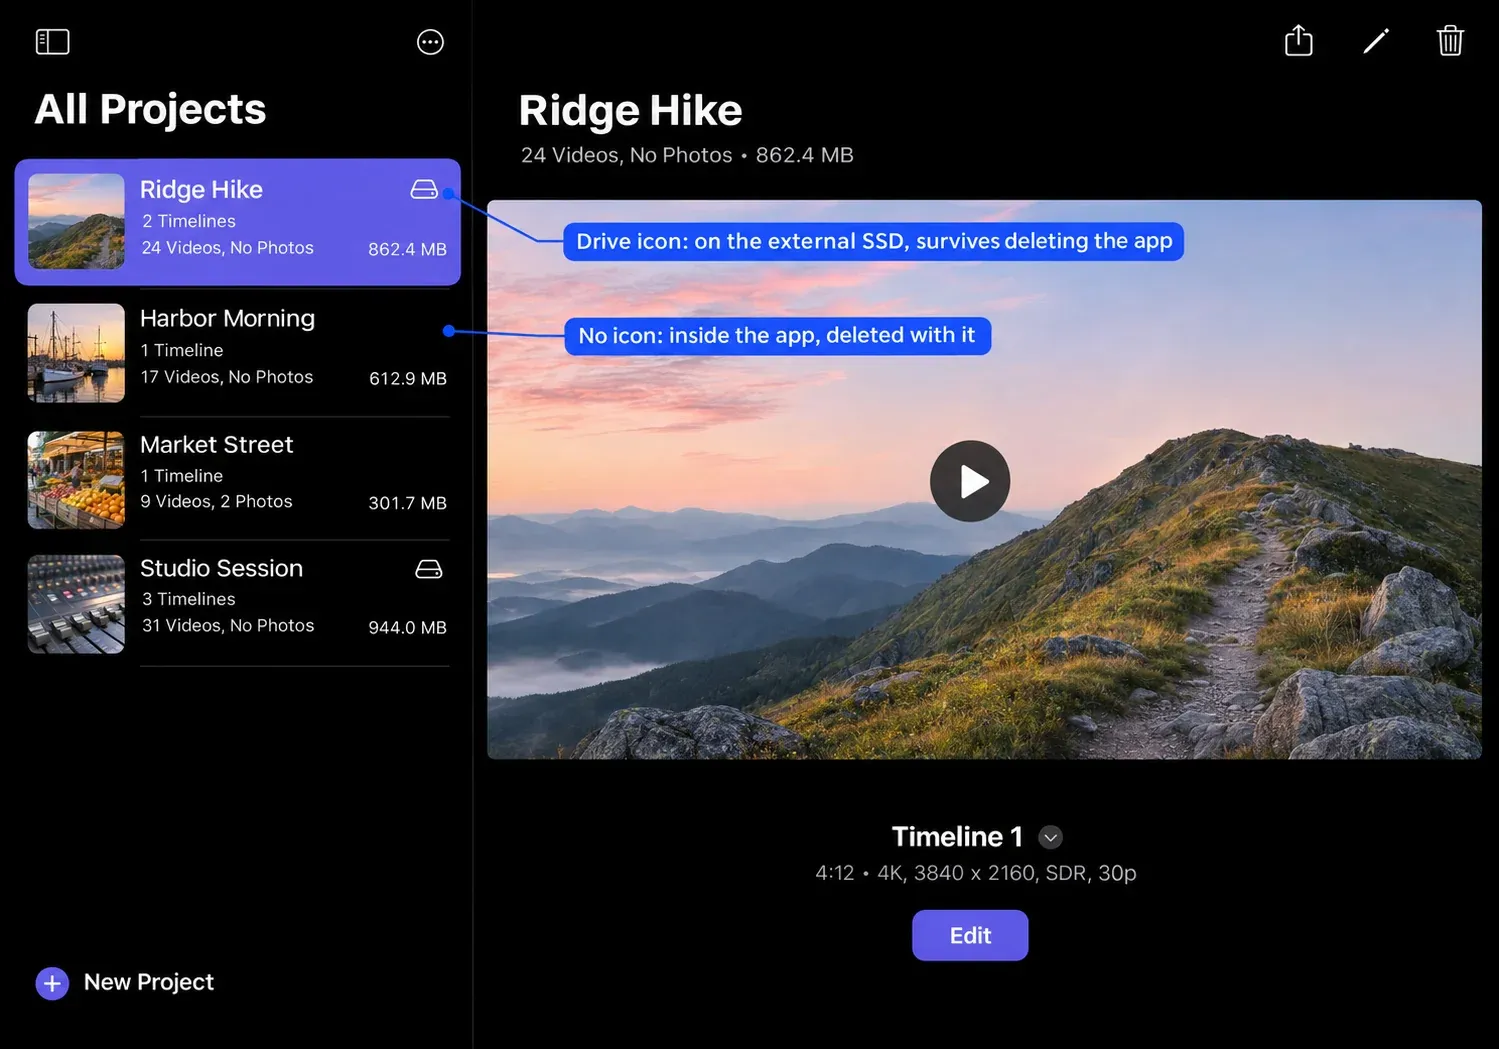
Where the project lives matters just as much. Apple's intro to projects splits them into two kinds:
- Internal projects live inside the app. The backup page warns that if you delete Final Cut Pro, "any internally stored projects (and their media and timelines) are also deleted."
- External projects live in On My iPad in the Files app or on an external SSD. Both are self-contained, with all media and timelines, and they survive deleting the app. You can't rename or duplicate them inside Final Cut, and a drive with projects on it can move to another iPad, or to a Mac for import.
For a drive you need iPadOS 17.5 or later, a USB-C cable rated USB 3.2 Gen 1x1 or better (at least 5 Gbit/s), and an SSD formatted as exFAT or APFS. Apple recommends APFS if the drive will also go to Final Cut Pro for Mac, while recording to the drive with Final Cut Camera needs exFAT, so pick the format by where the footage starts. A project sitting on network or cloud storage can't be opened in place; Apple's projects page says to move it to a supported location or import it first.
The storage results come from iPads with different chips and capacities. In SlatePad's M5 iPad Pro review, the Jazz Disk Bench Lite run put a 128GB M3 iPad Air at 1,484 MB/s read and 793 MB/s write, against 5,172 and 3,710 MB/s for a 512GB M5 iPad Pro, with a 512GB M1 iPad Pro and a 1TB M4 iPad Pro in between. That's SlatePad's single run, but the pattern is worth knowing: in it, the base-storage model was both the smallest and the slowest to write to.
Two habits keep the iPad from filling up. Jerad Hill's highlight-reel workflow copies footage from the SD card to an external drive in the Files app first and imports from Files, rather than importing straight from the card. And when space runs low, render files can go: touch and hold a project in the list and tap Clear Render Cache, or clear every project in More > Settings > App Settings. Apple's temporary files page says this "doesn't affect your project media files" and the renders are re-created the next time you work on the project. Keep a project backup on storage independent of the working project. A second file on the same working SSD won’t protect you if that drive fails.
Use Export Project to save the editable project. To move an existing internal project onto an SSD, select it on the Projects screen, tap Share, then Final Cut Pro for iPad Project. Leave Include All Media on, tap Export, choose Save to Files, select a folder on the SSD and tap Save. Exporting from the Projects screen also removes unnecessary cache files from the exported copy. Turning off Include All Media would make an offline project, not a smaller self-contained backup.
After the export finishes, use New Project > Browse Projects to add the SSD copy, then open it and check the intended timelines, picture and sound. Confirm which copy is open by touching and holding it in the project list to see its location. Do not delete the internal project until the SSD copy is verified and an independent backup is secure. External projects already include their media when exported, so they don't offer the Include All Media switch.
I'd create every real project on an external SSD from the start, because it survives deleting the app, it doesn't eat the iPad's storage, and the drive carries it to another iPad or a Mac.
Start your first project
Projects are the top level on the iPad: each one holds its media and one or more timelines. The timelines page covers adding more, for a trailer cut from the same media or an alternate edit.
- Below the project list, tap New Project, then tap New Project again. Type a name and tap Done.
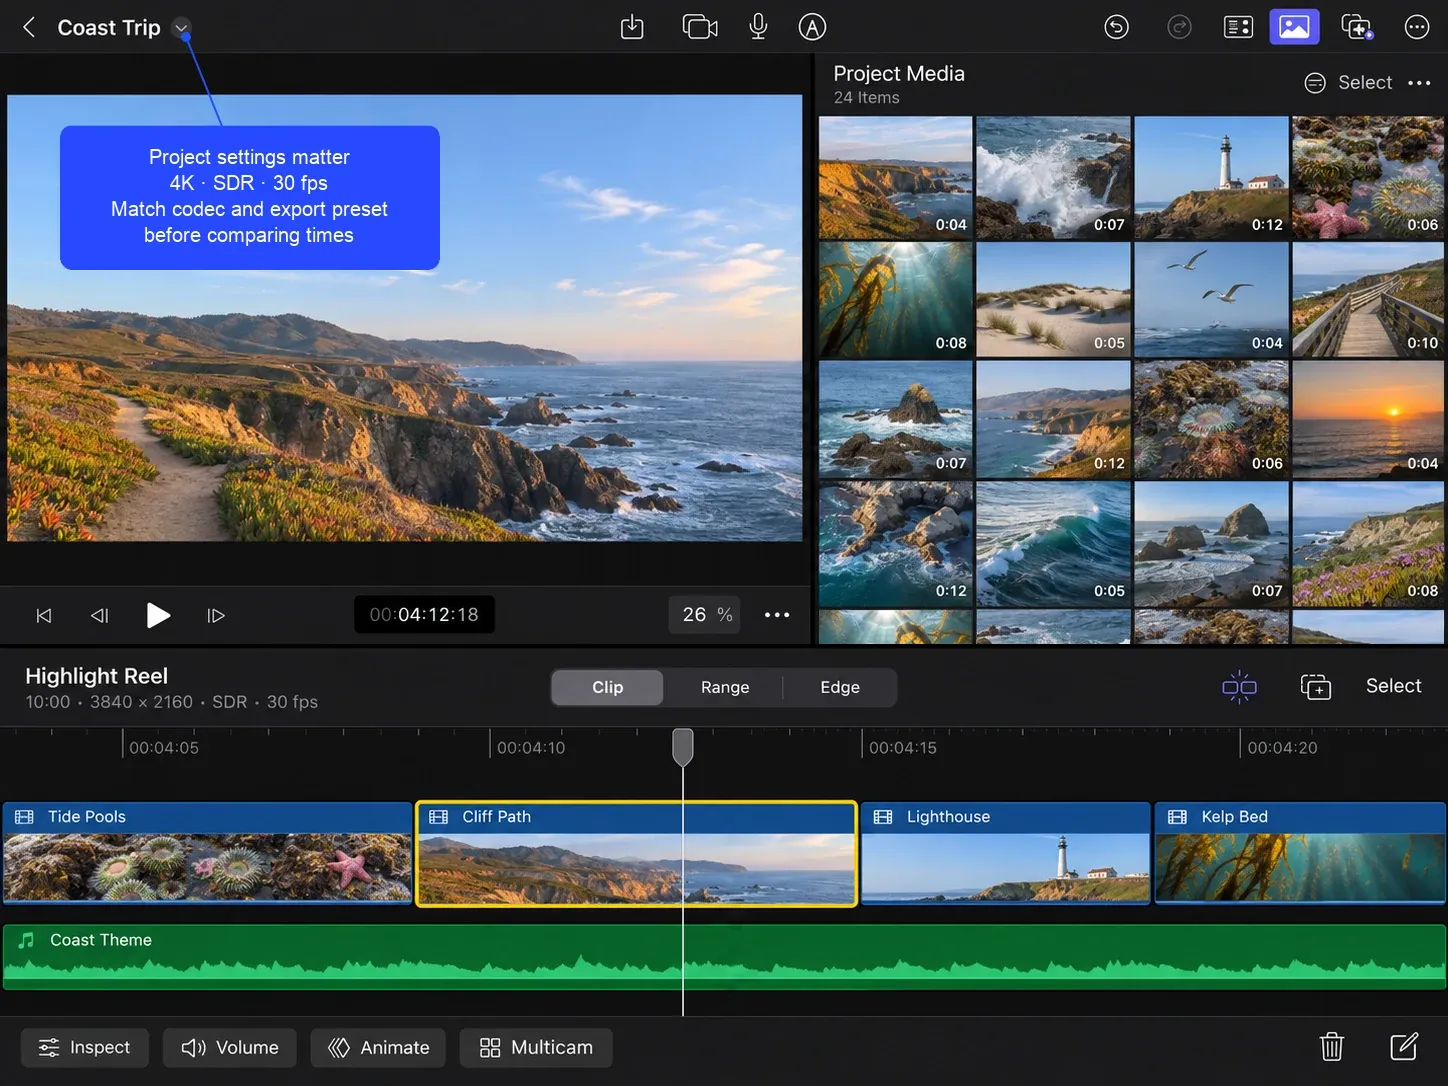
- Leave Format on Automatic to match the first clip you add, or choose Custom to set resolution (4K, 1080 HD, 720 HD, or a custom size up to 4096 pixels), orientation (Landscape or Portrait), color space (HDR, which is HLG, or SDR, which is Rec. 709) and frame rate. The frame rate can't change after the timeline exists, so set it to match your footage now.
- Pick the location. Leaving Location set to Final Cut Pro for iPad stores it internally; tap the arrows next to Location to choose On My iPad or a connected drive, then tap Open.
- Turn on Transcribe Audio if you'll want to search English dialogue, then tap Continue.
- Choose how to start: Record with Camera, Record with Live Multicam, Import from Photos, Import from Files, or Blank Project.
For an SDR delivery, I'd start with SDR (Rec. 709), because that keeps the timeline aligned with the intended viewing copy. Apple says to choose HDR (HLG) only on a device with an HDR display; without one, timeline clips won't look accurate. Before making a vertical or square version, duplicate the timeline and change that copy's resolution or orientation. The timelines share project media, so this preserves an alternate edit without duplicating the whole project. It isn't an independent backup.
After that it's familiar editing. Select a clip and tap Inspect to see its settings and effects, use the jog wheel for precise moves of the playhead and edits, and pair a Magic Keyboard for shortcuts like I and O for in and out points. For music-driven reels, Jerad Hill turns on beat detection so cuts can line up with the song.
Start with a few representative files before importing the whole card. Apple's supported video formats include ProRes, ProRes RAW, H.264, HEVC and ProRes in MXF. Check picture and sound with your actual camera files; a .mov extension doesn't identify the codec. Build the main shot in the primary storyline, trim its start and end, then connect a cutaway or title above it. Connecting a clip and inserting one do different jobs: a connected cutaway stays attached to its main-storyline point, while an insert moves later clips forward.
For spoken captions, select the timeline clips containing speech, touch and hold the selection, then tap Generate Captions. It creates connected Subtitle title clips. Read the names and numbers, check their timing, then use Inspect to adjust the selected captions. For a 9:16 version, Vertical Social Media Safe helps position them within the visible area. These are title clips; don't assume an exported movie also supplies a selectable caption track or a separate .srt file. Agree on that deliverable before choosing the iPad edit.
Before setting up Live Multicam, turn on Wi-Fi, Bluetooth and iCloud Keychain on the devices and sign in to an Apple Account on each. Devices on different Apple Accounts can connect using a pairing code. Wi-Fi needs to be enabled, but the devices don't have to join a Wi-Fi network.
With Live Multicam, previews arrive before the original files. The recording iPad can be one of the four angles; it isn't an extra fifth camera. After recording, keep Final Cut Pro and Final Cut Camera active on their respective devices while the originals transfer, and wait for the progress indicators on the multicam thumbnails to finish. Check each intended angle and its sound before disconnecting devices or clearing camera media. Being able to start editing immediately doesn't mean all originals have arrived.
Export and share
Exports start from the Share button. Apple's export page lists four video presets:
- Default uses the current timeline settings, which suits YouTube or Vimeo.
- High Quality writes Apple ProRes 422 HQ.
- Smaller File Size writes HEVC.
- Social Platforms writes H.264, the one Apple suggests for Instagram, Facebook and TikTok.
Advanced settings set the codec, resolution, file type (MOV or MP4) and color space, and the file can go to Photos, Files (including iCloud Drive), AirDrop, a connected drive or another app. The same Share menu exports audio only as AAC, WAV or AIFF, the current frame as TIFF, PNG or JPEG, or the whole project as an .fcpproj file. Before a long export, Apple suggests a longer Auto-Lock in Settings > Display & Brightness > Auto-Lock so the iPad doesn't go to sleep partway through, which matters most on iPads without background export.
I'd use Smaller File Size when the receiving device or service accepts HEVC. For a broadly compatible viewing copy, Social Platforms uses H.264. Choose High Quality when the next finishing step needs ProRes, and check a short exported file at the intended destination before committing to a long export. ProRes 422 HQ files are far larger, and on an iPad that space comes out of the same storage your projects need. The Mac-side settings, if you'll finish there, are in the export guide.
Before tapping Export, check the duration, resolution and color space displayed below Include, and confirm that audio is included when the delivery needs it. Advanced changes can alter the file type or produce a combination the destination can't play, even if the preset's name looked right. When rendering finishes, save the file to the intended Files folder or sharing destination. Open that completed video and check its first and last frames, speech, captions and color. A correct timeline preview doesn't verify the file you are about to send.
How fast it exports: published test results
Riley Hill's SlatePad review compares four iPads exporting one six-minute 4K project in November 2025. The codec, preset and app version aren't stated. The table keeps the reported times to approximate whole seconds and expresses each duration ratio as minutes of export per 10 minutes of video.
| Run | iPad | Export time | Minutes per 10 minutes of 4K |
|---|---|---|---|
| SlatePad, 6-minute 4K, codec not stated | M1 iPad Pro | 3:55 | 6.5 |
| SlatePad | M3 iPad Air | 3:17 | 5.5 |
| SlatePad | M4 iPad Pro | 2:57 | 4.9 |
| SlatePad | M5 iPad Pro | 2:28 | 4.1 |
SlatePad's M5 finished this six-minute 4K project about 30 seconds ahead of the M4 and about 87 seconds ahead of the M1. All four tested models finished the project faster than playback. I'd use the differences within this run to compare these iPads. The rescaled 10-minute column keeps the same project and settings; it isn't a timing forecast for a different edit.
My verdict: I wouldn't replace an M4 iPad Pro just for the roughly 30-second saving in this six-minute export. I'd put the budget toward enough project storage unless another task needs the newer hardware. M3 or later still matters for background export, because that feature lets another app stay on screen while the file is written.
When the iPad is the right place to edit
- Short videos you shoot and cut on the same day. The pro camera mode, Live Multicam with up to four iPhones or iPads, and Generate Captions keep the whole job on one device.
- Editing away from a desk. A project on an external SSD goes wherever the iPad goes, and back to a Mac when you need it.
- A first serious editor on education pricing. For eligible students and educators, the $2.99 U.S. monthly plan teaches the same timeline you'd later use on a Mac.
- Not the place for long projects that need a real grade, Magnetic Mask, third-party plug-ins or Motion templates, or several projects organized in one library. Those belong on the Mac.
If the choice is really between Final Cut and a free app, iMovie runs on the iPad at no cost, and the Final Cut Pro vs iMovie comparison shows what the subscription adds. The Final Cut Pro vs CapCut comparison covers the other common alternative for short social videos.
What I'd do
I'd check the chip first: M-series, the iPad (A16) or the iPad mini (A17 Pro or A20 Pro) runs it, and M3 or later is worth it for background export. If eligible, I'd start the free month only with a real project ready, create that project on an external SSD formatted for where the footage starts, and keep the music edit final before anything goes to a Mac. For delivery, choose Smaller File Size for a destination that accepts HEVC, or Social Platforms for a compatible H.264 viewing copy. And I'd plan the finish from day one: short edits can live and end on the iPad, while anything that needs a proper grade, Magnetic Mask or plug-ins should start on the iPad and go to the Mac, because that's the only direction Apple supports.