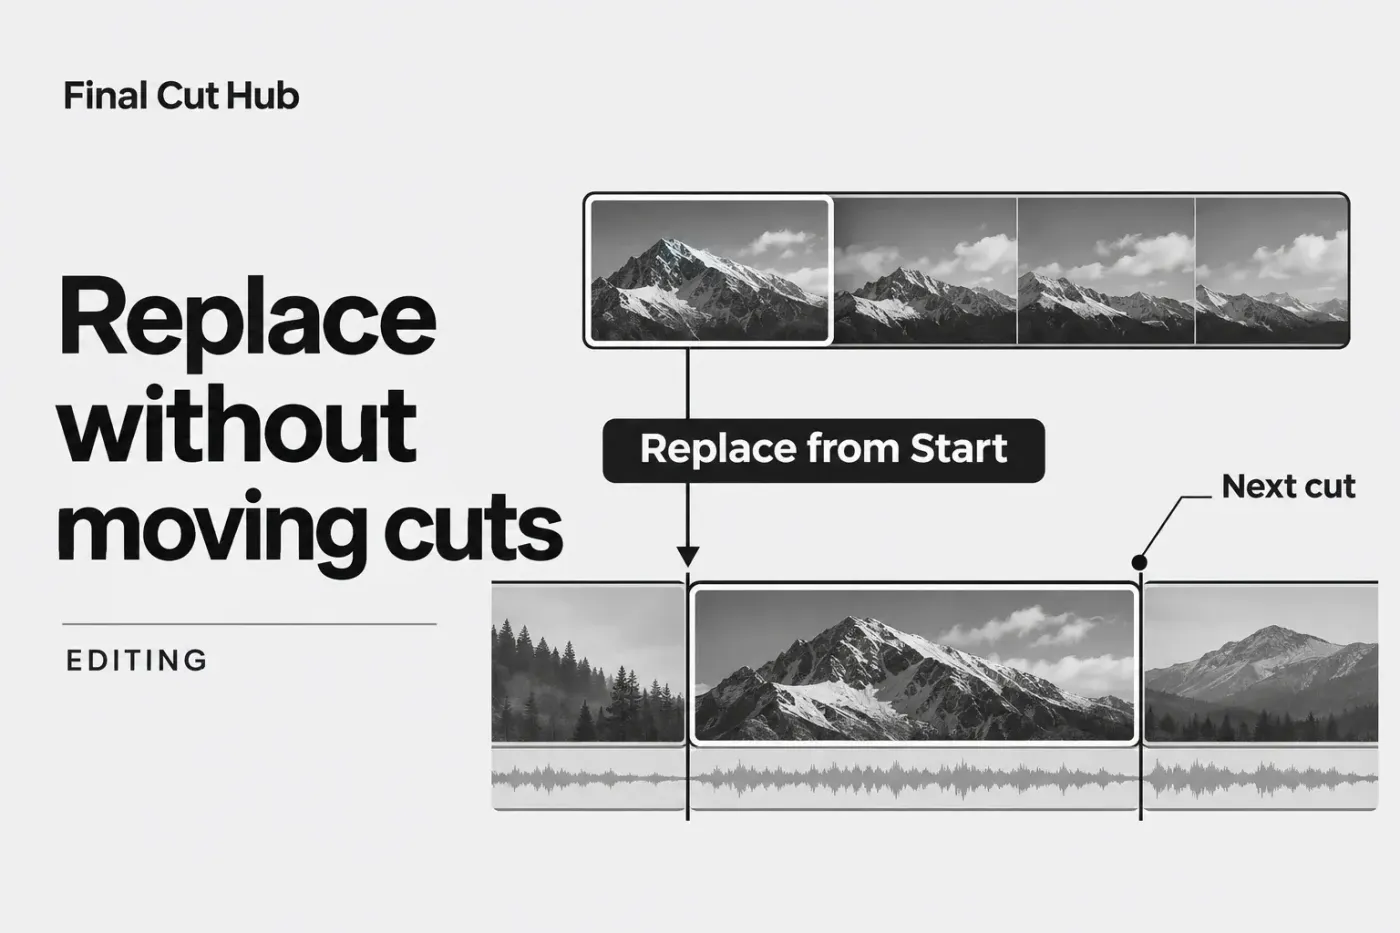
If you need a new shot without changing the duration of the timeline clip it replaces, choose Replace from Start, Replace from End, or Replace with Retime to Fit, depending on which part of the source you need. Start and End need enough usable media; Retime to Fit changes playback speed. Ordinary Replace uses the selected source duration; when that differs from the target's duration, later clips ripple. Apple's Final Cut Pro for Mac 12.4 Replace guide documents these distinctions.
Select the replacement and the whole target clip
For an important sequence, select its project in the browser and choose Edit > Duplicate (Command-D). If later changes will also affect shared compound or multicam contents, use Edit > Snapshot Project (Shift-Command-D) to give the protected copy separate parent clips. Keep the source media backed up separately. Note the target clip's duration and the timecode of the cut after it before replacing anything.
If the old shot has effects or framing worth keeping, select that timeline clip and press Command-C before the replacement. That puts the old settings on the clipboard for the Paste Attributes step below. Copying first lets you restore the old shot's crop or effects after replacing it.
To choose the replacement's exact moment, skim the source in the browser and press I where the wanted action starts, then O where it ends. These range points tell Start or End which source boundary to use; they don't force the timeline target to use that same length. Review the source range before dragging, especially when you want to preserve an ending gesture rather than the opening frame.
Choose a clip or marked range in the browser, or select a media file in Finder. Drag it over the timeline clip you want to replace. When the target shows a white outline, release over it to see the replacement shortcut menu. Replace acts on whole timeline clips, unlike an overwrite edit that can cover a selected span of time. If only a few seconds inside a long clip need to change, make sure Replace is really the tool you want.
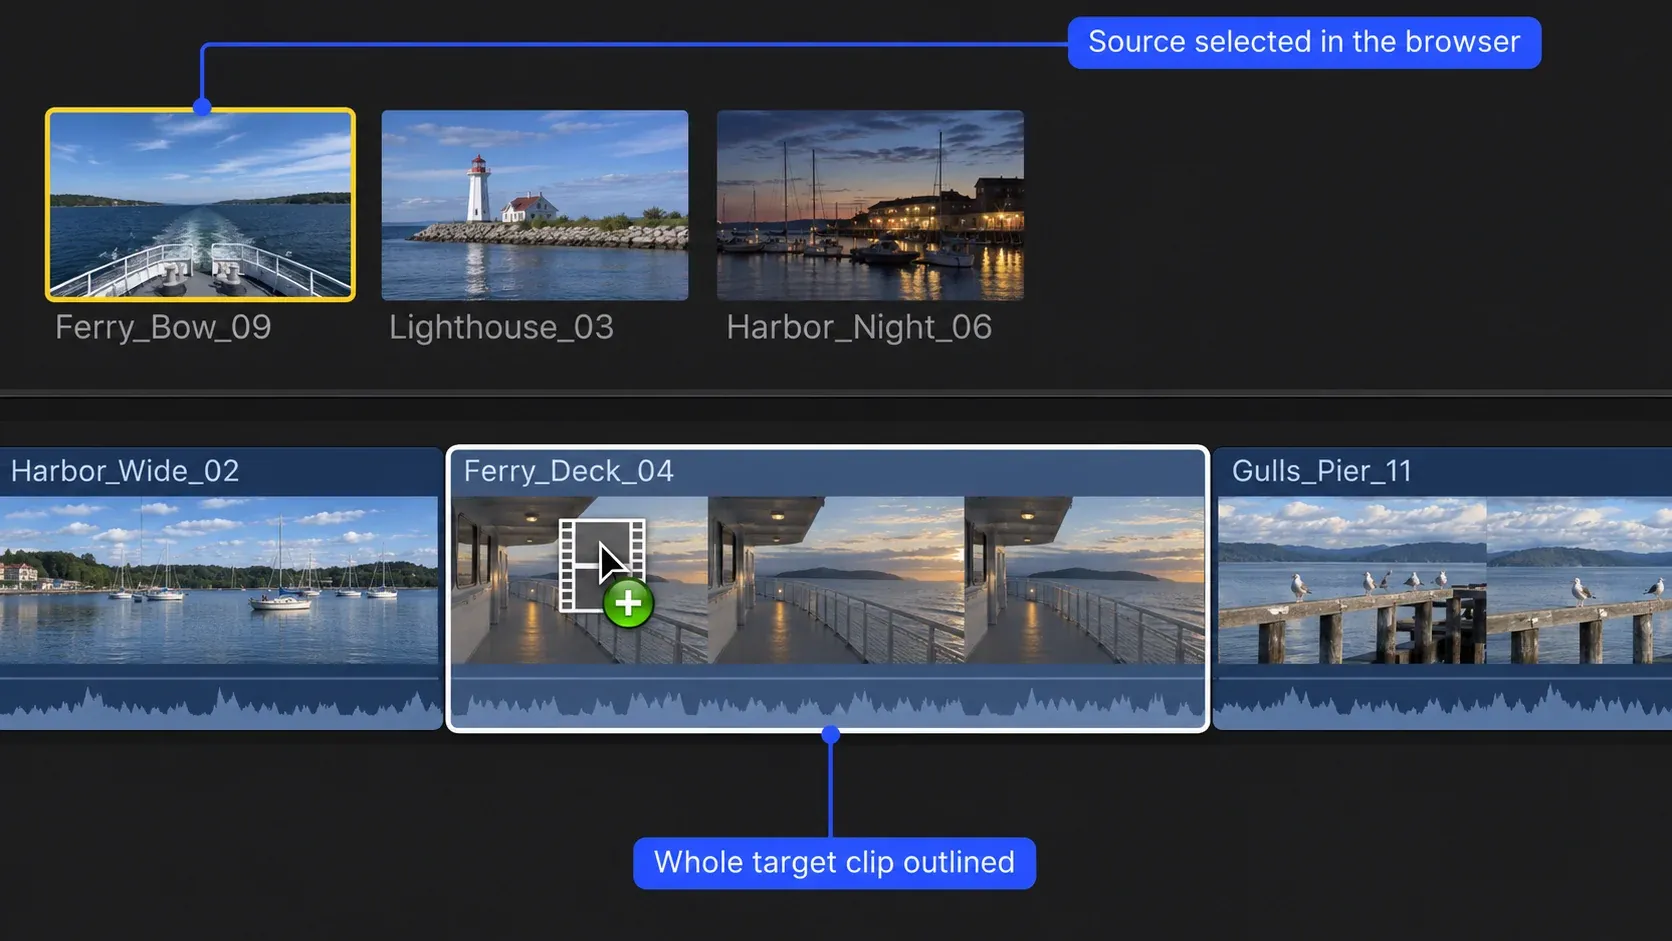
For the keyboard route, select the browser source first, then click the whole target clip once in the timeline. Press Option-R for Replace from Start. Shift-R performs ordinary Replace and can ripple the edit, so I'd use Option-R for a locked cut when the replacement has enough media. A yellow range with adjustable end handles is the wrong target selection. Pressing X creates a range even when its edges match the whole clip; it isn't a substitute for selecting that clip for a replace command.
When only an interior passage needs changing, Edit > Overwrite (D) is the neighboring tool: it writes source media over a span and can cross existing cut boundaries. It ignores a whole-clip selection, using a range start or the playhead/skimmer position instead. Don't press D expecting a selected shot's boundaries to limit the result; confirm the start position and source duration first.
Choose what should happen to duration
| Command | Timeline duration | Source choice |
|---|---|---|
| Replace | Source selection’s duration; later clips ripple if it differs from the target. | Selected clip or range. |
| Replace from Start | Target clip’s duration. | Starts at the source selection’s beginning; needs enough usable media. |
| Replace from End | Target clip’s duration. | Ends at the source selection’s end; needs enough usable media. |
| Replace with Retime to Fit | Target clip’s duration. | Entire selected source; playback speed adjusted to fit. |
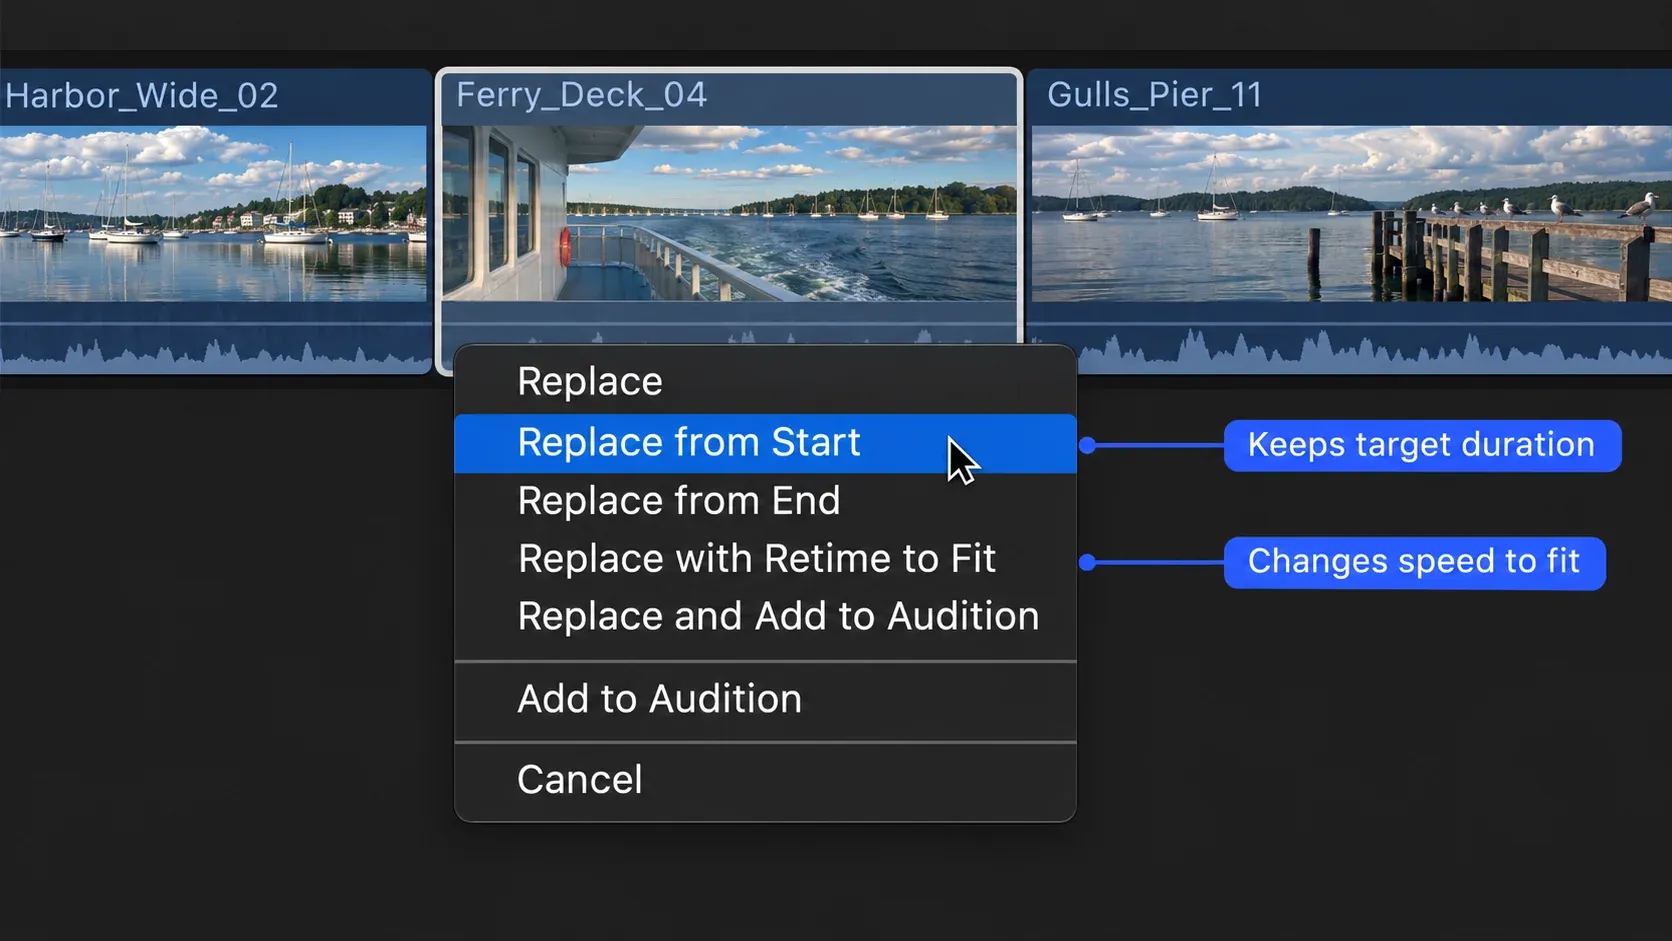
Replace uses the duration of the source selection. If source and target lengths differ, subsequent timeline clips ripple. I'd use it when the new shot's entire selected length is the priority and a timing change is acceptable. Afterward, inspect the cut following it and any connected titles, audio, or effects that depend on the surrounding passage. The magnetic timeline guide covers why a change in clip length can affect adjacent timing.
Replace from Start fills the target's duration starting at the beginning of the source selection. Replace from End fills that same target duration ending at the end of the source selection. Both keep the target's timeline length but can show different source frames. When the selected source range and target are the same duration, both may show the same frame range. Check the first and last visible frames before you pick one. With a selected source range shorter than the target, Final Cut Pro can extend the source selection when enough extra media exists. For a replacement at its original speed, choose source media that covers the target duration. If the entire usable source is too short for that original-speed replacement, I'd reach for a longer source first, or deliberately use Replace with Retime to Fit and inspect the motion and any source audio.
For example, suppose a normal-speed, six-second source selection has to fill a four-second timeline shot. Replace from Start uses the selection's first four seconds; Replace from End uses its last four. Those are different moments at the same timeline length. I'd choose End when the final gesture or landing matters, because anchoring the opening could cut that moment off. This example assumes ordinary forward playback and matching source/project timing.
If the required source span doesn't exist, stop before accepting the edit. A short marked range may have extra footage outside its marks; an exhausted source file has no such reserve. Choose a longer take when natural speed matters, or use Retime to Fit only when changed motion is acceptable. Don't assume Start or End will invent missing action or pad a short recording to the target length.
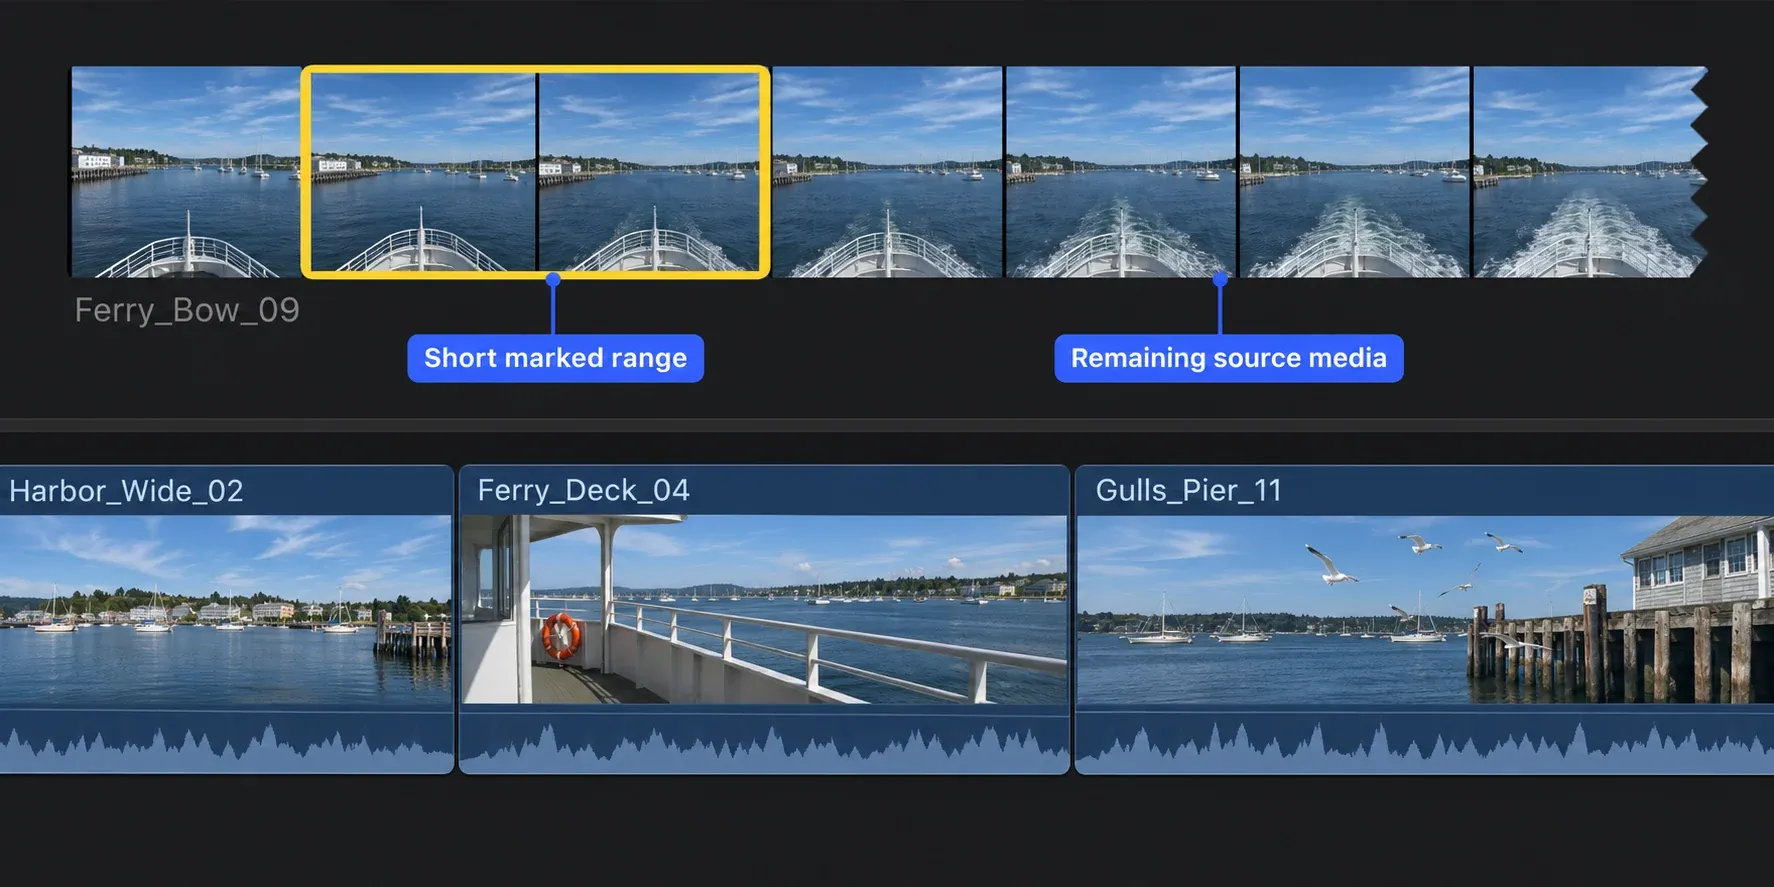
Replace with Retime to Fit uses the entire selected source while changing its speed to fit the target duration. It solves the timing constraint by altering playback speed; excess frames aren't silently discarded. That may be appropriate for a speed-based effect, but check motion and any source audio before accepting it. The guide also lists audition options. They're useful for comparing alternatives, but that's a separate decision from preserving a cut's time.
Fitting a normal-speed two-second selection into a four-second shot, for example, requires half-speed playback under the same timing conditions. Check moving edges and the ending action when you play the result. I'd avoid that choice for dialogue unless slower delivery is intentional. Final Cut normally preserves pitch when retiming, but that doesn't preserve the timing of speech. The clip speed guide covers motion quality and audio controls when a retimed replacement is the right choice.
Verify the actual edit
To restore the old shot's look, select the replacement and choose Edit > Paste Attributes (Shift-Command-V). Select the individual effects and settings you need, then click Paste. I'd copy the framing or correction deliberately rather than apply every old setting, because another take may need a different crop or exposure. Keep the old clip on the clipboard until this step is finished.
For animated settings, inspect Keyframe Timing in the same window. Maintain leaves the spacing between keyframes unchanged; Stretch to Fit adjusts their timing to the destination clip's duration. Recheck where the movement starts and ends on the new shot. Copying a scale value or animation doesn't ensure the subject stays framed, and complex speed ramps deserve their own review rather than an assumption that all timing transferred.
Play from before the replacement through the next cut. Compare the target's timeline length with its pre-edit length, and inspect the chosen source moment, audio, attached elements, and any applied effects. Check the next cut's timecode as well as the total project duration: an unchanged total alone doesn't show whether the intended action survived inside the shot. If the replacement is wrong, return to the protected version rather than compensating with another trim that changes the locked edit.
For a delivery check, clear an old range with Option-X, then mark a short interval with I and O that starts before the replacement and ends after the following cut. Sharing part of a project requires a range selection; selecting just the clip isn't sufficient. With the required media online, choose Optimized/Original in the View menu above the viewer so sharing uses optimized media where available, otherwise the original.
Choose File > Share > Export File, open Settings, and choose the required format. Check the displayed duration, frame size and frame rate, then click Next, choose a location and click Save. Once sharing finishes, open that file and watch the replacement and next cut with sound. Confirm the chosen action, framing, effect timing and audio before exporting the full project with the temporary range cleared.