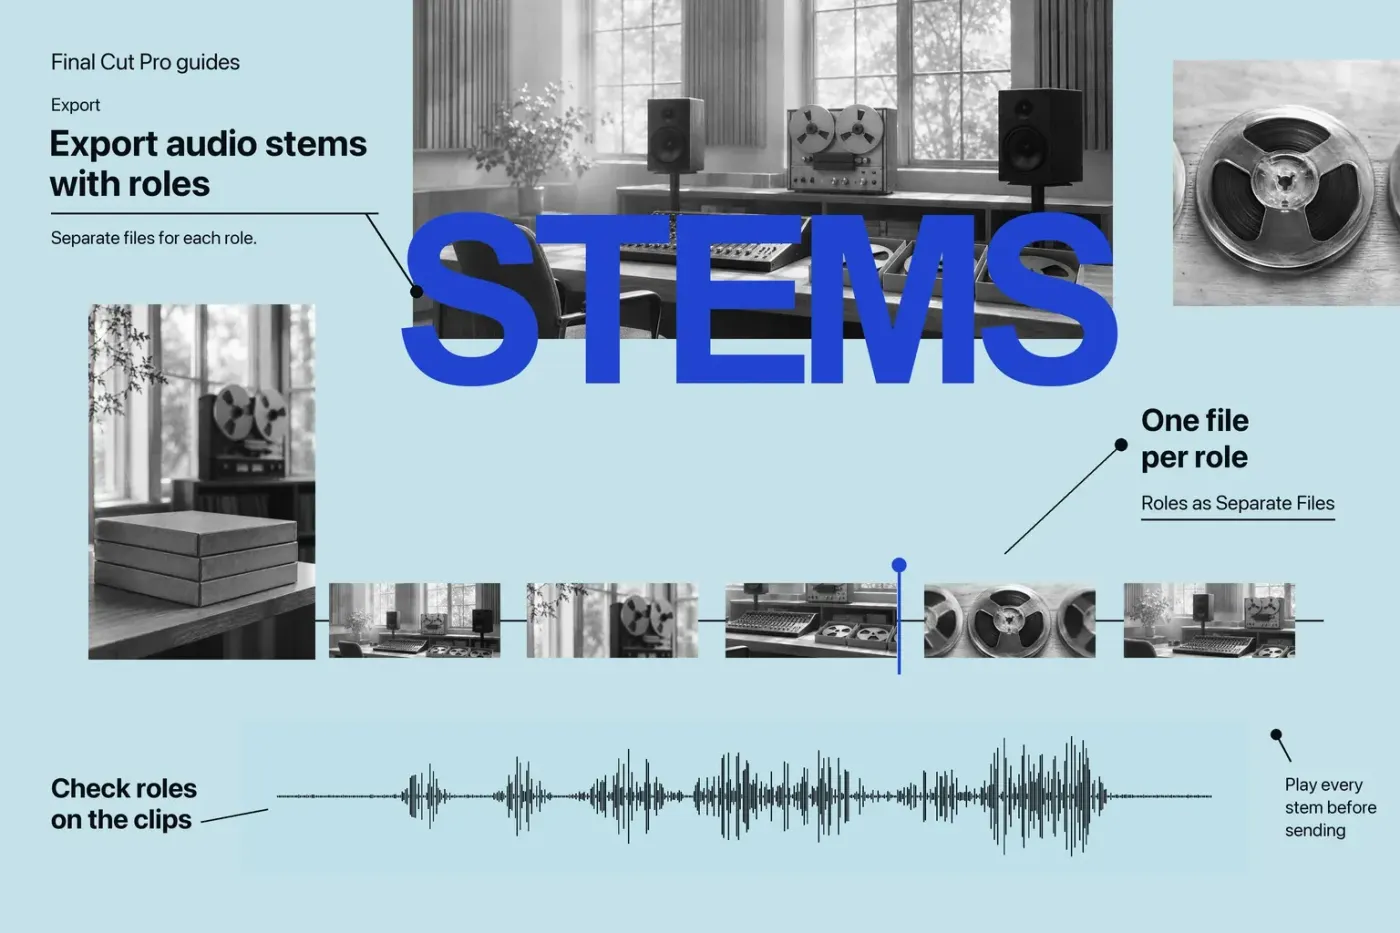
To deliver separate dialogue, music, and effects files from Final Cut Pro, first check the audio role assigned to each component. Then use File > Share > Export File, select Audio Only in Settings, and choose Audio Only as Separate Files in the Roles pane. Apple calls those role-based outputs media stems. A single audio-only export isn't the same deliverable: it doesn't automatically give the recipient one file per category.
Agree on the handoff before exporting
Ask the recipient whether they want separate audio files, a multitrack QuickTime file, or both. Apple's export dialog offers these as different role-output choices. Also agree on the role names, audio format, channel layout, project range, and whether a reference mix is needed.
For a simple three-file handoff, the intended map might be Dialogue, Music, and Effects. If dialogue and room tone need independent treatment, define that distinction with the mixer before creating more subroles. I'd match the files to decisions the recipient can make rather than export every color-coded lane by default. If the voice recording needs repair, deal with that question separately from the stem layout; our Voice Isolation guide explains what Apple's tool is built to do.
Check roles on the source clips
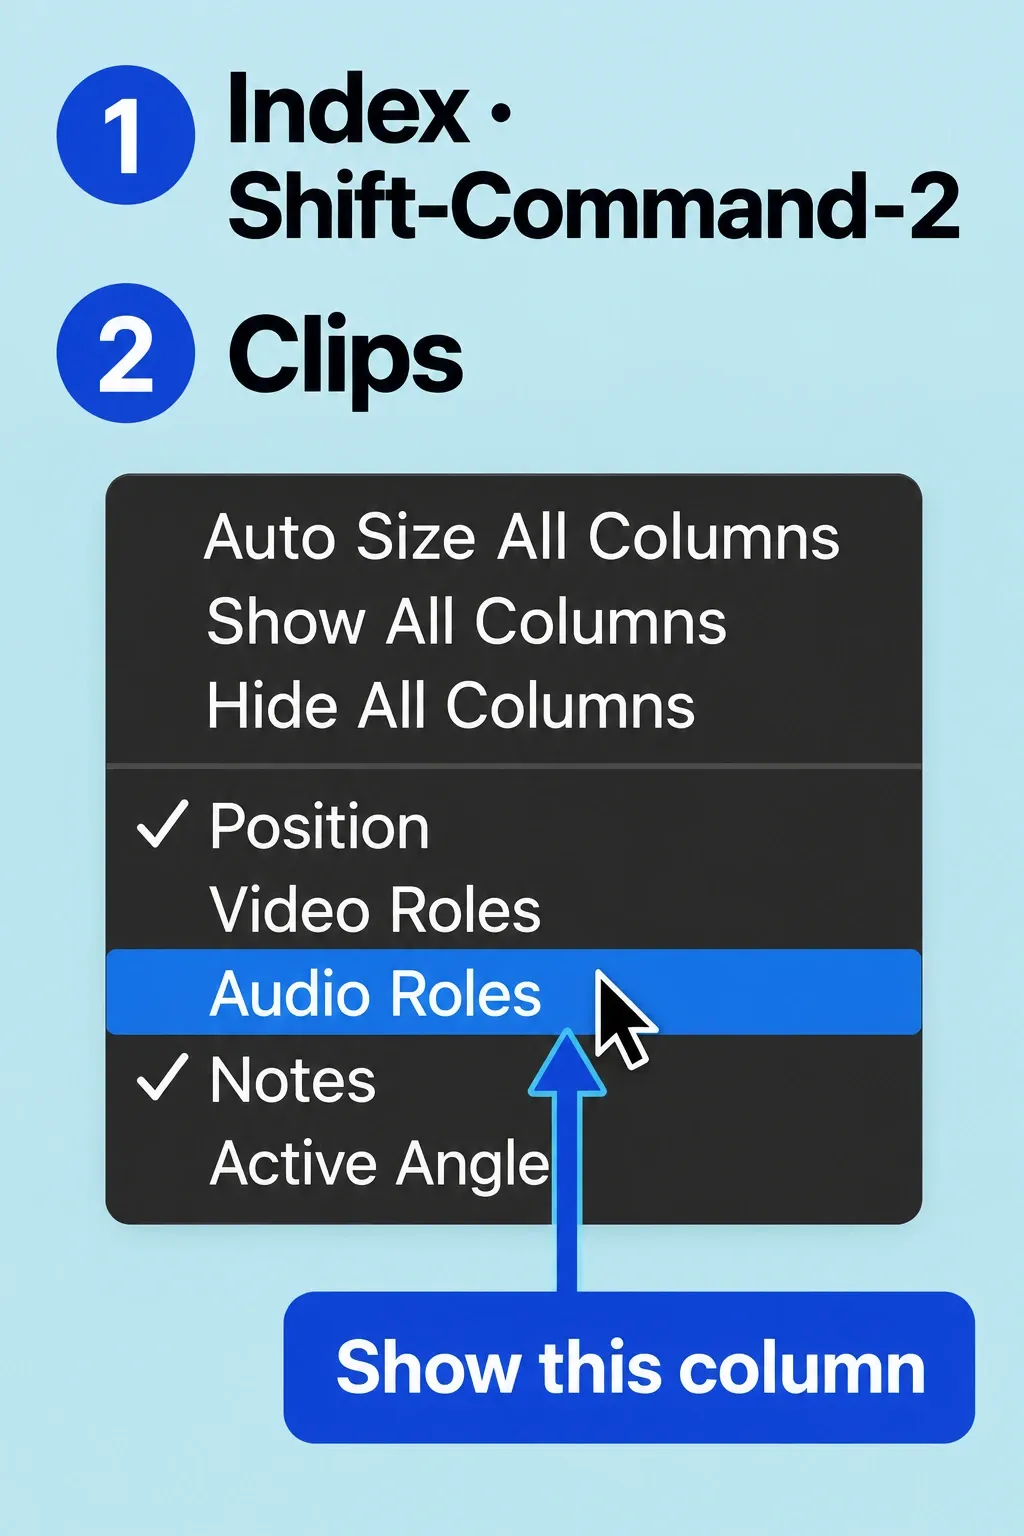
Final Cut Pro assigns roles when media is imported, using available metadata, but an automatic assignment is only a starting point. Review it, because proper role assignment is what makes role-based stem export work as intended. For a project-wide check, click Index at the top-left of the timeline (Shift-Command-2), then click Clips. If the Audio Roles column is hidden, Control-click a column heading and choose Audio Roles. Inspect the audio components across the selected project or range, including speech, music, effects, and audio inside video clips. A misassigned clip can put sound in the wrong file even when the export itself completes.
To change an audio component's role, select its clip in the browser or timeline, open the Audio inspector, and scroll to Audio Configuration. Then use the component's Roles menu there to choose a different subrole. Other assignment methods exist, but I'd use this route because it makes a multichannel clip's individual audio components visible. Recheck clips that carry both camera sound and a separately recorded voice. Choose the existing or custom subrole that matches the agreed handoff; assigning it is separate from choosing the export-file map below. If the camera/reference component isn't part of that handoff, select its clip in the timeline and deselect only the checkbox next to that unwanted component’s waveform in Audio Configuration. Play the project and confirm that the intended separately recorded voice remains audible. Giving reference audio a different role doesn't silence it.
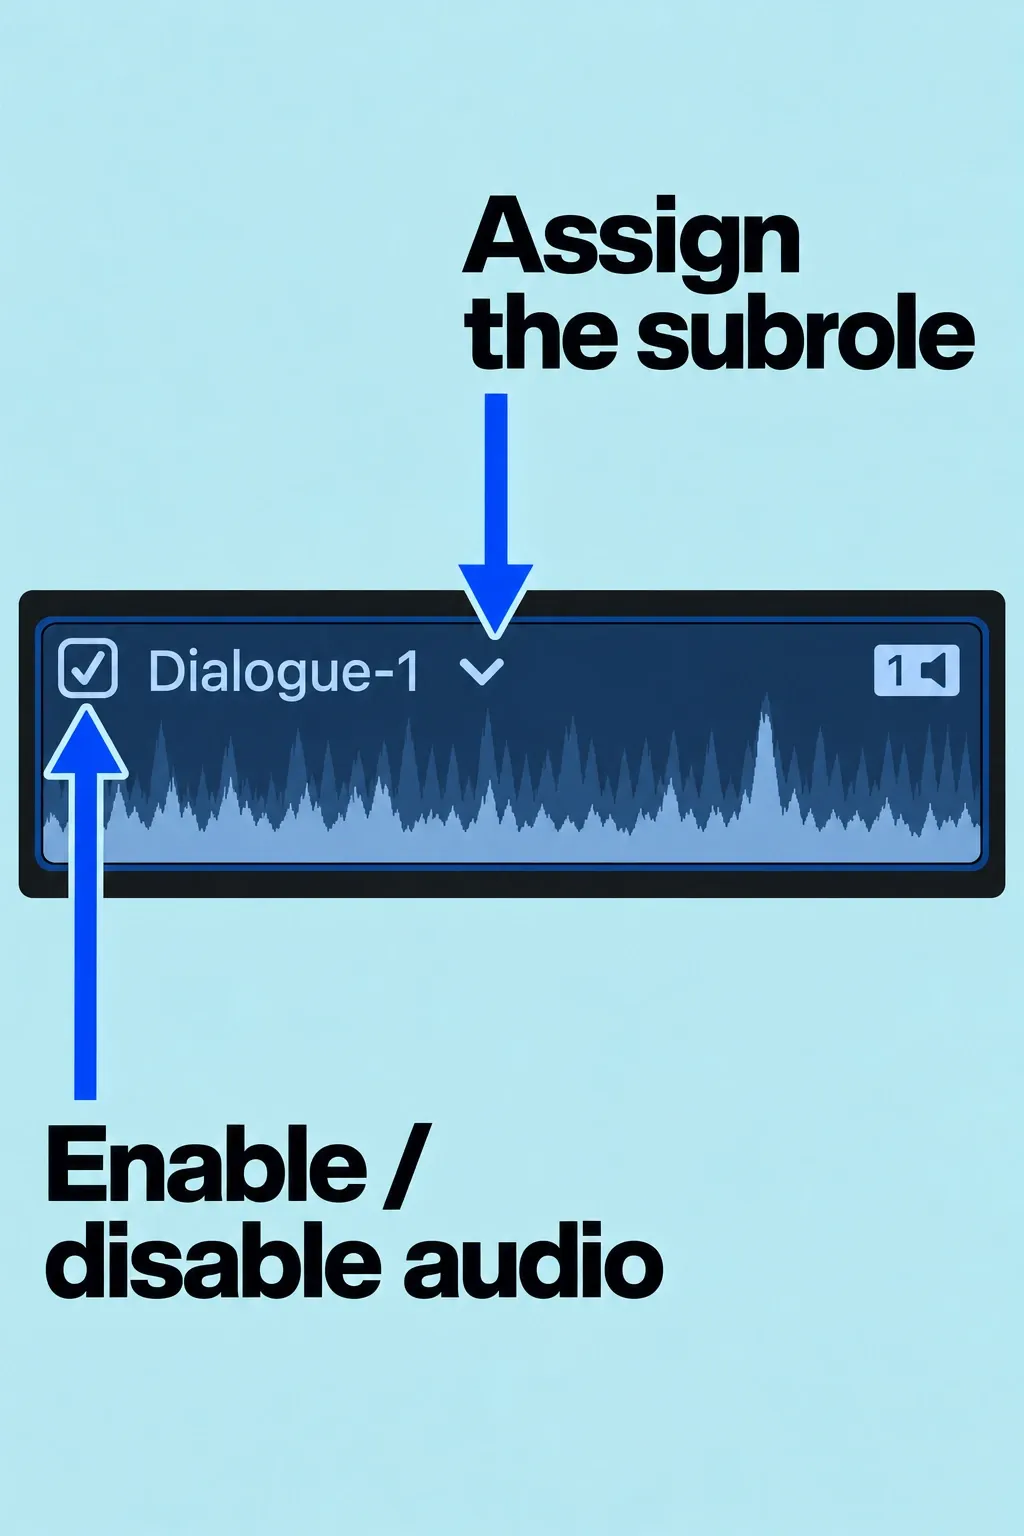
If you have already balanced the dialogue against music, keep that editorial mix decision distinct from file separation. Our guide to ducking music under dialogue covers dipping the music and checking peaks; a role label by itself does not repair an unbalanced mix.
Export the roles as separate audio files
Select the project in the browser, or use a timeline range when you need only a portion of the project; a selected clip is not enough to share just that project portion. For a partial export, set the timeline range start with I and its end with O, then confirm that the selected range covers the intended passage before opening Share. Choose File > Share > Export File. In the Share window, open Settings and choose Audio Only as the format, then inspect the available audio file format; some export choices depend on the source media and the format selected.
Next open Roles. From Roles as, choose Audio Only as Separate Files. This option exports each audio role you specify as a separate file. It differs from Multitrack QuickTime Movie, which keeps specified roles in one movie file, and from Separate Files, which can include video roles too. Inspect the proposed output list: use Add File to include a missing role, Add Role if a file should combine roles, and the remove controls to exclude an unintended one. For each audio file, choose the requested Mono, Stereo, or Surround channel format where offered. Apple warns that the Roles menu options change with your Settings choices; return to Settings if the expected option is absent.
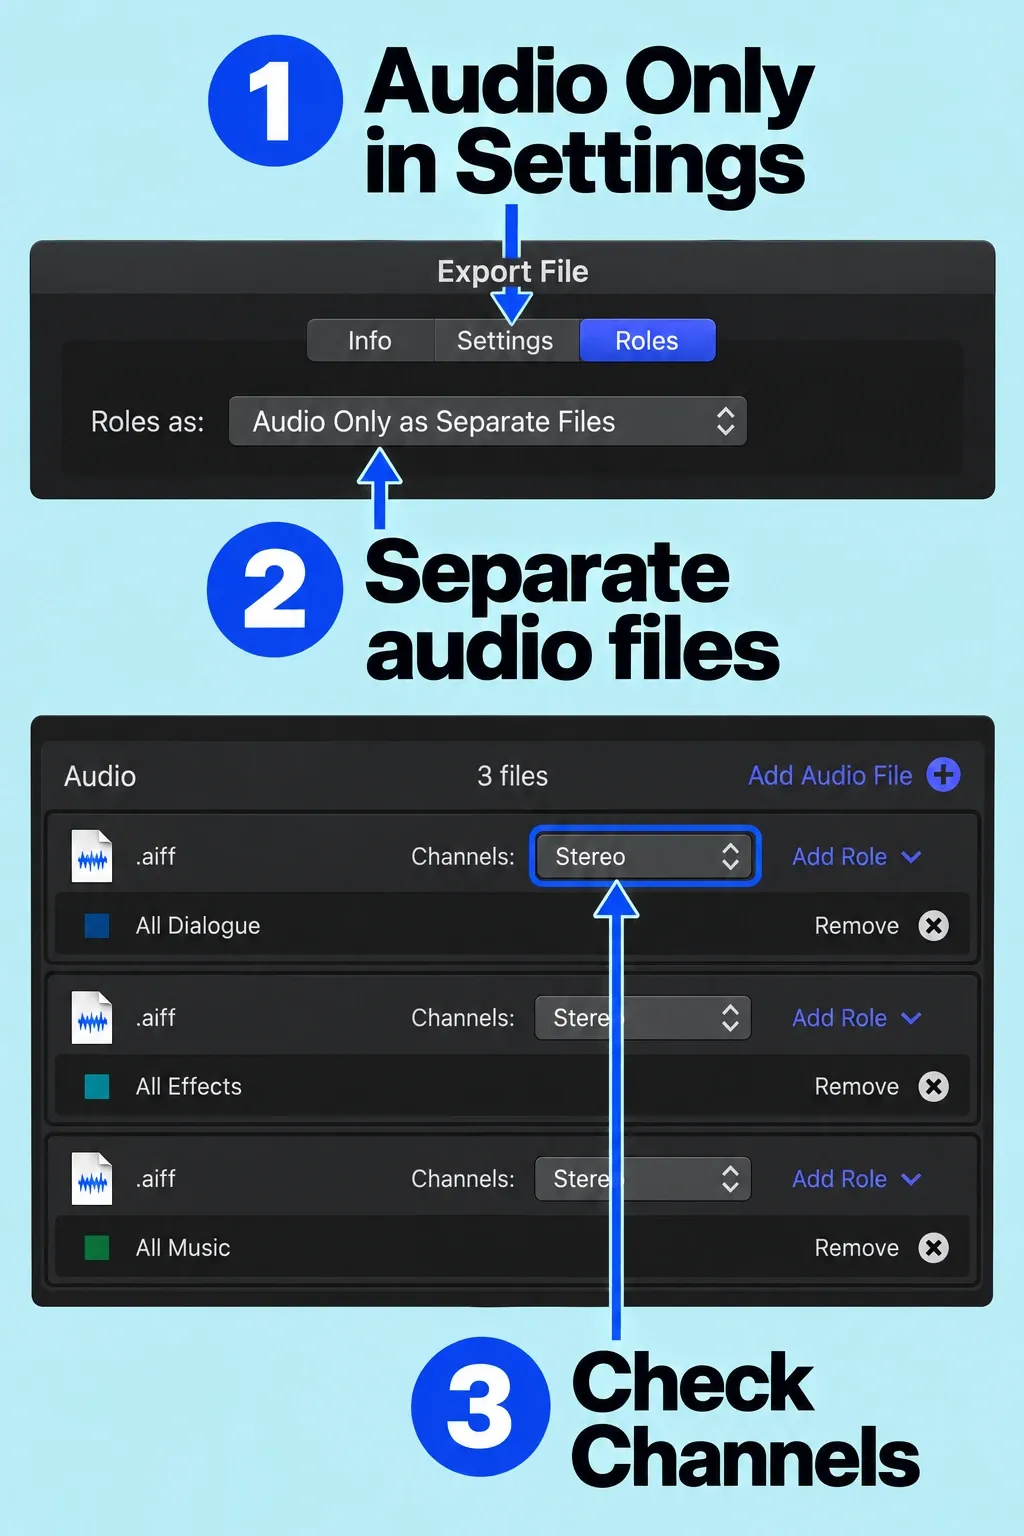
Click Next, name the export, choose a destination, and save; the transcode can be monitored in Background Tasks. Don't hand the folder off until the transcode completes. I'd save a preset only for a configuration that repeats, and only after confirming the current recipient's requirements.
Inspect the handoff, not just the export notification
Open the destination folder and compare the files with the agreed map. Are Dialogue, Music, and Effects present, and are there unexpected files? Listen to the start, a dense middle passage, and the end of each file. Check that each contains the intended material and that all files cover the same selected project range. For an important handoff, I'd also place the files at a common start in an audio editor and compare their combined playback with the intended reference mix, because a matching filename alone can't prove the content, timing, or mix is correct.
Send a short manifest with the project/range name, role-to-file mapping, chosen file format and channel layout, and any known exceptions. If a role combines dialogue and effects, say so explicitly. Keep a copy of the reference export and the role assignment decisions so a later revision can be compared against the same handoff specification.