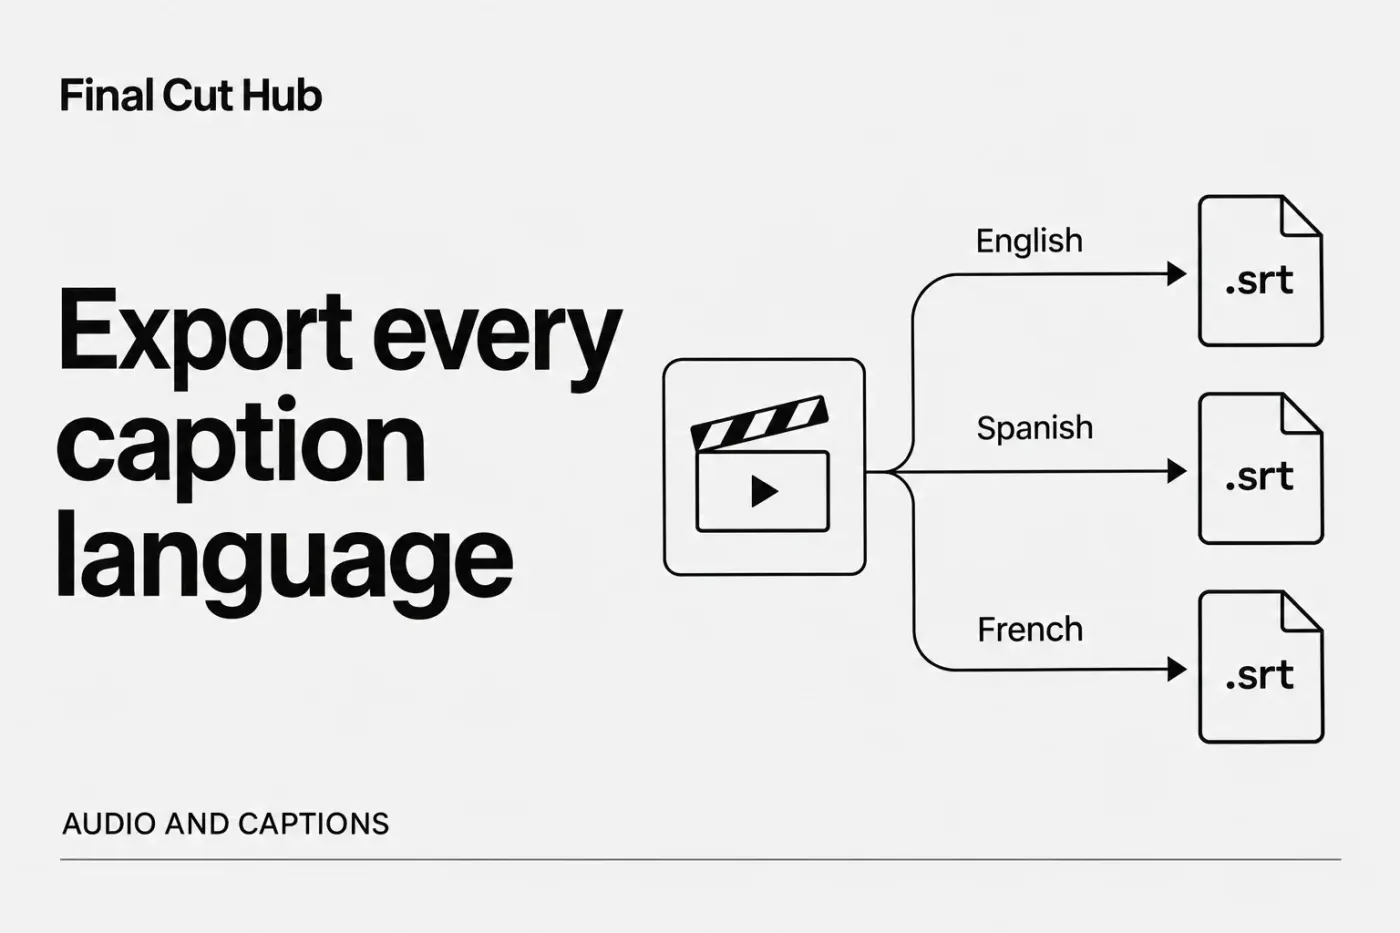
To export multiple caption languages from Final Cut Pro, open the project and choose File > Export Closed Captions, then select the requested language subroles in Roles. Final Cut Pro creates a separate caption file for each selected language subrole. Map every requested language and format to its prepared timeline set, use one agreed time base, and check each output against the same finished picture. Selecting a language doesn't translate its text.
Inventory the requested languages
You need reviewed caption text for every requested language before you start. Choosing a language subrole does not translate or supply that text.
If the Roles pane has no closed caption roles, the project doesn't have closed captions yet. Use the approved-file import below or finish the first language set before attempting a multilingual export.
Finish the dialogue edit and identify the approved picture revision before preparing the package. Captions are connected clips: moving their parent can move them, and deleting it can delete them. A late picture change needs another caption check across every language.
I'd protect that delivery version before changing formats or trimming captions. Select the project in the browser and choose Edit > Snapshot Project. A snapshot also separates its referenced compound and multicam parent versions from changes elsewhere. Keep the usual independent media backup; a project snapshot doesn't copy the camera files.
Write down the languages and format the receiver requested. In the timeline, identify the corresponding caption role and language subroles rather than inferring language from the project name or from one visible lane. I'd spot-check a caption near the opening and another near the end for each language, because that catches a mislabeled or incomplete subrole before any files are produced. It doesn't replace a translation review, though: when wording needs review, someone qualified in the language has to do it.
Press Shift-Command-2 to open the Timeline Index, then click Roles. Select the Captions checkbox to show captions in the viewer. For the spot-check, select the checkbox to the left of each language subrole in turn. Only one language is active in the viewer at a time; the right-hand Show Closed Captions control changes the timeline lane's visibility. You can still select several language subroles for separate files in the export dialog.
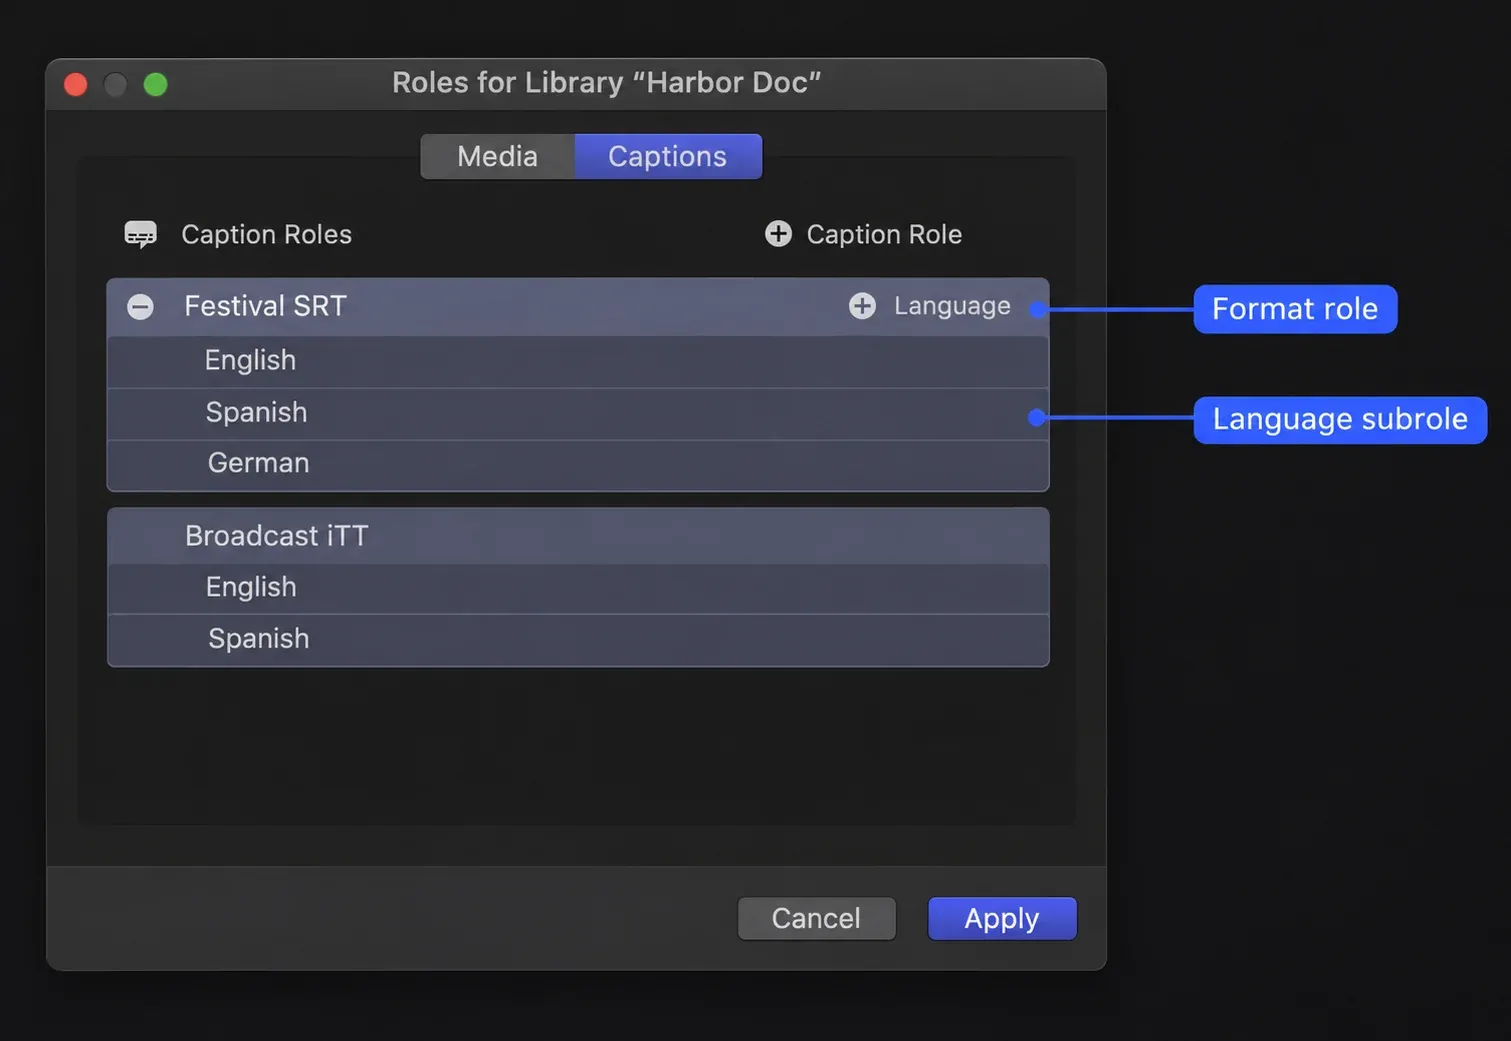
To check the role structure, choose Modify > Edit Roles, then click Captions. The format role is iTT, CEA-608, or SRT; language subroles sit beneath it. If a needed format role is missing, click Caption Role and choose the format. To add a language subrole, point to that format role, click Language, and choose the language. Click Apply. This adds role choices to the library; it does not populate them with caption text.
Populate a missing language set
If all requested sets are complete and reviewed, go straight to format conversion below. If a language is missing, creating an empty subrole isn't enough. Use a finished timed set or import the approved caption file supplied for that language.
- Activate the finished first language in Roles. Select one of its caption clips in the timeline, then press Command-A once to select that language set. Pressing it again selects everything in the timeline.
- Choose Edit > Closed Captions > Duplicate Captions to New Language, then choose the required language. The duplicate reuses the initial caption timing.
- Double-click each copied caption and enter its translation in the caption editor. Use the editor's arrows to move through the set. Have a reviewer who knows the language check the entire translation, including whether each cue stays on screen long enough to read.
To use a supplied file instead, open the delivery project and choose File > Import > Closed Captions. Select a valid .srt, .itt, or .scc file. Under Import as Role, choose its format role on the left and the intended language subrole on the right. Set Insertion Time to match the file: Relative to Timeline adds the project start; Absolute places cues at the file's actual times. Click Import, then verify the placement before editing.
A timed duplicate can still need longer cues after translation. Trim caption edges deliberately and review the adjacent cues; dragging a caption across its neighbors can overwrite them. Keep the original reviewed set until the translated and converted versions are accepted.
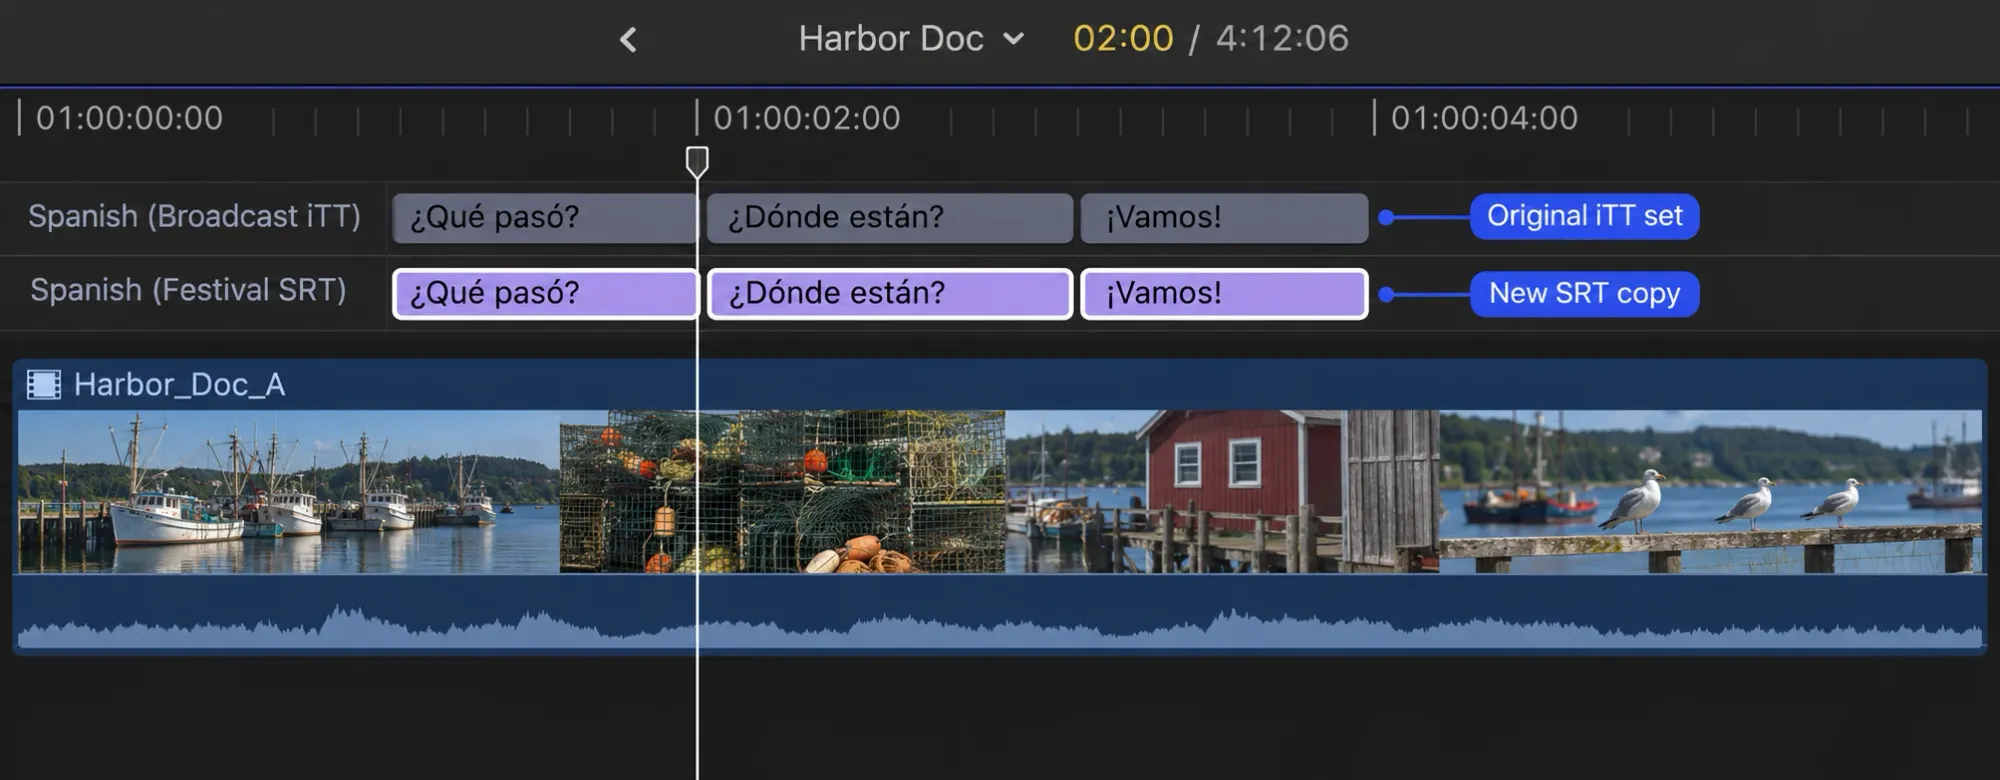
Choosing a language also does not convert the caption format. If the receiver needs SRT but a prepared language set is iTT or CEA-608, select its caption clips and choose Edit > Closed Captions > Duplicate Captions to New Format > SRT. The originals remain, and conversion can lose text or formatting. Check each converted language set before exporting.
Validate every delivery format
In Roles, activate each requested language under its delivery format, then open the Timeline Index's Captions pane. It lists the active set in time order. Select entries to navigate through the whole set, then click View Errors. A caption that fails the format rules turns red; select it and inspect the Validation message in the Captions inspector. Correct the message's cause, then click View All and review the surrounding text and timing.
- SRT: remove unintended overlaps and extra adjacent line breaks. A clean validation result doesn't check translation accuracy or prove that every line is comfortable to read.
- CEA-608: the supported languages and characters are limited. If the required text can't be represented, agree on a supported delivery format with the receiver; relabeling the language won't fix the characters.
- iTT: most languages allow two lines per cue, while Japanese allows four. Japanese captions can also overlap when placed in different screen areas, so an overlap isn't automatically a mistake in that case.
For accidental overlaps, select the affected captions and choose Edit > Closed Captions > Resolve Overlaps. This trims the clips. I'd replay the corrected section immediately, because removing an overlap can leave a translation too brief to read. Repeat validation after format conversion, not just on the original language set.
Use a clearly labeled output folder for this picture revision so old files don't get mistaken for the new delivery. Count the requested format/language pairs before exporting, then reconcile that count with the files produced. Leave unrequested duplicates unselected even when their text looks identical.
For a separate-file handoff, open the project timeline and choose File > Export Closed Captions. Name the export, choose the destination folder, and select the requested language subroles in Roles. Set the time base and formatting as described below, then click Export. Each selected language subrole creates a separate file. Compare the exported files with your language inventory; a completed dialog alone does not tell the receiver which file belongs to which language. Selecting the same language under both iTT and SRT requests two separate files. For an SRT-only package, select only the intended SRT subroles and leave the retained originals unselected.
Choose a time base and file policy once
Choose Relative to Timeline or Absolute start time according to the receiving specification and apply the same decision to all languages in the package. If the project starts at a nonzero timecode, mixing these time bases makes otherwise valid files disagree at the same picture frame. The single-language SRT guide explains the timing choices and import/export basics; this checklist focuses on matching multiple exported files to one edited picture.
For an arithmetic example, take a project starting at 01:00:00 with a cue at 01:00:02. Relative to Timeline subtracts the project start, giving 00:00:02; Absolute keeps 01:00:02. Use the same policy for every language paired with that picture.
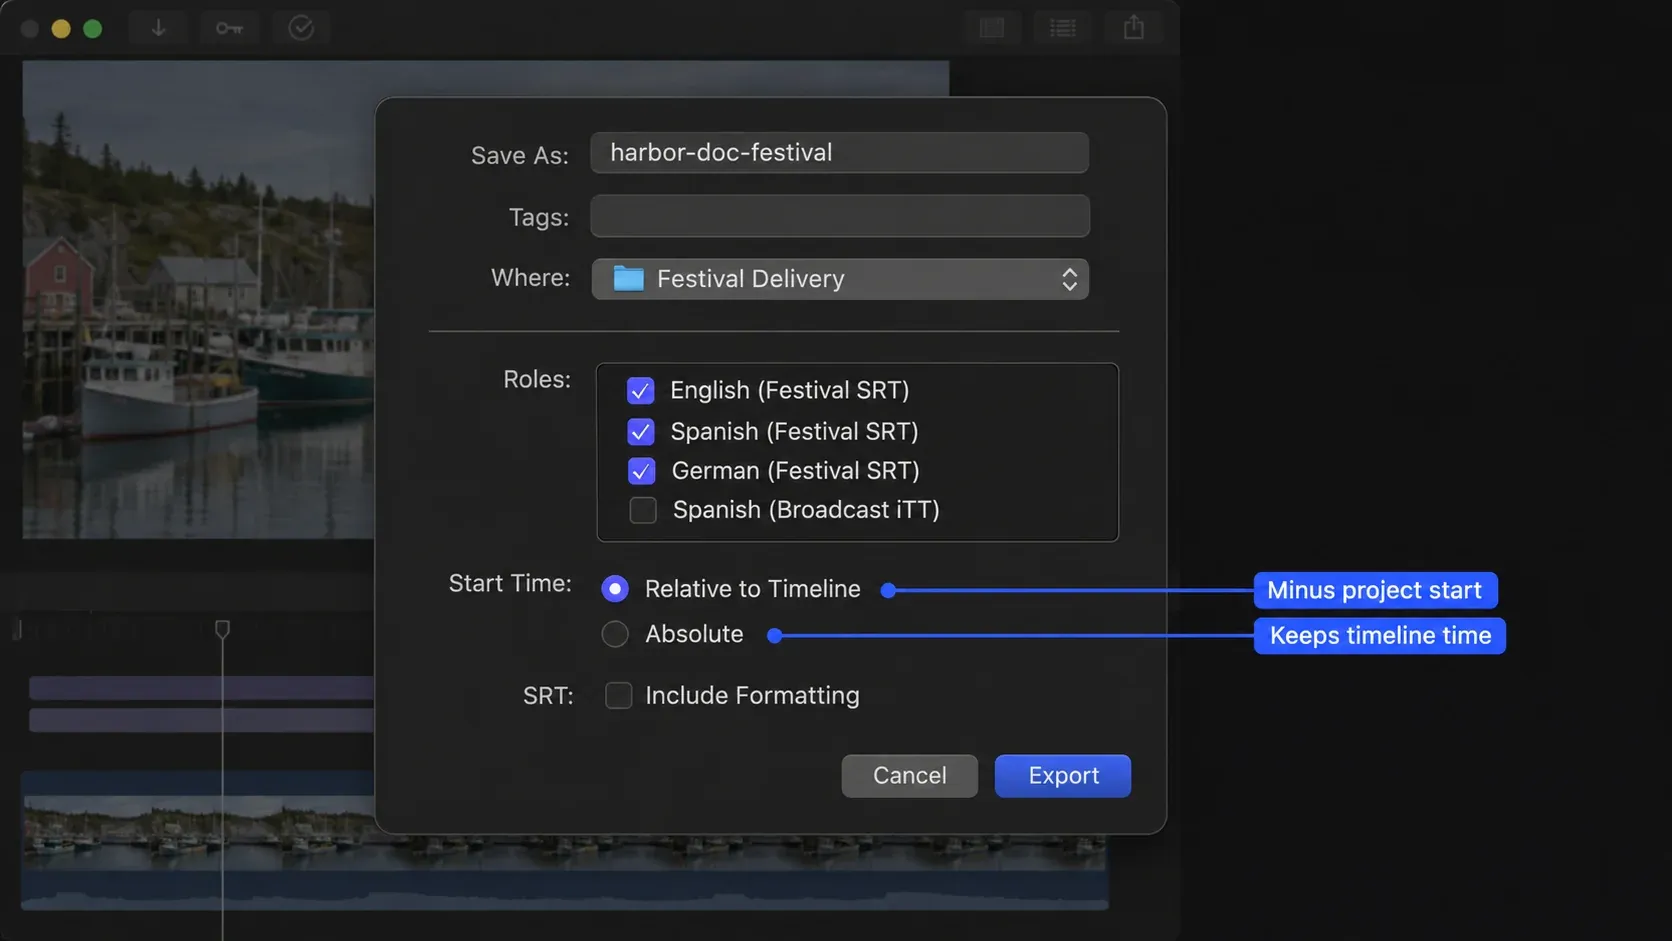
If the format is SRT, the dialog offers Include Formatting. Apple recommends leaving it off in most cases because SRT styling is not standardized. I'd follow that default and record the choice for the package, so the receiver doesn't expect one language file to use different formatting. Check the receiving platform too: even with formatting included, a player may not render bold or italic text correctly.
Export the matching picture
Export the video from the same approved delivery project. For the whole program, select that project in the browser and choose File > Share > Export File. If playback was using proxies, switch the viewer's View > Media Playback setting to Optimized/Original first. Confirm the output duration, frame size, frame rate, and audio details in the Share window, then use the receiver's required settings. Wait for the export to finish and open the actual movie file.
A trailer or excerpt needs a separate timing check. An I/O range limits the video share; selecting a clip alone doesn't. Do not assume that the video range also trims and retimes files produced by File > Export Closed Captions. I'd prepare a separate protected delivery project for the excerpt, retain only its required picture and captions there, and export and verify that pair together. Close the caption editor before using I or O: while it has focus, those keys enter text.
Reconcile every file with the picture
Open the exported video and each caption file. Check the language, filename, expected time base, and one caption at the opening, middle, and end against the same picture. A reviewer should be able to tell which file belongs to which language without opening Final Cut Pro. If a file is missing or doesn't line up, go back to its subrole and export settings. Renaming a wrong-language file won't fix what's in it.
Those opening, middle, and end checks catch obvious offsets; they aren't acceptance of the whole translation. Play every delivered language with the finished movie and have its qualified reviewer check the full program for missing dialogue, untranslated cues, altered characters, reading time, and collisions after conversion. Confirm the first and last intended cues as well as the cuts changed since the previous picture revision.
If the receiver's player can't load a file, isolate that file before re-exporting every language. Check its actual format and text, the selected subrole, and the import/export time basis. A constant offset calls for comparing project start and file origin; drifting sync calls for checking that the captions and movie belong to the same edit. Don't apply a blanket one-hour shift to every file.
One useful cross-check is to import each exported file into a separate QA project containing the finished movie. Set that project's start to the approved project's start and put the movie at that start. Import a Relative to Timeline export with Relative to Timeline insertion; import an Absolute export with Absolute insertion.
Keep this check out of the approved source project so it doesn't add duplicate caption lanes there. Review the delivered files in the receiving player too: a successful reimport doesn't establish that its SRT styling or character handling matches Final Cut Pro.
For example, a handoff manifest could identify picture revision cut07, video cut07.mov, format SRT, and Relative to Timeline timing from project start 01:00:00, then list:
| Language | Caption subrole | Chosen filename |
|---|---|---|
| English | SRT / English | cut07.en.srt |
| Spanish | SRT / Spanish | cut07.es.srt |
I picked these example names; Final Cut Pro doesn't guarantee them. Replace them with the actual delivered names and verify that the package contains both requested files, in the right languages and format, paired with the stated picture revision and time reference.
This procedure is for separate caption files. Embedding CEA-608 or burning text into video is a different delivery choice; use the captions versus subtitles guide when the receiver has not specified the format.