Before adding a LUT to flat-looking log footage in Final Cut Pro, check whether a Camera LUT is already active. Apple's Final Cut Pro LUT guide says the app can read log metadata and apply an appropriate built-in camera LUT automatically. A Custom LUT effect is a separate timeline effect. If both are meant to convert the same log signal to a display space, their combination may process the image twice. A contrasty image alone doesn't prove it; check the LUT selections and the file's intended input and output spaces.
Identify the two places a LUT can live
Final Cut Pro uses Camera LUT for log processing at the media level. It runs before clip effects and can affect every instance of the clip in the current library. The app may select one from embedded metadata during import, though missing or lost metadata can prevent automatic selection. In contrast, Custom LUT is an effect added to a timeline clip from the Effects browser; it can sit at a chosen position in the clip's effect order. Those are different controls with different reach.
This distinction matters when a camera manufacturer supplies a conversion LUT and another pack supplies a creative look. The word LUT doesn't tell you whether a file expects log footage or already-converted footage. Check the LUT maker's documentation and input/output labels before importing it. Apple says the Input and Output settings for a Custom LUT effect must match the color spaces the LUT was created to convert; if the answer is unclear, I'd ask its creator rather than guess from a thumbnail.
Inspect the media-level Camera LUT first
Select a log clip. If the inspector is hidden, choose Window > Show in Workspace > Inspector or press Command-4. Click the Info button at the top. If the Camera LUT control is hidden, choose General, Extended, or Settings from the Metadata View menu at the bottom-left of that inspector. The Camera LUT pop-up shows the current selection; None turns off that log processing. The same pop-up is where you apply, change, or remove a camera LUT. Still, None isn't a universal fix. A correct transform may be needed for that footage, and changing the Camera LUT affects other instances of the same clip throughout the current library.
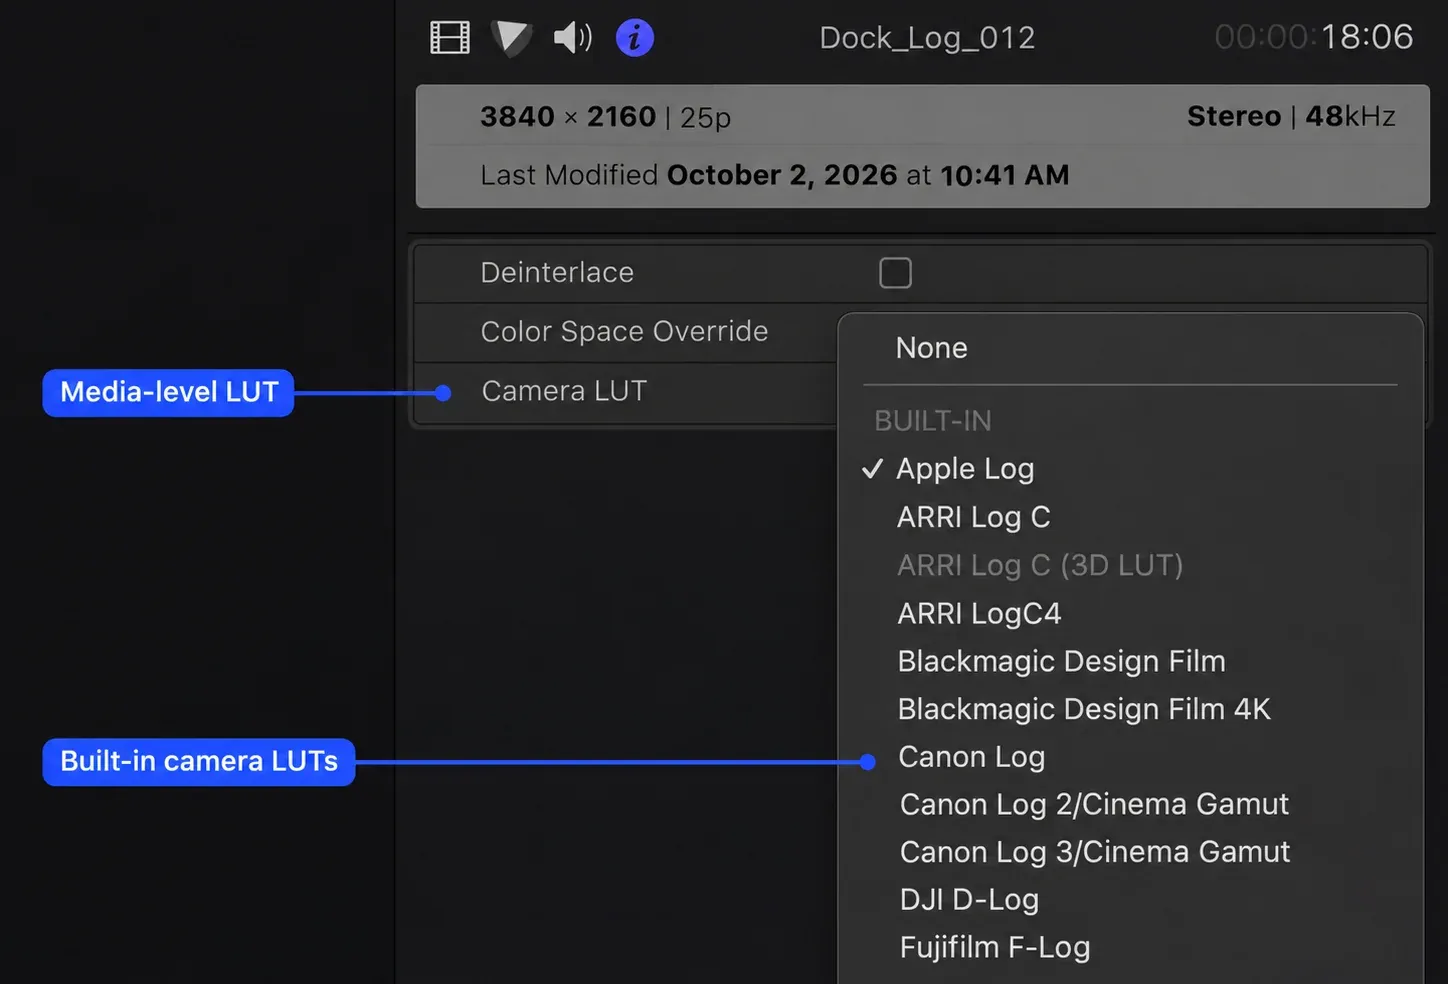
Note the camera format and the library's selected color-processing mode before you change anything. Wide Gamut HDR preserves the full dynamic range of log media when a camera LUT is applied, while Standard processing tone-maps it to a narrower SDR space. So don't copy a LUT selection from a different library without understanding its destination. The exact built-in choices vary by source camera and version.
Add a Custom LUT only for a defined job
For a separate timeline-level LUT, select the clip in the timeline, open the Effects browser, choose Color, and double-click Custom LUT. If the inspector is hidden, choose Window > Show in Workspace > Inspector or press Command-4. Click the Video button at the top, then open the LUT menu in its Custom LUT section and choose Choose Custom LUT. Select the file in the window that appears and click Open, then set its Input and Output spaces as specified by the LUT creator. Final Cut Pro recognizes .cube and .mga as supported 3D LUT file extensions. The Mix slider can blend the adjusted image with the original, but a lower Mix value is not a substitute for knowing whether the LUT expects log or display-referred input.
If you copy this library to another Mac, copy its imported custom camera LUT and Custom LUT effect files separately. Copying the library does not include those LUT files automatically. A missing custom camera LUT produces a yellow warning button beside Camera LUT in the Info inspector; click it to reimport that file. A missing Custom LUT effect file produces a yellow warning button beside LUT in the Video inspector's Custom LUT section; click that button to reimport the effect's LUT file.
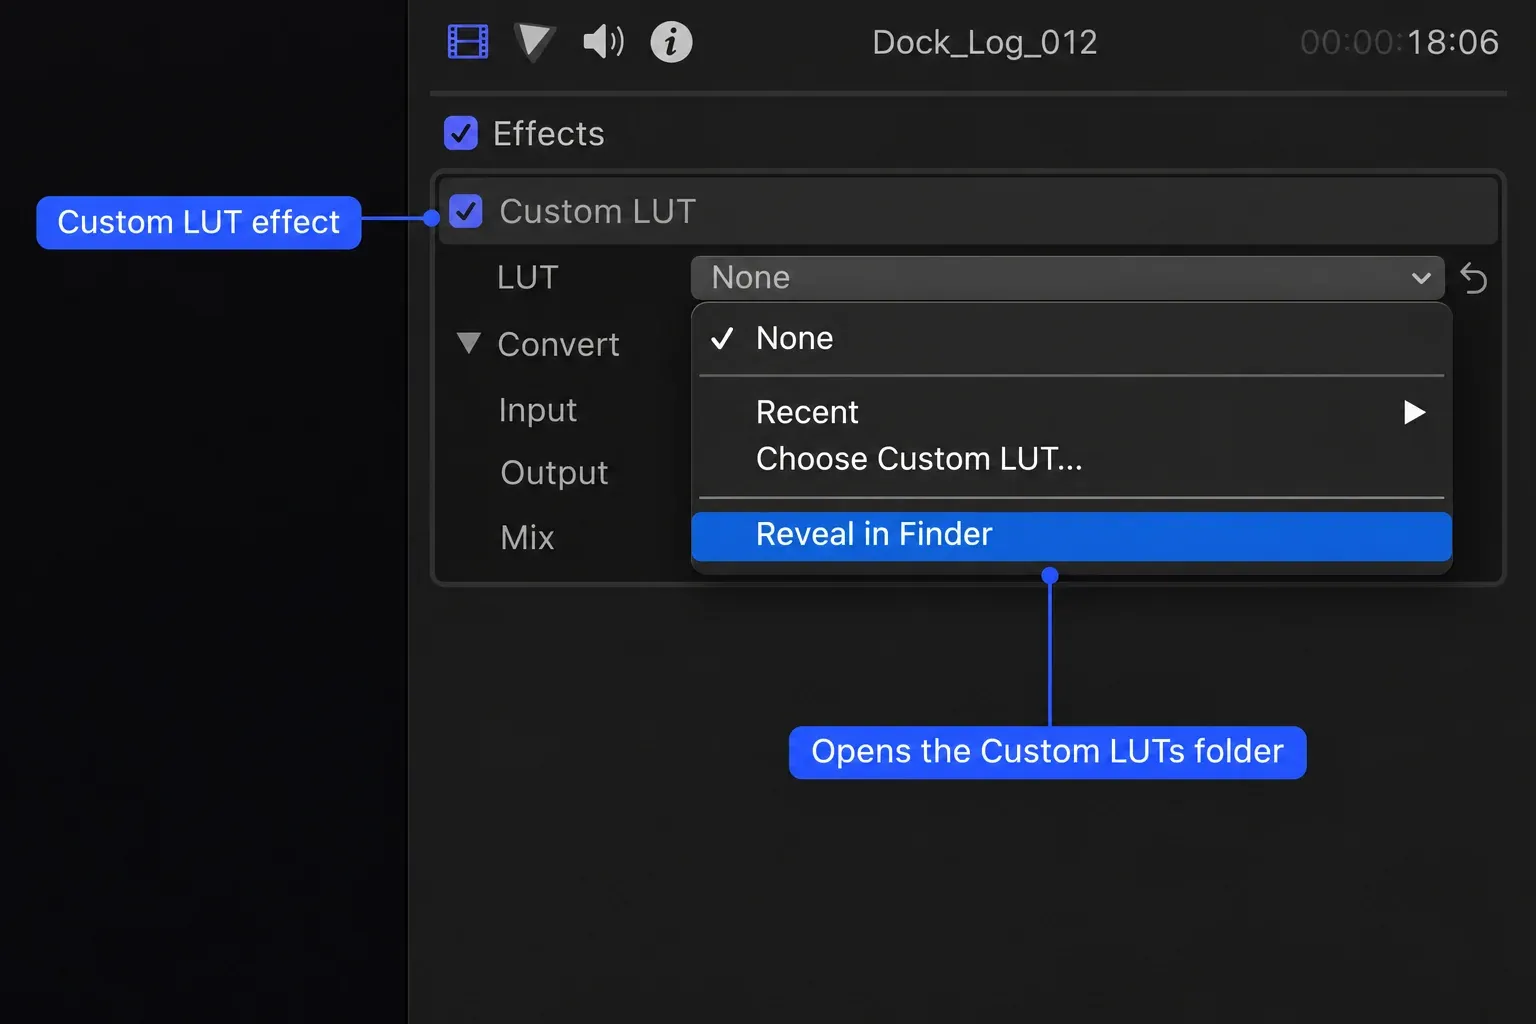
If the Camera LUT already converts the footage to the library working space, a Custom LUT intended to convert the original log signal again may be a mismatch. A creative look designed for the already-converted working image is a different case. I'd keep a written pipeline note: source encoding → Camera LUT or other log conversion → creative look → project/output handling. Use only the stages your source and delivery require.
Diagnose an unexpectedly harsh image safely
First confirm the clip's actual source format and the selected Camera LUT, then identify every color effect on the timeline clip. Check the third-party LUT's stated input and output. If those records show two conversions with the same purpose, I'd compare the image with the Custom LUT effect temporarily turned off first. Select that timeline clip. If the inspector is hidden, press Command-4. Click the Video button at the top. Select the Custom LUT effect in the Video inspector and clear only its effect checkbox. Recheck the same checkbox to turn the effect back on with its settings intact. A duplicate edit doesn't isolate Camera LUT settings: changing that media-level control affects every instance of the clip in the current library. Record the original Camera LUT selection before changing it and restore it after the comparison if other edits depend on it. A visual mismatch could also stem from the wrong LUT, color-space setting, exposure, or a creative effect; don't label all strong contrast as a double transform.
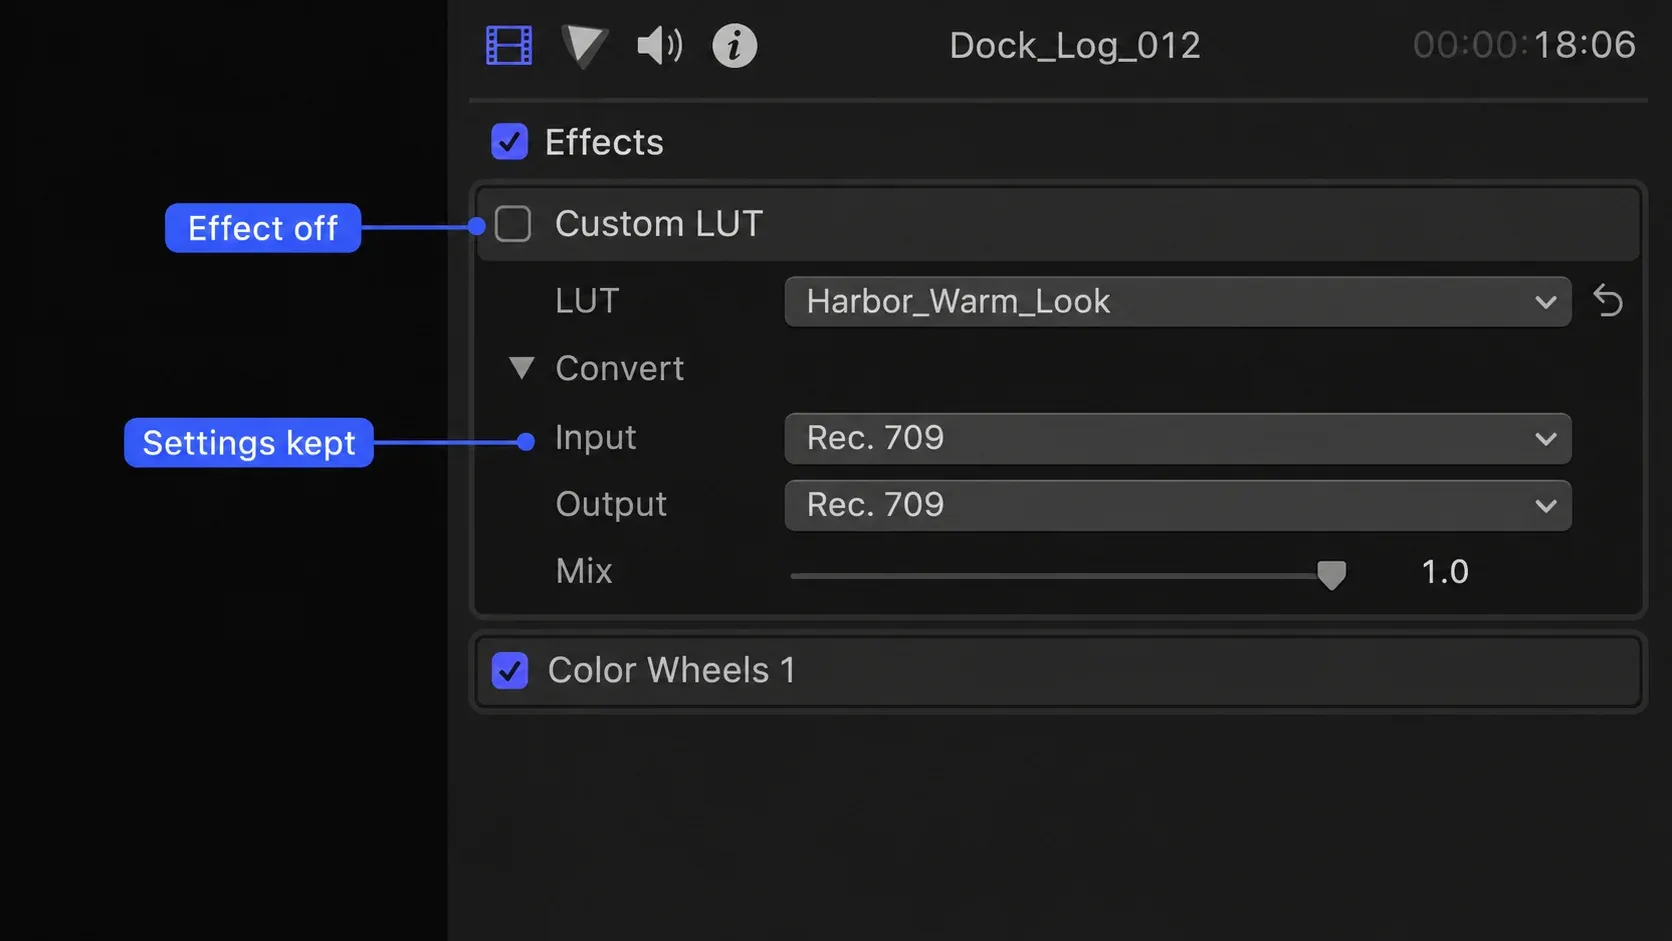
Judge the intended output in the relevant viewing and delivery context. A pleasing preview alone cannot certify the exported file.
Use the color-correction workflow to judge exposure and white balance before deciding whether the LUT improves the shot.